/admin-panel
fa-cogs
Admin Panel
{9p51a5r739 rkjd3roshl Managing Admin User Permissions This article describes each of the user permissions in the admin panel, as well as how to create and delete users. https://help.dealerspike.com/admin-panel/about-user-permissions-in-the-admin-panel /admin-panel/about-user-permissions-in-the-admin-panel about-user-permissions-in-the-admin-panel [] [] 2021-12-06 02:19:02.87838 +0000 UTC 2023-07-03 21:50:37.533314 +0000 UTC %!s(*render.Author=<nil>) %!s(bool=true) %!s(bool=false) 2 years ago %!s(bool=true) %!s(bool=true) %!s(*render.ArticleStaleStatus=&{false API 0xc003f0b470 0xc003f0b488}) map[en:/admin-panel/about-user-permissions-in-the-admin-panel] [] %!s(*render.Article=<nil>) %!s(*render.Article=<nil>)}{f78adzzkah rkjd3roshl Creating New Admin Panel User Accounts Estimated Reading Time: 5-10 minutes Required Permissions: Useradmin Click Here for Quick Guide: Sign into your site's admin panel. Go to the Manage Users page (Admin -> Manage Users). Click the Crea… https://help.dealerspike.com/admin-panel/creating-new-admin-panel-user-accounts /admin-panel/creating-new-admin-panel-user-accounts creating-new-admin-panel-user-accounts [access password accounting] [] 2021-09-28 21:54:28.015356 +0000 UTC 2024-10-31 15:53:02.381889 +0000 UTC %!s(*render.Author=<nil>) %!s(bool=true) %!s(bool=false) 2 years ago %!s(bool=false) %!s(bool=false) %!s(*render.ArticleStaleStatus=&{false API 0xc003f0b3f8 0xc003f0b410}) map[en:/admin-panel/creating-new-admin-panel-user-accounts] [] %!s(*render.Article=<nil>) %!s(*render.Article=<nil>)}{mcbozogukp rkjd3roshl Resetting Your Admin Panel Password Estimated Reading Time: 5 minutes Required Permissions: Useradmin Click Here for Quick Guide: Sign into your site's admin panel. Go to the Manage Users page (Admin -> Manage Users). Click the Update… https://help.dealerspike.com/admin-panel/resetting-your-admin-panel-password /admin-panel/resetting-your-admin-panel-password resetting-your-admin-panel-password [] [] 2021-12-02 20:34:07.313209 +0000 UTC 2023-06-27 12:21:02.463295 +0000 UTC %!s(*render.Author=<nil>) %!s(bool=true) %!s(bool=false) 2 years ago %!s(bool=false) %!s(bool=false) %!s(*render.ArticleStaleStatus=&{false API 0xc003f0b4e8 0xc003f0b500}) map[en:/admin-panel/resetting-your-admin-panel-password] [] %!s(*render.Article=<nil>) %!s(*render.Article=<nil>)}{ax00labzz7 rkjd3roshl Signing Into the Admin Panel Estimated Reading Time: 2 minutes Click Here for Quick Guide: Go to your site's admin panel log-in page (https:www.yoursitehere.com/admin). Put your user name and password into the sign in form and c… https://help.dealerspike.com/admin-panel/signing-into-the-admin-panel /admin-panel/signing-into-the-admin-panel signing-into-the-admin-panel [] [] 2021-11-16 15:40:48.289809 +0000 UTC 2023-06-27 12:20:53.005282 +0000 UTC %!s(*render.Author=<nil>) %!s(bool=true) %!s(bool=false) 2 years ago %!s(bool=false) %!s(bool=false) %!s(*render.ArticleStaleStatus=&{false API 0xc003f0b560 0xc003f0b578}) map[en:/admin-panel/signing-into-the-admin-panel] [] %!s(*render.Article=<nil>) %!s(*render.Article=<nil>)}
/analytics
fa-bar-chart
Analytics
{84yns4qmhf 96gx99rnay Using The Website Analytics Report This article covers where to find the Website Analytics Report and how to read it. https://help.dealerspike.com/analytics/using-the-website-performance-report /analytics/using-the-website-performance-report using-the-website-performance-report [analytics piwik google] [] 2024-03-11 13:55:47.140633 +0000 UTC 2026-05-14 15:56:49.022881 +0000 UTC %!s(*render.Author=&{0r2gjy8pko Randall Theil https://www.gravatar.com/avatar/deda774ad13f3d7133da2cb2a6777b5e?d=mm&s=150}) %!s(bool=true) %!s(bool=false) 3 weeks ago %!s(bool=true) %!s(bool=true) %!s(*render.ArticleStaleStatus=&{false API 0xc003f0b620 0xc003f0b638}) map[en:/analytics/using-the-website-performance-report] [] %!s(*render.Article=<nil>) %!s(*render.Article=<nil>)}{r64f6rjo5x 96gx99rnay Using the Engagement Analytics Report The Engagement Analytics report gives you information about which parts of your inventory are receiving the most and least attention from customers. It can be found in the admin panel by going to Digital Marketing > Engagement Analytics. This page will explain what's in the report and how to read it. https://help.dealerspike.com/analytics/using-the-engagement-analytics-report /analytics/using-the-engagement-analytics-report using-the-engagement-analytics-report [_recent] [] 2025-10-01 14:37:31.763967 +0000 UTC 2026-05-14 15:59:05.530761 +0000 UTC %!s(*render.Author=&{0r2gjy8pko Randall Theil https://www.gravatar.com/avatar/deda774ad13f3d7133da2cb2a6777b5e?d=mm&s=150}) %!s(bool=true) %!s(bool=false) 3 weeks ago %!s(bool=true) %!s(bool=false) %!s(*render.ArticleStaleStatus=&{false API 0xc003f0b5c0 0xc003f0b5d8}) map[en:/analytics/using-the-engagement-analytics-report] [] %!s(*render.Article=<nil>) %!s(*render.Article=<nil>)}{yvz73fez1v 96gx99rnay Using the Peer Benchmarking Report The Peer Benchmarking report shows gives you a detailed breakdown of how your website is performing compared to other Dealer Spike dealers in your industry and region. It can be found in DS Admin by… https://help.dealerspike.com/analytics/using-the-peer-benchmarking-report /analytics/using-the-peer-benchmarking-report using-the-peer-benchmarking-report [] [] 2025-10-23 14:41:13.261195 +0000 UTC 2026-05-14 15:55:22.577561 +0000 UTC %!s(*render.Author=&{0r2gjy8pko Randall Theil https://www.gravatar.com/avatar/deda774ad13f3d7133da2cb2a6777b5e?d=mm&s=150}) %!s(bool=true) %!s(bool=false) 3 weeks ago %!s(bool=false) %!s(bool=false) %!s(*render.ArticleStaleStatus=&{false API 0xc003f0b698 0xc003f0b6b0}) map[en:/analytics/using-the-peer-benchmarking-report] [] %!s(*render.Article=<nil>) %!s(*render.Article=<nil>)}{wejb3bdo25 96gx99rnay Tips to Improve Your Site's Search Engine Optimization Search Engine Optimization is one of the most important factors in connecting with customers online. This page will give you some basic tips and advice for improving the performance of your Dealer Spike website on search engines like Google. https://help.dealerspike.com/analytics/tips-to-improve-your-site-s-search-engine-optimization /analytics/tips-to-improve-your-site-s-search-engine-optimization tips-to-improve-your-site-s-search-engine-optimization [] [] 2022-09-13 15:14:59.453356 +0000 UTC 2026-03-11 21:16:40.212258 +0000 UTC %!s(*render.Author=&{0r2gjy8pko Randall Theil https://www.gravatar.com/avatar/deda774ad13f3d7133da2cb2a6777b5e?d=mm&s=150}) %!s(bool=true) %!s(bool=false) 2 months ago %!s(bool=true) %!s(bool=false) %!s(*render.ArticleStaleStatus=&{false API 0xc003f0b710 0xc003f0b728}) map[en:/analytics/tips-to-improve-your-site-s-search-engine-optimization] [] %!s(*render.Article=<nil>) %!s(*render.Article=<nil>)}{6tfwh71xit 96gx99rnay The Visitor Acquisition Dashboard Visitor Acquisition is a report that shows where your website visitors are located and how they're reaching your website. You can access it by clicking the Visitor Acquisition link under the Digital… https://help.dealerspike.com/analytics/the-visitor-acquisition-dashboard /analytics/the-visitor-acquisition-dashboard the-visitor-acquisition-dashboard [] [] 2025-10-23 15:03:14.869018 +0000 UTC 2025-10-23 15:27:24.009099 +0000 UTC %!s(*render.Author=&{0r2gjy8pko Randall Theil https://www.gravatar.com/avatar/deda774ad13f3d7133da2cb2a6777b5e?d=mm&s=150}) %!s(bool=true) %!s(bool=false) 7 months ago %!s(bool=false) %!s(bool=false) %!s(*render.ArticleStaleStatus=&{false API 0xc003f0b788 0xc003f0b7a0}) map[en:/analytics/the-visitor-acquisition-dashboard] [] %!s(*render.Article=<nil>) %!s(*render.Article=<nil>)}{n6feoklc4o 96gx99rnay The Consent Management Service The Consent Management Service is a feature for Dealer Spike websites that aids in compliance with data privacy laws and increases transparency for your customers. It is included with all Dealer Spike websites at no charge. This article will explain what the Consent Management Service is and how it works. https://help.dealerspike.com/analytics/consent-management-service /analytics/consent-management-service consent-management-service [_recent] [] 2025-05-15 15:29:22.451926 +0000 UTC 2025-05-15 15:29:22.451926 +0000 UTC %!s(*render.Author=&{0r2gjy8pko Randall Theil https://www.gravatar.com/avatar/deda774ad13f3d7133da2cb2a6777b5e?d=mm&s=150}) %!s(bool=true) %!s(bool=false) 1 year ago %!s(bool=true) %!s(bool=false) %!s(*render.ArticleStaleStatus=&{false API 0xc003f0b7e8 0xc003f0b800}) map[en:/analytics/consent-management-service] [] %!s(*render.Article=<nil>) %!s(*render.Article=<nil>)}{lafwfwx31l 96gx99rnay Setting Up Google Conversion Tracking for Dealer Spike Forms This article will show you how to track form conversions from your website in Google Analytics. https://help.dealerspike.com/analytics/setting-up-google-conversion-tracking-for-dealer-spike-forms /analytics/setting-up-google-conversion-tracking-for-dealer-spike-forms setting-up-google-conversion-tracking-for-dealer-spike-forms [] [] 2021-12-02 20:23:09.385656 +0000 UTC 2024-06-07 18:39:53.559078 +0000 UTC %!s(*render.Author=<nil>) %!s(bool=true) %!s(bool=false) 2 years ago %!s(bool=true) %!s(bool=false) %!s(*render.ArticleStaleStatus=&{false API 0xc003f0b860 0xc003f0b878}) map[en:/analytics/setting-up-google-conversion-tracking-for-dealer-spike-forms] [] %!s(*render.Article=<nil>) %!s(*render.Article=<nil>)}{s572y31mwb 96gx99rnay Using the New Reputation Management Console This article explains how the New Reputation Management program works and how to access your reputation management data and respond to customers. https://help.dealerspike.com/analytics/using-the-new-reputation-management-tool /analytics/using-the-new-reputation-management-tool using-the-new-reputation-management-tool [reputation management check online reviews social media mention online mention reputation manager] [] 2023-01-27 06:28:14.193507 +0000 UTC 2023-11-30 16:50:34.525795 +0000 UTC %!s(*render.Author=<nil>) %!s(bool=true) %!s(bool=false) 2 years ago %!s(bool=true) %!s(bool=false) %!s(*render.ArticleStaleStatus=&{false API 0xc003f0b8c0 0xc003f0b8d8}) map[en:/analytics/using-the-new-reputation-management-tool] [] %!s(*render.Article=<nil>) %!s(*render.Article=<nil>)}{j72ynppzn9 96gx99rnay Basic DNS Information for Your Website & Email Domain This page explains how to tell if your domain is expired, how to find information on your domain, and how to check and remove your email domain from blacklists. https://help.dealerspike.com/analytics/basic-dns-information-for-your-website /analytics/basic-dns-information-for-your-website basic-dns-information-for-your-website [] [] 2022-09-20 09:34:09.046521 +0000 UTC 2023-07-03 21:50:01.121547 +0000 UTC %!s(*render.Author=<nil>) %!s(bool=true) %!s(bool=false) 2 years ago %!s(bool=true) %!s(bool=false) %!s(*render.ArticleStaleStatus=&{false API 0xc003f0b938 0xc003f0b950}) map[en:/analytics/basic-dns-information-for-your-website] [] %!s(*render.Article=<nil>) %!s(*render.Article=<nil>)}{9p4cugyyye 96gx99rnay Changing Metadata through the inline editor Estimated Reading Time: 10 Minutes Required Permissions: Siteeditadmin, Snippet Click Here for Quick Guide: Sign into your site's admin panel. Click on the Content tab, then on the Site Editing butto… https://help.dealerspike.com/analytics/changing-metadata-through-the-inline-editor /analytics/changing-metadata-through-the-inline-editor changing-metadata-through-the-inline-editor [] [] 2021-11-16 15:38:27.703005 +0000 UTC 2023-06-27 12:20:38.302557 +0000 UTC %!s(*render.Author=<nil>) %!s(bool=true) %!s(bool=false) 2 years ago %!s(bool=false) %!s(bool=false) %!s(*render.ArticleStaleStatus=&{false API 0xc003f0b9b0 0xc003f0b9c8}) map[en:/analytics/changing-metadata-through-the-inline-editor] [] %!s(*render.Article=<nil>) %!s(*render.Article=<nil>)}{2i7d1isg9z 96gx99rnay Important Analytics and SEO Terms and What They Mean for Your Site This page runs down all of the most important SEO and analytics-related terms you'll run into when looking up information about how your site is doing. https://help.dealerspike.com/analytics/important-analytics-and-seo-terms-and-what-they-mean-for-your-site /analytics/important-analytics-and-seo-terms-and-what-they-mean-for-your-site important-analytics-and-seo-terms-and-what-they-mean-for-your-site [] [] 2022-10-07 14:37:59.471076 +0000 UTC 2023-06-27 12:20:30.216515 +0000 UTC %!s(*render.Author=&{0r2gjy8pko Randall Theil https://www.gravatar.com/avatar/deda774ad13f3d7133da2cb2a6777b5e?d=mm&s=150}) %!s(bool=true) %!s(bool=false) 2 years ago %!s(bool=true) %!s(bool=false) %!s(*render.ArticleStaleStatus=&{false API 0xc003f0ba28 0xc003f0ba40}) map[en:/analytics/important-analytics-and-seo-terms-and-what-they-mean-for-your-site] [] %!s(*render.Article=<nil>) %!s(*render.Article=<nil>)}
/content-editing
fa-edit
Content Editing
{2whjk9fi7i 6j0sfw36mv Creating Modal Pop-Ups with the Announcement Builder This article shows how to use Announcement Builder to add and manage custom pop-up announcements on your website. https://help.dealerspike.com/content-editing/building-modal-pop-ups-with-the-announcement-builder /content-editing/building-modal-pop-ups-with-the-announcement-builder building-modal-pop-ups-with-the-announcement-builder [remove popup holiday memorial_day christmas new_years new_year Easter thanksgiving independence_day labor_day labour_day Veterans_day may_day hanukkah] [] 2022-02-04 12:02:15.830366 +0000 UTC 2023-09-19 15:44:07.745981 +0000 UTC %!s(*render.Author=<nil>) %!s(bool=true) %!s(bool=false) 2 years ago %!s(bool=true) %!s(bool=true) %!s(*render.ArticleStaleStatus=&{false API 0xc003f0bcc8 0xc003f0bce0}) map[en:/content-editing/building-modal-pop-ups-with-the-announcement-builder] [] %!s(*render.Article=<nil>) %!s(*render.Article=<nil>)}{gz0xarulzp 6j0sfw36mv Tips and Tricks for Laying Out Pages This article shows off processes to create attractive page layouts just using the built in site editing tools. https://help.dealerspike.com/content-editing/tips-and-tricks-for-laying-out-pages /content-editing/tips-and-tricks-for-laying-out-pages tips-and-tricks-for-laying-out-pages [] [] 2022-05-31 10:54:19.46239 +0000 UTC 2023-06-27 12:19:48.113438 +0000 UTC %!s(*render.Author=<nil>) %!s(bool=true) %!s(bool=false) 2 years ago %!s(bool=true) %!s(bool=true) %!s(*render.ArticleStaleStatus=&{false API 0xc0067240d8 0xc0067240f0}) map[en:/content-editing/tips-and-tricks-for-laying-out-pages] [] %!s(*render.Article=<nil>) %!s(*render.Article=<nil>)}{gpbgcgh2uk 6j0sfw36mv Changing Hours with the Hours Editor This article will show you how to get the hours on your website updated instantly using the free new Hours Editor feature. https://help.dealerspike.com/content-editing/updating-hours /content-editing/updating-hours updating-hours [mon tue wed thu fri sat sun mon-fri tue-fri tues-fri monday-friday tue-sat tues-sat tuesday-saturday fall spring summer winter seasonal] [] 2021-10-01 17:15:01.862531 +0000 UTC 2023-06-27 12:19:43.667253 +0000 UTC %!s(*render.Author=<nil>) %!s(bool=true) %!s(bool=false) 2 years ago %!s(bool=true) %!s(bool=true) %!s(*render.ArticleStaleStatus=&{false Set by user API 0xc006724138 0xc006724150}) map[en:/content-editing/updating-hours] [] %!s(*render.Article=<nil>) %!s(*render.Article=<nil>)}{0812zj86qe 6j0sfw36mv New Certified Partner Program Announcement At Dealer Spike, we take you and your customer’s data, security, and online experience seriously. Due to an increase in unwanted data collection and degraded website and mobile experiences caused by… https://help.dealerspike.com/content-editing/new-certified-partner-program-announcement /content-editing/new-certified-partner-program-announcement new-certified-partner-program-announcement [] [] 2023-11-09 16:13:40.514696 +0000 UTC 2026-03-25 21:39:34.475958 +0000 UTC %!s(*render.Author=&{0r2gjy8pko Randall Theil https://www.gravatar.com/avatar/deda774ad13f3d7133da2cb2a6777b5e?d=mm&s=150}) %!s(bool=true) %!s(bool=false) 2 months ago %!s(bool=false) %!s(bool=false) %!s(*render.ArticleStaleStatus=&{false API 0xc003f0baa0 0xc003f0bab8}) map[en:/content-editing/new-certified-partner-program-announcement] [] %!s(*render.Article=<nil>) %!s(*render.Article=<nil>)}{varcyjjmjy 6j0sfw36mv Image Guidelines and Tips This page will show you where and how to compress images that don't get automatically compressed for faster page loading time, where to find images that you can use for free without adding any attributions (credits) to your site, and how and where to add alt text to your images to aid accessibility software and improve your SEO. https://help.dealerspike.com/content-editing/image-guidelines-and-tips /content-editing/image-guidelines-and-tips image-guidelines-and-tips [] [] 2021-12-10 21:09:25.623402 +0000 UTC 2026-03-11 21:21:13.406226 +0000 UTC %!s(*render.Author=<nil>) %!s(bool=true) %!s(bool=false) 2 months ago %!s(bool=true) %!s(bool=false) %!s(*render.ArticleStaleStatus=&{false API 0xc003f0bb18 0xc003f0bb30}) map[en:/content-editing/image-guidelines-and-tips] [] %!s(*render.Article=<nil>) %!s(*render.Article=<nil>)}{lvpu341iwy 6j0sfw36mv Using Built-in Web Forms and Leads This page will run down the list of forms that can be used on any site, example URLs you can use to preview the forms, and how they map to leads inside the admin panel. https://help.dealerspike.com/content-editing/adding-new-forms-to-your-site /content-editing/adding-new-forms-to-your-site adding-new-forms-to-your-site [] [] 2021-12-13 16:08:19.451075 +0000 UTC 2024-11-21 19:44:40.629388 +0000 UTC %!s(*render.Author=<nil>) %!s(bool=true) %!s(bool=false) 2 years ago %!s(bool=true) %!s(bool=false) %!s(*render.ArticleStaleStatus=&{false API 0xc003f0bb90 0xc003f0bba8}) map[en:/content-editing/adding-new-forms-to-your-site] [] %!s(*render.Article=<nil>) %!s(*render.Article=<nil>)}{2ykgpwj184 6j0sfw36mv Adding OEM Promotions to Your Website This article runs down all of the info you need to know about OEM promotions and promotional slides that can be added to your site. https://help.dealerspike.com/content-editing/adding-oem-promotions-to-your-website /content-editing/adding-oem-promotions-to-your-website adding-oem-promotions-to-your-website [] [] 2022-04-15 14:54:09.098329 +0000 UTC 2024-01-11 22:08:30.556908 +0000 UTC %!s(*render.Author=<nil>) %!s(bool=true) %!s(bool=false) 2 years ago %!s(bool=true) %!s(bool=false) %!s(*render.ArticleStaleStatus=&{false API 0xc003f0bc08 0xc003f0bc20}) map[en:/content-editing/adding-oem-promotions-to-your-website] [] %!s(*render.Article=<nil>) %!s(*render.Article=<nil>)}{4o673d2qb9 6j0sfw36mv Updating Slideshows (Rotating Banners) This article will show you how to update and manage the slideshows or rotating banners on your website. https://help.dealerspike.com/content-editing/uploading-slides-to-a-slideshow /content-editing/uploading-slides-to-a-slideshow uploading-slides-to-a-slideshow [rotator banner] [] 2021-11-16 16:00:55.18188 +0000 UTC 2024-01-11 22:07:58.943948 +0000 UTC %!s(*render.Author=<nil>) %!s(bool=true) %!s(bool=false) 2 years ago %!s(bool=true) %!s(bool=false) %!s(*render.ArticleStaleStatus=&{false API 0xc003f0bc68 0xc003f0bc80}) map[en:/content-editing/uploading-slides-to-a-slideshow] [] %!s(*render.Article=<nil>) %!s(*render.Article=<nil>)}{jaxhkavwr8 6j0sfw36mv Create Content Pages Content pages are additional web pages that can be created and linked on your website. https://help.dealerspike.com/content-editing/create-content-pages /content-editing/create-content-pages create-content-pages [Test-CMS-LighthouseWT] [] 2021-10-01 19:24:38.061343 +0000 UTC 2023-06-27 12:22:58.610612 +0000 UTC %!s(*render.Author=<nil>) %!s(bool=true) %!s(bool=false) 2 years ago %!s(bool=false) %!s(bool=false) %!s(*render.ArticleStaleStatus=&{false API 0xc003f0bd28 0xc003f0bd40}) map[en:/content-editing/create-content-pages] [] %!s(*render.Article=<nil>) %!s(*render.Article=<nil>)}{72c6crd5qy 6j0sfw36mv Using Basic HTML to Format Text in Inventory Fields and Content Snippets Estimated Reading Time: 10 Minutes Required Permissions: Snippet, Inventory Inventory Platform: Any.. You can use basic HTML code to style text within certain inventory fields and content snippets. T… https://help.dealerspike.com/content-editing/using-basic-html-to-format-text-in-inventory-fields-and-content-snippets /content-editing/using-basic-html-to-format-text-in-inventory-fields-and-content-snippets using-basic-html-to-format-text-in-inventory-fields-and-content-snippets [] [] 2021-11-16 15:19:58.344354 +0000 UTC 2023-06-27 12:22:44.133177 +0000 UTC %!s(*render.Author=<nil>) %!s(bool=true) %!s(bool=false) 2 years ago %!s(bool=false) %!s(bool=false) %!s(*render.ArticleStaleStatus=&{false API 0xc003f0bda0 0xc003f0bdb8}) map[en:/content-editing/using-basic-html-to-format-text-in-inventory-fields-and-content-snippets] [] %!s(*render.Article=<nil>) %!s(*render.Article=<nil>)}{1lf7noszye 6j0sfw36mv Managing Staff with the Staff Builder Tool Estimated Reading Time: 20 Minutes Required Permissions: Content Click Here for Quick Guide: Log into your site's admin panel. Go to the Staff Builder page from the Content menu at the top of the pag… https://help.dealerspike.com/content-editing/managing-staff-with-the-staff-builder-tool /content-editing/managing-staff-with-the-staff-builder-tool managing-staff-with-the-staff-builder-tool [] [] 2021-11-16 16:09:18.877986 +0000 UTC 2023-06-27 12:22:39.829481 +0000 UTC %!s(*render.Author=<nil>) %!s(bool=true) %!s(bool=false) 2 years ago %!s(bool=false) %!s(bool=false) %!s(*render.ArticleStaleStatus=&{false API 0xc003f0be18 0xc003f0be30}) map[en:/content-editing/managing-staff-with-the-staff-builder-tool] [] %!s(*render.Article=<nil>) %!s(*render.Article=<nil>)}{gp3n4vp9fu 6j0sfw36mv Changing the About Us Statement on the Home Page Estimated Reading Time: 5 Minutes Required Permissions: Snippet Click Here for Quick Guide: Log into your site's admin panel. Click the Content tab at the top of the page, then the Content Snippets b… https://help.dealerspike.com/content-editing/changing-the-about-us-statement-on-the-home-page /content-editing/changing-the-about-us-statement-on-the-home-page changing-the-about-us-statement-on-the-home-page [] [] 2021-11-16 15:36:15.739269 +0000 UTC 2023-06-27 12:22:35.482498 +0000 UTC %!s(*render.Author=<nil>) %!s(bool=true) %!s(bool=false) 2 years ago %!s(bool=false) %!s(bool=false) %!s(*render.ArticleStaleStatus=&{false API 0xc003f0be90 0xc003f0bea8}) map[en:/content-editing/changing-the-about-us-statement-on-the-home-page] [] %!s(*render.Article=<nil>) %!s(*render.Article=<nil>)}{ttw7u3b0cs 6j0sfw36mv Creating Calendar Events Estimated Reading Time: 5 Minutes Required Permissions: Events Click Here for Quick Guide: Log into your site's admin panel. Click on the Events tab at the top of the screen, then on the Manage Event… https://help.dealerspike.com/content-editing/creating-calendar-events /content-editing/creating-calendar-events creating-calendar-events [] [] 2021-12-02 20:28:04.52195 +0000 UTC 2023-06-27 12:22:31.161983 +0000 UTC %!s(*render.Author=<nil>) %!s(bool=true) %!s(bool=false) 2 years ago %!s(bool=false) %!s(bool=false) %!s(*render.ArticleStaleStatus=&{false API 0xc003f0bf08 0xc003f0bf20}) map[en:/content-editing/creating-calendar-events] [] %!s(*render.Article=<nil>) %!s(*render.Article=<nil>)}{ktz2zfmv0o 6j0sfw36mv Customizing Page URLs Estimated Reading Time: 5 Minutes.. Dealer Spike web page URLs have several unique characteristics and can be configured in one of a few different ways. This article will run down how URLs for web pa… https://help.dealerspike.com/content-editing/customizing-page-urls /content-editing/customizing-page-urls customizing-page-urls [] [] 2021-12-02 20:40:40.456222 +0000 UTC 2023-06-27 12:22:22.091442 +0000 UTC %!s(*render.Author=<nil>) %!s(bool=true) %!s(bool=false) 2 years ago %!s(bool=true) %!s(bool=false) %!s(*render.ArticleStaleStatus=&{false API 0xc006724000 0xc006724018}) map[en:/content-editing/customizing-page-urls] [] %!s(*render.Article=<nil>) %!s(*render.Article=<nil>)}{1mz5zbsvf2 6j0sfw36mv Creating Blog Posts Blogs can be a great way to provide stories, useful information, news, and more. This article provides step-by-step instructions to navigate to and use the new blog posting tool. https://help.dealerspike.com/content-editing/creating-blog-posts /content-editing/creating-blog-posts creating-blog-posts [lighthouse] [] 2021-10-01 17:15:46.212305 +0000 UTC 2023-06-27 12:22:12.762355 +0000 UTC %!s(*render.Author=<nil>) %!s(bool=true) %!s(bool=false) 2 years ago %!s(bool=false) %!s(bool=false) %!s(*render.ArticleStaleStatus=&{false API 0xc006724060 0xc006724078}) map[en:/content-editing/creating-blog-posts] [] %!s(*render.Article=<nil>) %!s(*render.Article=<nil>)}{633xcg6zzt 6j0sfw36mv Managing Announcement Pop-Up Templates This article shows how to create re-usable templates in the Announcement Builder tool. https://help.dealerspike.com/content-editing/creating-and-editing-announcement-builder-templates /content-editing/creating-and-editing-announcement-builder-templates creating-and-editing-announcement-builder-templates [] [] 2022-02-07 12:30:10.848907 +0000 UTC 2023-06-27 12:19:34.346641 +0000 UTC %!s(*render.Author=<nil>) %!s(bool=true) %!s(bool=false) 2 years ago %!s(bool=true) %!s(bool=false) %!s(*render.ArticleStaleStatus=&{false API 0xc0067241b0 0xc0067241c8}) map[en:/content-editing/creating-and-editing-announcement-builder-templates] [] %!s(*render.Article=<nil>) %!s(*render.Article=<nil>)}
/dms-integrations
fa-link
DMS Integrations
{rmljyz92s1 wy3ws4q7sx SKU Availability This page offers downloadable spreadsheets with examples of how to enter units imported from DMS applications by manufacturer. https://help.dealerspike.com/dms-integrations/sku-availability /dms-integrations/sku-availability sku-availability [_recent] [] 2025-01-29 14:32:59.488562 +0000 UTC 2025-04-23 16:37:13.421607 +0000 UTC %!s(*render.Author=&{0r2gjy8pko Randall Theil https://www.gravatar.com/avatar/deda774ad13f3d7133da2cb2a6777b5e?d=mm&s=150}) %!s(bool=true) %!s(bool=false) 1 year ago %!s(bool=false) %!s(bool=true) %!s(*render.ArticleStaleStatus=&{false API 0xc0067243f0 0xc006724408}) map[en:/dms-integrations/sku-availability] [] %!s(*render.Article=<nil>) %!s(*render.Article=<nil>)}{d5jowbst54 wy3ws4q7sx Inventory Trim Matching Guide Trim matching is how units are connected to the Dealer Spike inventory database and how units get extras like descriptions, specifications, and stock photos. This page explains how trim matching works. https://help.dealerspike.com/dms-integrations/inventory-trim-matching-guide /dms-integrations/inventory-trim-matching-guide inventory-trim-matching-guide [inventory model number unit model name stock photo matching stock image trim database model code glossary image photo] [] 2022-01-20 17:53:26.43316 +0000 UTC 2024-11-26 16:37:30.784277 +0000 UTC %!s(*render.Author=&{0jkkbet7wr Marcia Lovell https://www.gravatar.com/avatar/0ac3ff8556a1fbddf80e3bc020aee4b4?d=mm&s=150}) %!s(bool=true) %!s(bool=false) 2 years ago %!s(bool=true) %!s(bool=true) %!s(*render.ArticleStaleStatus=&{false API 0xc006724450 0xc006724468}) map[en:/dms-integrations/inventory-trim-matching-guide] [] %!s(*render.Article=<nil>) %!s(*render.Article=<nil>)}{72ldv4ez5b wy3ws4q7sx Getting Started with DMS Integrations Get an overview of DMS integrations including info on the first time setup process, how and when your DMS integration will run, and how your data will match with our vehicle database. https://help.dealerspike.com/dms-integrations/getting-started-with-dms-integrations /dms-integrations/getting-started-with-dms-integrations getting-started-with-dms-integrations [incoming Feed inventory new setup DMS trim matching] [] 2022-07-15 09:04:13.313955 +0000 UTC 2023-11-30 16:52:11.002622 +0000 UTC %!s(*render.Author=&{0jkkbet7wr Marcia Lovell https://www.gravatar.com/avatar/0ac3ff8556a1fbddf80e3bc020aee4b4?d=mm&s=150}) %!s(bool=true) %!s(bool=false) 2 years ago %!s(bool=true) %!s(bool=true) %!s(*render.ArticleStaleStatus=&{false API 0xc006724570 0xc006724588}) map[en:/dms-integrations/getting-started-with-dms-integrations] [] %!s(*render.Article=<nil>) %!s(*render.Article=<nil>)}{ukt70y33al wy3ws4q7sx Integration Details for Dealers with a Talon DMS Talon integrations are one of the most complex and involved integrations Dealer Spike offers and are not guaranteed to work 100% correctly 100% of the time. Having a dedicated IT person or team will… https://help.dealerspike.com/dms-integrations/integration-details-for-dealers-with-a-talon-dms /dms-integrations/integration-details-for-dealers-with-a-talon-dms integration-details-for-dealers-with-a-talon-dms [] [] 2023-08-02 21:53:23.546879 +0000 UTC 2023-08-03 15:34:48.000123 +0000 UTC %!s(*render.Author=&{0jkkbet7wr Marcia Lovell https://www.gravatar.com/avatar/0ac3ff8556a1fbddf80e3bc020aee4b4?d=mm&s=150}) %!s(bool=true) %!s(bool=false) 2 months ago %!s(bool=false) %!s(bool=false) %!s(*render.ArticleStaleStatus=&{false API 0xc006724228 0xc006724240}) map[en:/dms-integrations/integration-details-for-dealers-with-a-talon-dms] [] %!s(*render.Article=<nil>) %!s(*render.Article=<nil>)}{ms5uex6hbu wy3ws4q7sx DMS Integrations Overview (Incoming Feeds) This page lists all of the existing DMS providers Dealer Spike can integrate with to feed inventory to your website. https://help.dealerspike.com/dms-integrations/dms-integrations-overview-incoming-feeds /dms-integrations/dms-integrations-overview-incoming-feeds dms-integrations-overview-incoming-feeds [] [] 2022-06-17 15:08:08.345331 +0000 UTC 2026-03-26 16:40:56.436029 +0000 UTC %!s(*render.Author=&{0r2gjy8pko Randall Theil https://www.gravatar.com/avatar/deda774ad13f3d7133da2cb2a6777b5e?d=mm&s=150}) %!s(bool=true) %!s(bool=false) 2 months ago %!s(bool=true) %!s(bool=false) %!s(*render.ArticleStaleStatus=&{false API 0xc0067242a0 0xc0067242b8}) map[en:/dms-integrations/dms-integrations-overview-incoming-feeds] [] %!s(*render.Article=<nil>) %!s(*render.Article=<nil>)}{wp71c7uwvi wy3ws4q7sx How to Prepare for your DMS Integration The DMS Integration process is a joint effort between the Production Team, the Integration Team, and the Dealer. Each party has specific responsibilities to ensure a smooth experience. What is a DMS… https://help.dealerspike.com/dms-integrations/how-to-prepare-for-your-dms-integration /dms-integrations/how-to-prepare-for-your-dms-integration how-to-prepare-for-your-dms-integration [] [] 2023-08-01 14:20:50.490305 +0000 UTC 2026-03-11 21:19:39.080018 +0000 UTC %!s(*render.Author=&{0jkkbet7wr Marcia Lovell https://www.gravatar.com/avatar/0ac3ff8556a1fbddf80e3bc020aee4b4?d=mm&s=150}) %!s(bool=true) %!s(bool=false) 2 months ago %!s(bool=false) %!s(bool=false) %!s(*render.ArticleStaleStatus=&{false API 0xc006724318 0xc006724330}) map[en:/dms-integrations/how-to-prepare-for-your-dms-integration] [] %!s(*render.Article=<nil>) %!s(*render.Article=<nil>)}{w4eh7pfeyb wy3ws4q7sx Integration Details for Dealers with Lightspeed DMS When integrating your Dealer Spike website with your Lightspeed DMS to import major unit inventory, please be aware of the following: Dealer Spike needs your CMF number. If you have multiple stores w… https://help.dealerspike.com/dms-integrations/integration-details-for-dealers-with-cdk-lightspeed-dms /dms-integrations/integration-details-for-dealers-with-cdk-lightspeed-dms integration-details-for-dealers-with-cdk-lightspeed-dms [] [] 2023-08-02 19:36:42.826983 +0000 UTC 2025-07-09 14:56:57.879214 +0000 UTC %!s(*render.Author=&{0jkkbet7wr Marcia Lovell https://www.gravatar.com/avatar/0ac3ff8556a1fbddf80e3bc020aee4b4?d=mm&s=150}) %!s(bool=true) %!s(bool=false) 11 months ago %!s(bool=false) %!s(bool=false) %!s(*render.ArticleStaleStatus=&{false API 0xc006724390 0xc0067243a8}) map[en:/dms-integrations/integration-details-for-dealers-with-cdk-lightspeed-dms] [] %!s(*render.Article=<nil>) %!s(*render.Article=<nil>)}{tr8pk6683a wy3ws4q7sx How to Turn off Inventory Fields from Updating Nightly Inventory Field Feeds Manager. You, the dealer, can now control whether specific inventory unit data fields in your Inventory Manager are updated during the nightly inventory feed! Until now, this co… https://help.dealerspike.com/dms-integrations/how-to-turn-off-inventory-fields-from-updating-nightly /dms-integrations/how-to-turn-off-inventory-fields-from-updating-nightly how-to-turn-off-inventory-fields-from-updating-nightly [nightly field off pricing turn update enable disable updating prices refresh] [] 2023-05-03 22:17:29.872094 +0000 UTC 2023-08-17 14:32:19.188136 +0000 UTC %!s(*render.Author=&{0jkkbet7wr Marcia Lovell https://www.gravatar.com/avatar/0ac3ff8556a1fbddf80e3bc020aee4b4?d=mm&s=150}) %!s(bool=true) %!s(bool=false) 2 years ago %!s(bool=false) %!s(bool=false) %!s(*render.ArticleStaleStatus=&{false API 0xc0067244b0 0xc0067244c8}) map[en:/dms-integrations/how-to-turn-off-inventory-fields-from-updating-nightly] [] %!s(*render.Article=<nil>) %!s(*render.Article=<nil>)}{dvv7qg92og wy3ws4q7sx DMS Integration Frequently Asked Questions Get answers to frequently asked DMS integration questions like how long integrations usually take to set up and which fields on your units will update nightly. https://help.dealerspike.com/dms-integrations/dms-integration-frequently-asked-questions /dms-integrations/dms-integration-frequently-asked-questions dms-integration-frequently-asked-questions [Incoming Feed integration] [] 2022-07-15 09:21:28.772103 +0000 UTC 2024-07-23 21:37:46.396149 +0000 UTC %!s(*render.Author=<nil>) %!s(bool=true) %!s(bool=false) 2 years ago %!s(bool=true) %!s(bool=false) %!s(*render.ArticleStaleStatus=&{false API 0xc006724510 0xc006724528}) map[en:/dms-integrations/dms-integration-frequently-asked-questions] [] %!s(*render.Article=<nil>) %!s(*render.Article=<nil>)}{esofypywlh wy3ws4q7sx Integration Details for Dealers with an AutoMate DMS AutoMate requires a signed Authorization form before they will send data to Dealer Spike. If you have multiple locations, a form will need to be completed and signed for each location. Your assigned… https://help.dealerspike.com/dms-integrations/integration-details-for-dealers-with-an-auto-mate-dms /dms-integrations/integration-details-for-dealers-with-an-auto-mate-dms integration-details-for-dealers-with-an-auto-mate-dms [] [] 2023-08-04 21:05:33.442286 +0000 UTC 2023-08-04 21:14:01.864825 +0000 UTC %!s(*render.Author=&{0jkkbet7wr Marcia Lovell https://www.gravatar.com/avatar/0ac3ff8556a1fbddf80e3bc020aee4b4?d=mm&s=150}) %!s(bool=true) %!s(bool=false) 2 years ago %!s(bool=false) %!s(bool=false) %!s(*render.ArticleStaleStatus=&{false API 0xc0067245e8 0xc006724600}) map[en:/dms-integrations/integration-details-for-dealers-with-an-auto-mate-dms] [] %!s(*render.Article=<nil>) %!s(*render.Article=<nil>)}{xa0djkew5o wy3ws4q7sx How to Manage your Talon DMS Integration This article walks through updating your site's invnetory with a Talon DMS integration. https://help.dealerspike.com/dms-integrations/how-to-manage-your-talon-dms-integration /dms-integrations/how-to-manage-your-talon-dms-integration how-to-manage-your-talon-dms-integration [Talon] [] 2022-04-15 19:51:14.569723 +0000 UTC 2023-06-27 12:24:47.014703 +0000 UTC %!s(*render.Author=&{0jkkbet7wr Marcia Lovell https://www.gravatar.com/avatar/0ac3ff8556a1fbddf80e3bc020aee4b4?d=mm&s=150}) %!s(bool=true) %!s(bool=false) 2 years ago %!s(bool=false) %!s(bool=false) %!s(*render.ArticleStaleStatus=&{false API 0xc006724648 0xc006724660}) map[en:/dms-integrations/how-to-manage-your-talon-dms-integration] [] %!s(*render.Article=<nil>) %!s(*render.Article=<nil>)}
/dealer-spike
fa-group
Dealer Spike Information
{gnrg8hvg7n fy817bh53c Contacting Technical Support This page will show you different ways you can get in touch with the Technical Support Department https://help.dealerspike.com/dealer-spike/contacting-technical-support /dealer-spike/contacting-technical-support contacting-technical-support [who can i reach out to web manager web representative tech support dealerspike phone] [] 2021-12-02 20:25:21.339682 +0000 UTC 2026-04-30 14:00:02.480241 +0000 UTC %!s(*render.Author=<nil>) %!s(bool=true) %!s(bool=false) 1 month ago %!s(bool=true) %!s(bool=true) %!s(*render.ArticleStaleStatus=&{false API 0xc0067246a8 0xc0067246c0}) map[en:/dealer-spike/contacting-technical-support] [] %!s(*render.Article=<nil>) %!s(*render.Article=<nil>)}{628ujmrb7t fy817bh53c Getting in Touch with Your Account Manager Quick Contacts: Tech Support/Updates - phone: (800)288-5917 , option 1 | email: support@dealerspike.com Billing Team - phone (877) 373-1173 | email: billing@leadventure.com. Estimated Reading Time: 2… https://help.dealerspike.com/dealer-spike/getting-in-touch-with-your-account-manager /dealer-spike/getting-in-touch-with-your-account-manager getting-in-touch-with-your-account-manager [] [] 2021-11-16 15:45:58.737127 +0000 UTC 2026-04-30 13:58:58.827455 +0000 UTC %!s(*render.Author=<nil>) %!s(bool=true) %!s(bool=false) 1 month ago %!s(bool=false) %!s(bool=false) %!s(*render.ArticleStaleStatus=&{false API 0xc006724720 0xc006724738}) map[en:/dealer-spike/getting-in-touch-with-your-account-manager] [] %!s(*render.Article=<nil>) %!s(*render.Article=<nil>)}{oq7g3xib1p fy817bh53c Am I on the Right Help Center? Make sure you are looking at help content for your website. This help center: V6/V7 Websites. All help content on: https://help.dealerspike.com is for Dealer Spike customers on the older V6/V7 platfo… https://help.dealerspike.com/dealer-spike/am-i-on-the-right-help-center /dealer-spike/am-i-on-the-right-help-center am-i-on-the-right-help-center [spark v6 v7 v6/v7 wrong can't find catalogs] [] 2025-02-04 22:18:17.15174 +0000 UTC 2025-02-06 17:06:36.401562 +0000 UTC %!s(*render.Author=&{zx657b2yfe Patrick Mares https://www.gravatar.com/avatar/0c83d88c1d4c4317d41ee1dbd633242f?d=mm&s=150}) %!s(bool=true) %!s(bool=false) 1 year ago %!s(bool=true) %!s(bool=false) %!s(*render.ArticleStaleStatus=&{false API 0xc006724780 0xc006724798}) map[en:/dealer-spike/am-i-on-the-right-help-center] [] %!s(*render.Article=<nil>) %!s(*render.Article=<nil>)}{lv5aspxa8y fy817bh53c Getting Started This article will walk you through all of the basics of the help center and where to go to find particular info. https://help.dealerspike.com/dealer-spike/getting-started /dealer-spike/getting-started getting-started [] [] 2021-12-07 00:57:58.753753 +0000 UTC 2024-04-19 17:56:39.180828 +0000 UTC %!s(*render.Author=<nil>) %!s(bool=true) %!s(bool=false) 2 years ago %!s(bool=true) %!s(bool=false) %!s(*render.ArticleStaleStatus=&{false API 0xc0067247f8 0xc006724810}) map[en:/dealer-spike/getting-started] [] %!s(*render.Article=<nil>) %!s(*render.Article=<nil>)}{r64vks6562 fy817bh53c Third Party Partner Program Script Guidelines Dealer Spike has implemented guidelines for third party partners who wish to add external scripts or code to dealer websites. This article will list requirements and procedures third parties must adhere to get added to Dealer Spike websites. https://help.dealerspike.com/dealer-spike/third-party-partner-program-script-guidelines /dealer-spike/third-party-partner-program-script-guidelines third-party-partner-program-script-guidelines [certified] [] 2023-10-31 22:58:58.315571 +0000 UTC 2023-11-02 15:53:10.529245 +0000 UTC %!s(*render.Author=&{0r2gjy8pko Randall Theil https://www.gravatar.com/avatar/deda774ad13f3d7133da2cb2a6777b5e?d=mm&s=150}) %!s(bool=true) %!s(bool=false) 2 years ago %!s(bool=true) %!s(bool=false) %!s(*render.ArticleStaleStatus=&{false API 0xc006724858 0xc006724870}) map[en:/dealer-spike/third-party-partner-program-script-guidelines] [] %!s(*render.Article=<nil>) %!s(*render.Article=<nil>)}{oylxo2hfle fy817bh53c Changing Your Billing Information Looking to update your payment method on file? This article will show you where to go to get your billing information updated. https://help.dealerspike.com/dealer-spike/changing-your-billing-information /dealer-spike/changing-your-billing-information changing-your-billing-information [contacting accounting] [] 2022-07-18 14:54:22.361726 +0000 UTC 2023-06-27 12:24:20.834108 +0000 UTC %!s(*render.Author=<nil>) %!s(bool=true) %!s(bool=false) 2 years ago %!s(bool=false) %!s(bool=false) %!s(*render.ArticleStaleStatus=&{false API 0xc0067248b8 0xc0067248d0}) map[en:/dealer-spike/changing-your-billing-information] [] %!s(*render.Article=<nil>) %!s(*render.Article=<nil>)}{pdwjn07n0z fy817bh53c Getting News and Updates about Dealer Spike This page lists all the different resources you can subscribe to to get updates about Dealer Spike news, new feature releases, tips and advice, and industry news. https://help.dealerspike.com/dealer-spike/getting-news-and-updates-about-dealer-spike /dealer-spike/getting-news-and-updates-about-dealer-spike getting-news-and-updates-about-dealer-spike [] [] 2022-03-28 11:42:00.350714 +0000 UTC 2023-06-27 12:24:11.641417 +0000 UTC %!s(*render.Author=<nil>) %!s(bool=true) %!s(bool=false) 2 years ago %!s(bool=true) %!s(bool=false) %!s(*render.ArticleStaleStatus=&{false API 0xc006724930 0xc006724948}) map[en:/dealer-spike/getting-news-and-updates-about-dealer-spike] [] %!s(*render.Article=<nil>) %!s(*render.Article=<nil>)}
/ecommerce
fa-dollar
Ecommerce
/managing-catalogs
u0pgoh5xvt
fa-server
Catalog and Product Management
{lcemo2li7u xzv24hlmc3 Ecommerce Products, Product Groups, Categories and Catalogs Learn more about Ecommerce Products, Product Groups, Categories and Catalogs, where to find them and how to use them. https://help.dealerspike.com/managing-catalogs/products-vs-categories-examples /managing-catalogs/products-vs-categories-examples products-vs-categories-examples [] [] 2021-11-22 21:22:16.456404 +0000 UTC 2026-03-11 21:26:35.597491 +0000 UTC %!s(*render.Author=<nil>) %!s(bool=true) %!s(bool=false) 2 months ago %!s(bool=true) %!s(bool=true) %!s(*render.ArticleStaleStatus=&{false API 0xc0067249c0 0xc0067249d8}) map[en:/managing-catalogs/products-vs-categories-examples] [] %!s(*render.Article=<nil>) %!s(*render.Article=<nil>)}{jepc0vsfoz xzv24hlmc3 Update Categories and Category Structure by CSV Import This guide walks through updating the categories on your web store by uploading customized CSV spreadsheet files. https://help.dealerspike.com/managing-catalogs/categories-by-csv /managing-catalogs/categories-by-csv categories-by-csv [] [] 2021-11-23 22:37:07.738109 +0000 UTC 2026-03-11 21:24:02.970293 +0000 UTC %!s(*render.Author=<nil>) %!s(bool=true) %!s(bool=false) 2 months ago %!s(bool=false) %!s(bool=false) %!s(*render.ArticleStaleStatus=&{false API 0xc006724a38 0xc006724a50}) map[en:/managing-catalogs/categories-by-csv] [] %!s(*render.Article=<nil>) %!s(*render.Article=<nil>)}{17un5708v3 xzv24hlmc3 Update Price Overrides by CSV Import This guide walks through using CSV files to upload pricing overrides for each distributor SKU (stock-keeping unit number). https://help.dealerspike.com/managing-catalogs/price-overrides-by-csv-file /managing-catalogs/price-overrides-by-csv-file price-overrides-by-csv-file [] [] 2021-11-23 22:00:29.399328 +0000 UTC 2026-03-11 21:23:04.84429 +0000 UTC %!s(*render.Author=<nil>) %!s(bool=true) %!s(bool=false) 2 months ago %!s(bool=false) %!s(bool=false) %!s(*render.ArticleStaleStatus=&{false API 0xc006724ab0 0xc006724ac8}) map[en:/managing-catalogs/price-overrides-by-csv-file] [] %!s(*render.Article=<nil>) %!s(*render.Article=<nil>)}{v3dft9dubp xzv24hlmc3 Hide or Show Ecommerce Product Groups and Categories Hidden Ecommerce Categories allow you to temporarily remove Product groups or categories without losing Product and Category information or reliably remove Categories from Aftermarket Catalogs. https://help.dealerspike.com/managing-catalogs/hide-an-ecommerce-category /managing-catalogs/hide-an-ecommerce-category hide-an-ecommerce-category [] [] 2022-09-20 21:45:05.375329 +0000 UTC 2023-10-04 18:00:18.029161 +0000 UTC %!s(*render.Author=<nil>) %!s(bool=true) %!s(bool=false) 2 years ago %!s(bool=true) %!s(bool=false) %!s(*render.ArticleStaleStatus=&{false API 0xc006724b28 0xc006724b40}) map[en:/managing-catalogs/hide-an-ecommerce-category] [] %!s(*render.Article=<nil>) %!s(*render.Article=<nil>)}{rzbukjz6b9 xzv24hlmc3 Update Image Overrides by CSV Import This guide walks through uploading custom product images to your ecommerce items. https://help.dealerspike.com/managing-catalogs/image-overrides /managing-catalogs/image-overrides image-overrides [] [] 2021-11-23 22:13:08.41993 +0000 UTC 2023-06-27 12:42:33.14617 +0000 UTC %!s(*render.Author=<nil>) %!s(bool=true) %!s(bool=false) 2 years ago %!s(bool=false) %!s(bool=false) %!s(*render.ArticleStaleStatus=&{false API 0xc006724ba0 0xc006724bb8}) map[en:/managing-catalogs/image-overrides] [] %!s(*render.Article=<nil>) %!s(*render.Article=<nil>)}{ad4bgwz803 xzv24hlmc3 Update Cost Overrides by CSV Import This page shows how to add cost from your distributors to your ecommerce store by downloading and filling out a template file. https://help.dealerspike.com/managing-catalogs/cost-overrides /managing-catalogs/cost-overrides cost-overrides [] [] 2021-11-23 22:11:54.579686 +0000 UTC 2023-06-27 12:42:29.902687 +0000 UTC %!s(*render.Author=<nil>) %!s(bool=true) %!s(bool=false) 2 years ago %!s(bool=false) %!s(bool=false) %!s(*render.ArticleStaleStatus=&{false API 0xc006724c18 0xc006724c30}) map[en:/managing-catalogs/cost-overrides] [] %!s(*render.Article=<nil>) %!s(*render.Article=<nil>)}{xe19658egk xzv24hlmc3 Update Shelf Inventory and Price by User Interface This page has information on updating your Aftermarket and Private Product inventory by uploading a CSV spreadsheet file. https://help.dealerspike.com/managing-catalogs/update-shelf-inventory-by-user-interface-aftermarket /managing-catalogs/update-shelf-inventory-by-user-interface-aftermarket update-shelf-inventory-by-user-interface-aftermarket [] [] 2021-11-23 16:24:40.789696 +0000 UTC 2023-06-27 12:42:23.387101 +0000 UTC %!s(*render.Author=<nil>) %!s(bool=true) %!s(bool=false) 2 years ago %!s(bool=false) %!s(bool=false) %!s(*render.ArticleStaleStatus=&{false API 0xc006724c90 0xc006724ca8}) map[en:/managing-catalogs/update-shelf-inventory-by-user-interface-aftermarket] [] %!s(*render.Article=<nil>) %!s(*render.Article=<nil>)}{1i9m6c7sul xzv24hlmc3 Update Categories and Category Structure by User Interface This page shows how to manually add and remove categories. https://help.dealerspike.com/managing-catalogs/categories-manage-add-delete /managing-catalogs/categories-manage-add-delete categories-manage-add-delete [] [] 2021-11-22 22:55:12.999621 +0000 UTC 2023-06-27 12:42:19.779312 +0000 UTC %!s(*render.Author=<nil>) %!s(bool=true) %!s(bool=false) 2 years ago %!s(bool=false) %!s(bool=false) %!s(*render.ArticleStaleStatus=&{false API 0xc006724d08 0xc006724d20}) map[en:/managing-catalogs/categories-manage-add-delete] [] %!s(*render.Article=<nil>) %!s(*render.Article=<nil>)}{eyw29xr4t5 xzv24hlmc3 How to Format an Ecommerce SKU for Imports This guide shows how to use Microsoft Excel to update a SKU sent from distributors to the correct format to upload to your web store. https://help.dealerspike.com/managing-catalogs/how-to-format-an-aftermarket-sku /managing-catalogs/how-to-format-an-aftermarket-sku how-to-format-an-aftermarket-sku [] [] 2021-11-23 22:31:37.522191 +0000 UTC 2023-06-27 12:42:12.044094 +0000 UTC %!s(*render.Author=<nil>) %!s(bool=true) %!s(bool=false) 2 years ago %!s(bool=false) %!s(bool=false) %!s(*render.ArticleStaleStatus=&{false API 0xc006724d80 0xc006724d98}) map[en:/managing-catalogs/how-to-format-an-aftermarket-sku] [] %!s(*render.Article=<nil>) %!s(*render.Article=<nil>)}{h1jjsldgzu xzv24hlmc3 Hosting Visuals in Media Center This page has information on Media Center, an image hosting platform that can be used to upload custom images for custom/private products. https://help.dealerspike.com/managing-catalogs/media-center /managing-catalogs/media-center media-center [] [] 2021-11-22 22:41:29.293374 +0000 UTC 2023-06-27 12:42:07.876911 +0000 UTC %!s(*render.Author=<nil>) %!s(bool=true) %!s(bool=false) 2 years ago %!s(bool=false) %!s(bool=false) %!s(*render.ArticleStaleStatus=&{false API 0xc006724df8 0xc006724e10}) map[en:/managing-catalogs/media-center] [] %!s(*render.Article=<nil>) %!s(*render.Article=<nil>)}{7atjzk3u7b xzv24hlmc3 Set Sales on Ecommerce Products Set Ecommerce sales by Discounting a Manufacturer or adding an optional Sale Price to individual Products. https://help.dealerspike.com/managing-catalogs/set-sales-on-ecommerce-products /managing-catalogs/set-sales-on-ecommerce-products set-sales-on-ecommerce-products [sale special clearance pss sale discount] [] 2023-01-12 15:33:47.560846 +0000 UTC 2023-06-27 12:40:27.628705 +0000 UTC %!s(*render.Author=<nil>) %!s(bool=true) %!s(bool=false) 2 years ago %!s(bool=true) %!s(bool=false) %!s(*render.ArticleStaleStatus=&{false API 0xc006724e58 0xc006724e70}) map[en:/managing-catalogs/set-sales-on-ecommerce-products] [] %!s(*render.Article=<nil>) %!s(*render.Article=<nil>)}{3ny15b6dve xzv24hlmc3 Update Shelf Inventory and Sale Price by CSV Import This page has information on updating your inventory by uploading a CSV spreadsheet file. https://help.dealerspike.com/managing-catalogs/update-shelf-inventory-by-csv-aftermarket /managing-catalogs/update-shelf-inventory-by-csv-aftermarket update-shelf-inventory-by-csv-aftermarket [] [] 2021-11-22 22:13:09.312399 +0000 UTC 2023-06-27 12:40:23.724604 +0000 UTC %!s(*render.Author=<nil>) %!s(bool=true) %!s(bool=false) 2 years ago %!s(bool=false) %!s(bool=false) %!s(*render.ArticleStaleStatus=&{false API 0xc006724ed0 0xc006724ee8}) map[en:/managing-catalogs/update-shelf-inventory-by-csv-aftermarket] [] %!s(*render.Article=<nil>) %!s(*render.Article=<nil>)}{8c9lfrwmvw xzv24hlmc3 Creating Ecommerce Feature Groups This guide walks through the process of featuring selected product groups on your web store's home page. https://help.dealerspike.com/managing-catalogs/how-to-feature-product-groups /managing-catalogs/how-to-feature-product-groups how-to-feature-product-groups [] [] 2021-11-22 21:27:55.045521 +0000 UTC 2023-06-27 12:40:14.896652 +0000 UTC %!s(*render.Author=<nil>) %!s(bool=true) %!s(bool=false) 2 years ago %!s(bool=false) %!s(bool=false) %!s(*render.ArticleStaleStatus=&{false API 0xc006724f48 0xc006724f60}) map[en:/managing-catalogs/how-to-feature-product-groups] [] %!s(*render.Article=<nil>) %!s(*render.Article=<nil>)}{dordmjl0un xzv24hlmc3 Update Price Rules & Price Overrides by User Interface This page has information on using price rules and overrides to apply custom pricing on inventory and the different methods to do so. https://help.dealerspike.com/managing-catalogs/price-rules-price-overrides /managing-catalogs/price-rules-price-overrides price-rules-price-overrides [] [] 2021-11-22 22:45:01.744732 +0000 UTC 2023-06-27 12:40:10.544034 +0000 UTC %!s(*render.Author=<nil>) %!s(bool=true) %!s(bool=false) 2 years ago %!s(bool=true) %!s(bool=false) %!s(*render.ArticleStaleStatus=&{false API 0xc006724fc0 0xc006724fd8}) map[en:/managing-catalogs/price-rules-price-overrides] [] %!s(*render.Article=<nil>) %!s(*render.Article=<nil>)}{2ze6daz0od xzv24hlmc3 Delete or Exclude a Product Group This page shows how to manually remove products and product groups. https://help.dealerspike.com/managing-catalogs/products-manage-add-delete /managing-catalogs/products-manage-add-delete products-manage-add-delete [] [] 2021-11-22 21:23:27.331756 +0000 UTC 2023-06-27 12:40:03.131107 +0000 UTC %!s(*render.Author=<nil>) %!s(bool=true) %!s(bool=false) 2 years ago %!s(bool=true) %!s(bool=false) %!s(*render.ArticleStaleStatus=&{false duplicate API 0xc006725038 0xc006725050}) map[en:/managing-catalogs/products-manage-add-delete] [] %!s(*render.Article=<nil>) %!s(*render.Article=<nil>)}{65lr7qsnfz xzv24hlmc3 Update Product Group Category Mapping by User Interface This page shows how to update the category for a product using the regular user interface on your ecommerce web store. https://help.dealerspike.com/managing-catalogs/how-to-change-the-category-of-a-listed-product-from-the-dashboard /managing-catalogs/how-to-change-the-category-of-a-listed-product-from-the-dashboard how-to-change-the-category-of-a-listed-product-from-the-dashboard [] [] 2021-11-22 22:57:09.493205 +0000 UTC 2023-06-27 12:39:59.505361 +0000 UTC %!s(*render.Author=<nil>) %!s(bool=true) %!s(bool=false) 2 years ago %!s(bool=false) %!s(bool=false) %!s(*render.ArticleStaleStatus=&{false API 0xc0067250b0 0xc0067250c8}) map[en:/managing-catalogs/how-to-change-the-category-of-a-listed-product-from-the-dashboard] [] %!s(*render.Article=<nil>) %!s(*render.Article=<nil>)}{k4wxy3kd54 xzv24hlmc3 Update Product Group Category Mapping by CSV Import Product Mapping imports update the Category mapped to Aftermarket and Private Catalog Product Group listings. This allows listing, webstore reorganization and delisting Product Groups. https://help.dealerspike.com/managing-catalogs/how-do-i-set-or-update-ecommerce-product-group-categories /managing-catalogs/how-do-i-set-or-update-ecommerce-product-group-categories how-do-i-set-or-update-ecommerce-product-group-categories [Category Mapping List Products Map Product Groups Why aren't my Ecommerce Products Missing Ecommerce Products Product Group to Category] [] 2022-09-13 13:44:46.643367 +0000 UTC 2023-06-27 12:39:55.413971 +0000 UTC %!s(*render.Author=<nil>) %!s(bool=true) %!s(bool=false) 2 years ago %!s(bool=false) %!s(bool=false) %!s(*render.ArticleStaleStatus=&{false API 0xc006725110 0xc006725128}) map[en:/managing-catalogs/how-do-i-set-or-update-ecommerce-product-group-categories] [] %!s(*render.Article=<nil>) %!s(*render.Article=<nil>)}
/aftermarket-catalog-and-product-management
xzv24hlmc3
fa-medkit
Aftermarket Catalog and Product Management
{mtmv1pg7cc oqoxey91q7 Automatic Category Management This article details the rules governing automatic management of Aftermarket Categories. https://help.dealerspike.com/aftermarket-catalog-and-product-management/automatic-category-management /aftermarket-catalog-and-product-management/automatic-category-management automatic-category-management [randomly where missing moved lost came] [] 2022-10-10 20:57:55.258379 +0000 UTC 2023-06-27 12:38:44.427796 +0000 UTC %!s(*render.Author=<nil>) %!s(bool=true) %!s(bool=false) 2 years ago %!s(bool=true) %!s(bool=false) %!s(*render.ArticleStaleStatus=&{false API 0xc006725170 0xc006725188}) map[en:/aftermarket-catalog-and-product-management/automatic-category-management] [] %!s(*render.Article=<nil>) %!s(*render.Article=<nil>)}{xkiibqiqd5 oqoxey91q7 Catalog Availability - Ecommerce Aftermarket This article has information on the available distributor catalogs that can be added to your web store. https://help.dealerspike.com/aftermarket-catalog-and-product-management/catalog-availablility-ecommerce-and-partstream /aftermarket-catalog-and-product-management/catalog-availablility-ecommerce-and-partstream catalog-availablility-ecommerce-and-partstream [DS_exclusive] [] 2021-11-22 23:23:59.332725 +0000 UTC 2023-06-27 12:38:40.119074 +0000 UTC %!s(*render.Author=<nil>) %!s(bool=true) %!s(bool=false) 2 years ago %!s(bool=false) %!s(bool=false) %!s(*render.ArticleStaleStatus=&{false API 0xc0067251d0 0xc0067251e8}) map[en:/aftermarket-catalog-and-product-management/catalog-availablility-ecommerce-and-partstream] [] %!s(*render.Article=<nil>) %!s(*render.Article=<nil>)}
/parts-finder-oem-catalogs
xzv24hlmc3
fa-wrench
Parts Finder OEM Catalogs
{7rar4kt81m bp83dwsh8w Bulk Update OEM Part Prices You may set basic pricing rules for each OEM parts brand you carry in Parts Finder for Ecommerce. Parts with individual or imported updates will override brand wide settings. https://help.dealerspike.com/parts-finder-oem-catalogs/bulk-update-oem-part-prices-in-the-cms /parts-finder-oem-catalogs/bulk-update-oem-part-prices-in-the-cms bulk-update-oem-part-prices-in-the-cms [parts finder streams admin oem parts] [] 2026-03-09 21:10:40.344398 +0000 UTC 2026-04-03 16:25:35.686702 +0000 UTC %!s(*render.Author=&{zx657b2yfe Patrick Mares https://www.gravatar.com/avatar/0c83d88c1d4c4317d41ee1dbd633242f?d=mm&s=150}) %!s(bool=true) %!s(bool=false) 2 months ago %!s(bool=true) %!s(bool=false) %!s(*render.ArticleStaleStatus=&{false API 0xc006725230 0xc006725248}) map[en:/parts-finder-oem-catalogs/bulk-update-oem-part-prices-in-the-cms] [] %!s(*render.Article=<nil>) %!s(*render.Article=<nil>)}{jc18ca4qo9 bp83dwsh8w Parts Finder OEM Price Uploads This guide shows how to manage and upload a file containing custom prices for the OEM parts on your Dealer Spike website. https://help.dealerspike.com/parts-finder-oem-catalogs/parts-finder-oem-price-uploads /parts-finder-oem-catalogs/parts-finder-oem-price-uploads parts-finder-oem-price-uploads [streams admin parts finder oem parts] [] 2026-03-09 20:59:37.853133 +0000 UTC 2026-03-09 22:01:52.047253 +0000 UTC %!s(*render.Author=&{zx657b2yfe Patrick Mares https://www.gravatar.com/avatar/0c83d88c1d4c4317d41ee1dbd633242f?d=mm&s=150}) %!s(bool=true) %!s(bool=false) 2 months ago %!s(bool=true) %!s(bool=false) %!s(*render.ArticleStaleStatus=&{false API 0xc006725290 0xc0067252a8}) map[en:/parts-finder-oem-catalogs/parts-finder-oem-price-uploads] [] %!s(*render.Article=<nil>) %!s(*render.Article=<nil>)}{9y6t9ad1a7 bp83dwsh8w Parts Finder OEM Catalog Availability Please see all Parts Finder OEM Catalogs here. https://help.dealerspike.com/parts-finder-oem-catalogs/parts-finder-oem-catalog-availability-v-2 /parts-finder-oem-catalogs/parts-finder-oem-catalog-availability-v-2 parts-finder-oem-catalog-availability-v-2 [parts finder streams admin oem parts] [] 2026-03-09 21:03:19.810569 +0000 UTC 2026-03-09 22:02:58.791931 +0000 UTC %!s(*render.Author=&{zx657b2yfe Patrick Mares https://www.gravatar.com/avatar/0c83d88c1d4c4317d41ee1dbd633242f?d=mm&s=150}) %!s(bool=true) %!s(bool=false) 2 months ago %!s(bool=true) %!s(bool=false) %!s(*render.ArticleStaleStatus=&{false API 0xc0067252f0 0xc006725308}) map[en:/parts-finder-oem-catalogs/parts-finder-oem-catalog-availability-v-2] [] %!s(*render.Article=<nil>) %!s(*render.Article=<nil>)}{wan26zfhxk bp83dwsh8w Where Can I Manage Parts Finder OEM Parts? Read about all functionality to update and change pricing on OEM replacement parts. https://help.dealerspike.com/parts-finder-oem-catalogs/where-can-i-manage-parts-finder-oem-parts /parts-finder-oem-catalogs/where-can-i-manage-parts-finder-oem-parts where-can-i-manage-parts-finder-oem-parts [parts finder streams admin oem parts] [] 2026-03-09 21:06:49.948134 +0000 UTC 2026-03-09 22:04:30.380414 +0000 UTC %!s(*render.Author=&{zx657b2yfe Patrick Mares https://www.gravatar.com/avatar/0c83d88c1d4c4317d41ee1dbd633242f?d=mm&s=150}) %!s(bool=true) %!s(bool=false) 2 months ago %!s(bool=true) %!s(bool=false) %!s(*render.ArticleStaleStatus=&{false API 0xc006725350 0xc006725368}) map[en:/parts-finder-oem-catalogs/where-can-i-manage-parts-finder-oem-parts] [] %!s(*render.Article=<nil>) %!s(*render.Article=<nil>)}{by7esuhdtk bp83dwsh8w Edit Single Parts Finder Parts You can hide prices, update prices and update descriptions for individual Parts Finder parts in parts finder management. https://help.dealerspike.com/parts-finder-oem-catalogs/edit-single-parts-finder-parts /parts-finder-oem-catalogs/edit-single-parts-finder-parts edit-single-parts-finder-parts [streams admin parts finder oem parts] [] 2026-03-09 21:06:01.526601 +0000 UTC 2026-03-09 22:05:09.010564 +0000 UTC %!s(*render.Author=&{zx657b2yfe Patrick Mares https://www.gravatar.com/avatar/0c83d88c1d4c4317d41ee1dbd633242f?d=mm&s=150}) %!s(bool=true) %!s(bool=false) 2 months ago %!s(bool=true) %!s(bool=false) %!s(*render.ArticleStaleStatus=&{false API 0xc0067253b0 0xc0067253c8}) map[en:/parts-finder-oem-catalogs/edit-single-parts-finder-parts] [] %!s(*render.Article=<nil>) %!s(*render.Article=<nil>)}
/adding-private-custom-catalog-data
xzv24hlmc3
fa-book
Private Catalog and Product Management
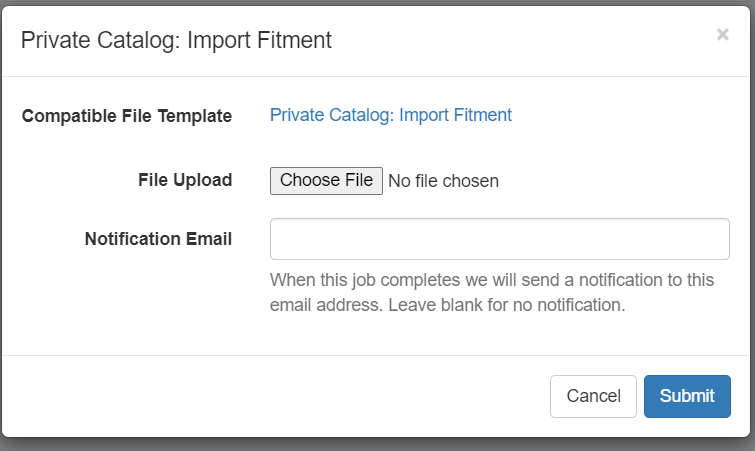
{srrwmz9fk3 xt6skbuxw7 What Should I Know Before Starting a Private Catalog? What core concepts should I know before building a custom Private Catalog for ecommerce? https://help.dealerspike.com/adding-private-custom-catalog-data/core-concepts /adding-private-custom-catalog-data/core-concepts core-concepts [Custom Catalog Private Catalog core concepts Get Started with Private Ecommerce Catalogs] [] 2021-11-22 23:18:56.103958 +0000 UTC 2023-06-27 12:38:09.533258 +0000 UTC %!s(*render.Author=<nil>) %!s(bool=true) %!s(bool=false) 2 years ago %!s(bool=true) %!s(bool=true) %!s(*render.ArticleStaleStatus=&{false API 0xc006725548 0xc006725560}) map[en:/adding-private-custom-catalog-data/core-concepts] [] %!s(*render.Article=<nil>) %!s(*render.Article=<nil>)}{bel7arjxmp xt6skbuxw7 How do I Create and Publish Private/Custom Catalogs? This article lists recommended options for: getting Private Catalog data into the backend, managing pricing, fitments, and inventory, and listing Private Catalog data to the Webstore. https://help.dealerspike.com/adding-private-custom-catalog-data/getting-your-private-catalog-data-into-the-backend /adding-private-custom-catalog-data/getting-your-private-catalog-data-into-the-backend getting-your-private-catalog-data-into-the-backend [Private Catalog] [] 2021-11-22 17:16:20.90566 +0000 UTC 2023-06-27 12:37:48.686813 +0000 UTC %!s(*render.Author=<nil>) %!s(bool=true) %!s(bool=false) 2 years ago %!s(bool=true) %!s(bool=true) %!s(*render.ArticleStaleStatus=&{false lacks links to mapping. update in two sets of proceefures, not both import and manhual in one track. API 0xc0067256c8 0xc0067256e0}) map[en:/adding-private-custom-catalog-data/getting-your-private-catalog-data-into-the-backend] [] %!s(*render.Article=<nil>) %!s(*render.Article=<nil>)}{9f96brf8y5 xt6skbuxw7 Update Private Catalog Products and Product Groups by User Interface Add and edit Private Catalog Products and Product Groups. Set basic information and fitment. Update sale prices and inventory levels. https://help.dealerspike.com/adding-private-custom-catalog-data/create-products-by-using-the-user-interface /adding-private-custom-catalog-data/create-products-by-using-the-user-interface create-products-by-using-the-user-interface [] [] 2021-11-22 22:50:00.733387 +0000 UTC 2026-03-11 21:33:44.038238 +0000 UTC %!s(*render.Author=<nil>) %!s(bool=true) %!s(bool=false) 2 months ago %!s(bool=true) %!s(bool=false) %!s(*render.ArticleStaleStatus=&{false confirming status of: This designation will follow the product to eBay so that it is properly marked on the marketplace. API 0xc006725428 0xc006725440}) map[en:/adding-private-custom-catalog-data/create-products-by-using-the-user-interface] [] %!s(*render.Article=<nil>) %!s(*render.Article=<nil>)}{vseqzm2dxo xt6skbuxw7 Examples of Product Data and Attributes This page has examples of product data from a CSV file along with live examples from a demonstration site of how the products will look. https://help.dealerspike.com/adding-private-custom-catalog-data/examples-of-product-data-and-attributes /adding-private-custom-catalog-data/examples-of-product-data-and-attributes examples-of-product-data-and-attributes [DS_exclusive] [] 2021-12-08 15:39:29.568811 +0000 UTC 2024-04-19 18:08:31.343918 +0000 UTC %!s(*render.Author=<nil>) %!s(bool=true) %!s(bool=false) 2 years ago %!s(bool=false) %!s(bool=false) %!s(*render.ArticleStaleStatus=&{false API 0xc006725488 0xc0067254a0}) map[en:/adding-private-custom-catalog-data/examples-of-product-data-and-attributes] [] %!s(*render.Article=<nil>) %!s(*render.Article=<nil>)}{xxh18ir8ax xt6skbuxw7 Update Private Catalog Products and Product Groups by CSV Import How to download a template CSV file, customize it with data, and upload it to import Private Catalog Products into your Ecommerce webstore. https://help.dealerspike.com/adding-private-custom-catalog-data/private-catalog-import-products-1 /adding-private-custom-catalog-data/private-catalog-import-products-1 private-catalog-import-products-1 [Product import product group import ecommerce item import Private Catalog] [] 2021-11-24 21:29:05.377295 +0000 UTC 2023-07-03 21:50:57.599368 +0000 UTC %!s(*render.Author=<nil>) %!s(bool=true) %!s(bool=false) 2 years ago %!s(bool=true) %!s(bool=false) %!s(*render.ArticleStaleStatus=&{false API 0xc0067254e8 0xc006725500}) map[en:/adding-private-custom-catalog-data/private-catalog-import-products-1] [] %!s(*render.Article=<nil>) %!s(*render.Article=<nil>)}{1pn6zgtggi xt6skbuxw7 Update Fitment by User Interface This guide shows how to add fitment through the regular user interface in the ecommerce platform. https://help.dealerspike.com/adding-private-custom-catalog-data/add-fitment-by-user-interface /adding-private-custom-catalog-data/add-fitment-by-user-interface add-fitment-by-user-interface [Private Catalog] [] 2021-11-22 21:13:42.334416 +0000 UTC 2023-06-27 12:38:02.744806 +0000 UTC %!s(*render.Author=<nil>) %!s(bool=true) %!s(bool=false) 2 years ago %!s(bool=false) %!s(bool=false) %!s(*render.ArticleStaleStatus=&{false API 0xc0067255a8 0xc0067255c0}) map[en:/adding-private-custom-catalog-data/add-fitment-by-user-interface] [] %!s(*render.Article=<nil>) %!s(*render.Article=<nil>)}{3ol01exygc xt6skbuxw7 Export Ecommerce Products and Product Groups to CSV This guide shows how to export private catalog product data to a CSV file that can be opened in a spreadsheet editor like Microsoft Excel or imported into another system. https://help.dealerspike.com/adding-private-custom-catalog-data/private-catalog-export-products /adding-private-custom-catalog-data/private-catalog-export-products private-catalog-export-products [Private Catalog] [] 2021-11-23 22:19:10.011381 +0000 UTC 2023-06-27 12:37:58.235271 +0000 UTC %!s(*render.Author=<nil>) %!s(bool=true) %!s(bool=false) 2 years ago %!s(bool=false) %!s(bool=false) %!s(*render.ArticleStaleStatus=&{false API 0xc006725608 0xc006725620}) map[en:/adding-private-custom-catalog-data/private-catalog-export-products] [] %!s(*render.Article=<nil>) %!s(*render.Article=<nil>)}{03m9jdu49i xt6skbuxw7 Update Fitment by CSV Import This guide walks through how to add fitment by uploading a CSV spreadsheet file. https://help.dealerspike.com/adding-private-custom-catalog-data/private-catalog-import-fitment /adding-private-custom-catalog-data/private-catalog-import-fitment private-catalog-import-fitment [Private Catalog] [] 2021-11-23 22:22:23.973021 +0000 UTC 2023-06-27 12:37:53.411608 +0000 UTC %!s(*render.Author=<nil>) %!s(bool=true) %!s(bool=false) 2 years ago %!s(bool=false) %!s(bool=false) %!s(*render.ArticleStaleStatus=&{false API 0xc006725668 0xc006725680}) map[en:/adding-private-custom-catalog-data/private-catalog-import-fitment] [] %!s(*render.Article=<nil>) %!s(*render.Article=<nil>)}{78zz9wh5n6 xt6skbuxw7 Delete Products This guide walks through how to delete private/custom products from your web store. https://help.dealerspike.com/adding-private-custom-catalog-data/deleting-your-private-catalog-data /adding-private-custom-catalog-data/deleting-your-private-catalog-data deleting-your-private-catalog-data [] [] 2021-11-22 21:19:28.386141 +0000 UTC 2023-06-27 12:37:19.889199 +0000 UTC %!s(*render.Author=<nil>) %!s(bool=true) %!s(bool=false) 2 years ago %!s(bool=false) %!s(bool=false) %!s(*render.ArticleStaleStatus=&{false API 0xc006725740 0xc006725758}) map[en:/adding-private-custom-catalog-data/deleting-your-private-catalog-data] [] %!s(*render.Article=<nil>) %!s(*render.Article=<nil>)}
/order-management
u0pgoh5xvt
fa-inbox
Ecommerce Checkout Process and Orders
{3vmwp7hwcx hc8frri8lp How do I Fulfill In-Store Pickup Orders? Learn how to indicate Ready for Pickup Status to customers and mark Orders Fulfilled from Orders>Order Lookup. https://help.dealerspike.com/order-management/how-do-i-fulfill-in-store-pickup-orders /order-management/how-do-i-fulfill-in-store-pickup-orders how-do-i-fulfill-in-store-pickup-orders [fulfill pickup in-store mark ready for pickup bopis in-store pickup pickup in store pick up in store in store pickup pick up at dealer location _recent] [] 2023-11-30 16:17:51.346684 +0000 UTC 2023-11-30 16:31:38.000823 +0000 UTC %!s(*render.Author=&{zx657b2yfe Patrick Mares https://www.gravatar.com/avatar/0c83d88c1d4c4317d41ee1dbd633242f?d=mm&s=150}) %!s(bool=true) %!s(bool=false) 2 months ago %!s(bool=true) %!s(bool=false) %!s(*render.ArticleStaleStatus=&{false API 0xc0067257a0 0xc0067257b8}) map[en:/order-management/how-do-i-fulfill-in-store-pickup-orders] [] %!s(*render.Article=<nil>) %!s(*render.Article=<nil>)}{jkvn5f3iyv hc8frri8lp Create Coupon Codes This article has information on creating coupon codes that apply discounts to products in your web store. https://help.dealerspike.com/order-management/create-coupon-codes /order-management/create-coupon-codes create-coupon-codes [] [] 2021-11-23 15:37:27.472513 +0000 UTC 2026-03-19 14:48:27.706922 +0000 UTC %!s(*render.Author=<nil>) %!s(bool=true) %!s(bool=false) 2 months ago %!s(bool=false) %!s(bool=false) %!s(*render.ArticleStaleStatus=&{false article is a stub API 0xc006725818 0xc006725830}) map[en:/order-management/create-coupon-codes] [] %!s(*render.Article=<nil>) %!s(*render.Article=<nil>)}{2qacao8b92 hc8frri8lp How to Charge Shipping This guide shows how to set up shipping tiers with costs so customers are charged appropriately for orders to be sent to them. https://help.dealerspike.com/order-management/how-to-charge-shipping /order-management/how-to-charge-shipping how-to-charge-shipping [] [] 2021-11-23 16:04:13.516741 +0000 UTC 2024-04-25 19:40:56.967333 +0000 UTC %!s(*render.Author=<nil>) %!s(bool=true) %!s(bool=false) 2 years ago %!s(bool=false) %!s(bool=false) %!s(*render.ArticleStaleStatus=&{false API 0xc006725890 0xc0067258a8}) map[en:/order-management/how-to-charge-shipping] [] %!s(*render.Article=<nil>) %!s(*render.Article=<nil>)}{1d4sjp5vin hc8frri8lp Configure In-Store Pickup In-Store Pickup offers functionality to make In-Store Pickup frictionless for dealers and customers. https://help.dealerspike.com/order-management/configure-in-store-pickup /order-management/configure-in-store-pickup configure-in-store-pickup [pick up in store in store pickup pickup in store bopis pickup location pick up location buy online pick up in store _recent] [] 2023-10-03 15:39:43.870629 +0000 UTC 2023-11-30 16:31:57.597283 +0000 UTC %!s(*render.Author=&{0r2gjy8pko Randall Theil https://www.gravatar.com/avatar/deda774ad13f3d7133da2cb2a6777b5e?d=mm&s=150}) %!s(bool=true) %!s(bool=false) 2 years ago %!s(bool=true) %!s(bool=false) %!s(*render.ArticleStaleStatus=&{false API 0xc0067258f0 0xc006725908}) map[en:/order-management/configure-in-store-pickup] [] %!s(*render.Article=<nil>) %!s(*render.Article=<nil>)}{9tzrchcl3c hc8frri8lp Orders Overview This guide has basic information for understanding and managing orders placed through your web store. https://help.dealerspike.com/order-management/orders-overview /order-management/orders-overview orders-overview [purchase Order Cancelled] [] 2021-11-22 22:21:12.857206 +0000 UTC 2023-10-04 18:37:03.552679 +0000 UTC %!s(*render.Author=<nil>) %!s(bool=true) %!s(bool=false) 2 years ago %!s(bool=true) %!s(bool=false) %!s(*render.ArticleStaleStatus=&{false API 0xc006725950 0xc006725968}) map[en:/order-management/orders-overview] [] %!s(*render.Article=<nil>) %!s(*render.Article=<nil>)}{ksniy6wyq5 hc8frri8lp Configure Shipping Dealers should complete prior items in the Ecommerce Setup Checklist and Troubleshooting article before configuring an Ecommerce delivery option. Ecommerce offers two delivery options: Shipping and P… https://help.dealerspike.com/order-management/configure-shipping /order-management/configure-shipping configure-shipping [] [] 2023-10-03 14:59:35.847262 +0000 UTC 2023-10-03 16:01:41.383548 +0000 UTC %!s(*render.Author=&{0r2gjy8pko Randall Theil https://www.gravatar.com/avatar/deda774ad13f3d7133da2cb2a6777b5e?d=mm&s=150}) %!s(bool=true) %!s(bool=false) 2 years ago %!s(bool=false) %!s(bool=false) %!s(*render.ArticleStaleStatus=&{false API 0xc0067259c8 0xc0067259e0}) map[en:/order-management/configure-shipping] [] %!s(*render.Article=<nil>) %!s(*render.Article=<nil>)}{n2e895v2yy hc8frri8lp EasyPost - Feature Summary and Set-up This article shows the ins and outs of EasyPost, a third party integration that can be added to your web store to help with shipping and fulfillment. https://help.dealerspike.com/order-management/easy-post-feature-summary-and-set-up /order-management/easy-post-feature-summary-and-set-up easy-post-feature-summary-and-set-up [] [] 2021-11-23 15:42:32.719712 +0000 UTC 2023-10-03 15:56:20.463201 +0000 UTC %!s(*render.Author=<nil>) %!s(bool=true) %!s(bool=false) 2 years ago %!s(bool=false) %!s(bool=false) %!s(*render.ArticleStaleStatus=&{false API 0xc006725a40 0xc006725a58}) map[en:/order-management/easy-post-feature-summary-and-set-up] [] %!s(*render.Article=<nil>) %!s(*render.Article=<nil>)}{y6du0qksl3 hc8frri8lp How to Configure Paypal for Checkout This article shows how to set up Paypal as a payment processor for your webstore. https://help.dealerspike.com/order-management/how-to-configure-paypal-for-checkout /order-management/how-to-configure-paypal-for-checkout how-to-configure-paypal-for-checkout [] [] 2021-11-22 23:10:28.881952 +0000 UTC 2023-06-27 12:50:07.291212 +0000 UTC %!s(*render.Author=<nil>) %!s(bool=true) %!s(bool=false) 2 years ago %!s(bool=false) %!s(bool=false) %!s(*render.ArticleStaleStatus=&{false API 0xc006725ab8 0xc006725ad0}) map[en:/order-management/how-to-configure-paypal-for-checkout] [] %!s(*render.Article=<nil>) %!s(*render.Article=<nil>)}{ljttu0qtgs hc8frri8lp How to configure Authorize.net for checkout This article shows how to set up authorize.net as a payment processor for your web store. https://help.dealerspike.com/order-management/how-to-configure-authorize-net-for-checkout /order-management/how-to-configure-authorize-net-for-checkout how-to-configure-authorize-net-for-checkout [] [] 2021-11-22 23:17:12.496104 +0000 UTC 2023-06-27 12:50:03.32241 +0000 UTC %!s(*render.Author=<nil>) %!s(bool=true) %!s(bool=false) 2 years ago %!s(bool=false) %!s(bool=false) %!s(*render.ArticleStaleStatus=&{false API 0xc006725b30 0xc006725b48}) map[en:/order-management/how-to-configure-authorize-net-for-checkout] [] %!s(*render.Article=<nil>) %!s(*render.Article=<nil>)}{5w856ki1q7 hc8frri8lp How to configure Stripe for checkout This article show how to set up Stripe as a payment processor for your web store. https://help.dealerspike.com/order-management/how-to-configure-stripe-for-checkout /order-management/how-to-configure-stripe-for-checkout how-to-configure-stripe-for-checkout [] [] 2021-11-22 23:15:14.282094 +0000 UTC 2023-06-27 12:49:57.477258 +0000 UTC %!s(*render.Author=<nil>) %!s(bool=true) %!s(bool=false) 2 years ago %!s(bool=false) %!s(bool=false) %!s(*render.ArticleStaleStatus=&{false API 0xc006725ba8 0xc006725bc0}) map[en:/order-management/how-to-configure-stripe-for-checkout] [] %!s(*render.Article=<nil>) %!s(*render.Article=<nil>)}{ya4mcl2oc1 hc8frri8lp Lightspeed Web Orders Module This article has information related to the third party CDK Lightspeed integration that sends order data to Lightspeed. https://help.dealerspike.com/order-management/lightspeed-web-orders-module /order-management/lightspeed-web-orders-module lightspeed-web-orders-module [] [] 2021-11-23 15:51:32.750167 +0000 UTC 2023-06-27 12:49:53.766884 +0000 UTC %!s(*render.Author=<nil>) %!s(bool=true) %!s(bool=false) 2 years ago %!s(bool=false) %!s(bool=false) %!s(*render.ArticleStaleStatus=&{false API 0xc006725c20 0xc006725c38}) map[en:/order-management/lightspeed-web-orders-module] [] %!s(*render.Article=<nil>) %!s(*render.Article=<nil>)}{auo02iug2e hc8frri8lp Order Automation This page shows how to set up automation for orders to simplify fulfillment for high-volume stores. https://help.dealerspike.com/order-management/order-automation /order-management/order-automation order-automation [] [] 2021-11-22 22:28:09.258618 +0000 UTC 2023-06-27 12:49:49.693175 +0000 UTC %!s(*render.Author=<nil>) %!s(bool=true) %!s(bool=false) 2 years ago %!s(bool=false) %!s(bool=false) %!s(*render.ArticleStaleStatus=&{false API 0xc006725c98 0xc006725cb0}) map[en:/order-management/order-automation] [] %!s(*render.Article=<nil>) %!s(*render.Article=<nil>)}{xmstial9qh hc8frri8lp How to Buy Postage This guide walks through the process of calculating and purchasing postage for an order using EasyPost and printing out the shipping label for the shipment. https://help.dealerspike.com/order-management/how-to-buy-postage /order-management/how-to-buy-postage how-to-buy-postage [] [] 2021-11-22 16:09:17.967065 +0000 UTC 2023-06-27 12:49:35.944311 +0000 UTC %!s(*render.Author=<nil>) %!s(bool=true) %!s(bool=false) 2 years ago %!s(bool=false) %!s(bool=false) %!s(*render.ArticleStaleStatus=&{false API 0xc006725d10 0xc006725d28}) map[en:/order-management/how-to-buy-postage] [] %!s(*render.Article=<nil>) %!s(*render.Article=<nil>)}
/getting-started-with-ecommerce
u0pgoh5xvt
fa-bullhorn
Getting Started with Ecommerce
{zft59j0q4p bwi3pgvryn Ecommerce Terms and Functions Reference to each part of Ecommerce functionality and links to available documentation. https://help.dealerspike.com/getting-started-with-ecommerce/ecommerc-terms-and-functions /getting-started-with-ecommerce/ecommerc-terms-and-functions ecommerc-terms-and-functions [] [] 2022-04-21 16:10:58.943029 +0000 UTC 2026-03-11 21:29:29.645952 +0000 UTC %!s(*render.Author=<nil>) %!s(bool=true) %!s(bool=false) 2 months ago %!s(bool=true) %!s(bool=false) %!s(*render.ArticleStaleStatus=&{false API 0xc006725d88 0xc006725da0}) map[en:/getting-started-with-ecommerce/ecommerc-terms-and-functions] [] %!s(*render.Article=<nil>) %!s(*render.Article=<nil>)}{6a3esz8twl bwi3pgvryn FAQs This article has frequently asked questions from customers with their responses. It's a good idea to check here if you're having an issue to see if there's already a solution or answer listed. https://help.dealerspike.com/getting-started-with-ecommerce/pss-faqs-light-speed-faqs /getting-started-with-ecommerce/pss-faqs-light-speed-faqs pss-faqs-light-speed-faqs [DS_exclusive] [] 2021-11-23 15:58:56.581364 +0000 UTC 2024-04-19 18:10:42.00703 +0000 UTC %!s(*render.Author=<nil>) %!s(bool=true) %!s(bool=false) 2 years ago %!s(bool=false) %!s(bool=false) %!s(*render.ArticleStaleStatus=&{false API 0xc006725de8 0xc006725e00}) map[en:/getting-started-with-ecommerce/pss-faqs-light-speed-faqs] [] %!s(*render.Article=<nil>) %!s(*render.Article=<nil>)}{pwh11oiqv7 bwi3pgvryn What is the New Webstore Landing Page for Ecommerce? The New Ecommerce Landing Page invites shoppers to discover categories and brands to shop as soon as they land on a dealer's webstore. https://help.dealerspike.com/getting-started-with-ecommerce/what-is-the-new-webstore-landing-page-for-ecommerce /getting-started-with-ecommerce/what-is-the-new-webstore-landing-page-for-ecommerce what-is-the-new-webstore-landing-page-for-ecommerce [] [] 2024-02-16 22:11:57.938136 +0000 UTC 2024-03-18 14:30:54.364421 +0000 UTC %!s(*render.Author=&{0r2gjy8pko Randall Theil https://www.gravatar.com/avatar/deda774ad13f3d7133da2cb2a6777b5e?d=mm&s=150}) %!s(bool=true) %!s(bool=false) 2 years ago %!s(bool=true) %!s(bool=false) %!s(*render.ArticleStaleStatus=&{false API 0xc006725e60 0xc006725e78}) map[en:/getting-started-with-ecommerce/what-is-the-new-webstore-landing-page-for-ecommerce] [] %!s(*render.Article=<nil>) %!s(*render.Article=<nil>)}{2pyg8aj5rg bwi3pgvryn Ecommerce Setup Checklist and Troubleshooting Resolve issues with your Ecommerce configuration with these tips. If you do not see your issue here please reach out to technical support. https://help.dealerspike.com/getting-started-with-ecommerce/ecommerce-setup-checklist-and-troubleshooting /getting-started-with-ecommerce/ecommerce-setup-checklist-and-troubleshooting ecommerce-setup-checklist-and-troubleshooting [Troubleshoot Ecommerce Ecommerce Broken Can't Check Out Checkout brokent missing catalogs can't find catalogs catalog missing product missing product group missing can't find product can't find catalog] [] 2023-10-03 15:42:28.973298 +0000 UTC 2023-11-16 14:49:30.523794 +0000 UTC %!s(*render.Author=&{0r2gjy8pko Randall Theil https://www.gravatar.com/avatar/deda774ad13f3d7133da2cb2a6777b5e?d=mm&s=150}) %!s(bool=true) %!s(bool=false) 2 years ago %!s(bool=true) %!s(bool=false) %!s(*render.ArticleStaleStatus=&{false API 0xc006725ec0 0xc006725ed8}) map[en:/getting-started-with-ecommerce/ecommerce-setup-checklist-and-troubleshooting] [] %!s(*render.Article=<nil>) %!s(*render.Article=<nil>)}{mr1a9ckd6a bwi3pgvryn Webstore Settings This article shows how to input the basic settings for your web store. https://help.dealerspike.com/getting-started-with-ecommerce/webstore-settings /getting-started-with-ecommerce/webstore-settings webstore-settings [] [] 2021-11-23 15:47:33.51566 +0000 UTC 2023-08-31 20:07:19.013792 +0000 UTC %!s(*render.Author=<nil>) %!s(bool=true) %!s(bool=false) 2 years ago %!s(bool=false) %!s(bool=false) %!s(*render.ArticleStaleStatus=&{false API 0xc006725f38 0xc006725f50}) map[en:/getting-started-with-ecommerce/webstore-settings] [] %!s(*render.Article=<nil>) %!s(*render.Article=<nil>)}{ns1sv9sf4b bwi3pgvryn Configure Inventory Rules This article shows how to configure the rules governing automation and aggregation of your inventory. https://help.dealerspike.com/getting-started-with-ecommerce/configure-inventory-rules /getting-started-with-ecommerce/configure-inventory-rules configure-inventory-rules [Aftermarket Inventory Rules] [] 2021-11-23 15:34:09.857094 +0000 UTC 2023-06-27 12:48:54.296232 +0000 UTC %!s(*render.Author=<nil>) %!s(bool=true) %!s(bool=false) 2 years ago %!s(bool=false) %!s(bool=false) %!s(*render.ArticleStaleStatus=&{false API 0xc006774018 0xc006774030}) map[en:/getting-started-with-ecommerce/configure-inventory-rules] [] %!s(*render.Article=<nil>) %!s(*render.Article=<nil>)}{zq5fwhpr8w bwi3pgvryn General Account Settings This page has information for setting up an account for the user who will be managing the ecommerce store. https://help.dealerspike.com/getting-started-with-ecommerce/general-account-settings /getting-started-with-ecommerce/general-account-settings general-account-settings [] [] 2021-11-23 15:38:39.721771 +0000 UTC 2023-06-27 12:48:50.689902 +0000 UTC %!s(*render.Author=<nil>) %!s(bool=true) %!s(bool=false) 2 years ago %!s(bool=false) %!s(bool=false) %!s(*render.ArticleStaleStatus=&{false API 0xc006774090 0xc0067740a8}) map[en:/getting-started-with-ecommerce/general-account-settings] [] %!s(*render.Article=<nil>) %!s(*render.Article=<nil>)}{1bjeftdth0 bwi3pgvryn Accessing Ecommerce This article will walk you through the process of signing in to the ecommerce platform for the first time. https://help.dealerspike.com/getting-started-with-ecommerce/accessing-ecommerce /getting-started-with-ecommerce/accessing-ecommerce accessing-ecommerce [DS_exclusive] [] 2022-02-18 15:49:22.919632 +0000 UTC 2023-06-27 12:48:42.540599 +0000 UTC %!s(*render.Author=<nil>) %!s(bool=true) %!s(bool=false) 2 years ago %!s(bool=false) %!s(bool=false) %!s(*render.ArticleStaleStatus=&{false API 0xc0067740f0 0xc006774108}) map[en:/getting-started-with-ecommerce/accessing-ecommerce] [] %!s(*render.Article=<nil>) %!s(*render.Article=<nil>)}{tnztjywt3u bwi3pgvryn File Center Import and Export Hub This page walks through the basics of the File Center tab where you can upload and export CSV spreadsheet files to manipulate the inventory, products, categories, and prices in your web store. https://help.dealerspike.com/getting-started-with-ecommerce/file-center /getting-started-with-ecommerce/file-center file-center [] [] 2021-11-22 22:40:11.931636 +0000 UTC 2023-06-27 12:48:38.558505 +0000 UTC %!s(*render.Author=<nil>) %!s(bool=true) %!s(bool=false) 2 years ago %!s(bool=false) %!s(bool=false) %!s(*render.ArticleStaleStatus=&{false API 0xc006774168 0xc006774180}) map[en:/getting-started-with-ecommerce/file-center] [] %!s(*render.Article=<nil>) %!s(*render.Article=<nil>)}
/other-integrations
u0pgoh5xvt
fa-link
Other Integrations
/cdk-lightspeed
5kjhjd1n67
fa-code-fork
CDK Lightspeed
{p8on2qiglx 2fn6o8je4d Integrate Lightspeed with Ecommerce The Lightspeed 3rd Party Integration allows Ecommerce and Lightspeed to sync Pricing, Inventory, and Orders information. https://help.dealerspike.com/cdk-lightspeed/lightspeed-3-rd-party-3-pa /cdk-lightspeed/lightspeed-3-rd-party-3-pa lightspeed-3-rd-party-3-pa [3pa web orders module lightspeed ecommerce integration pss integration] [] 2021-11-22 22:36:52.704535 +0000 UTC 2025-07-09 14:58:16.761065 +0000 UTC %!s(*render.Author=<nil>) %!s(bool=true) %!s(bool=false) 11 months ago %!s(bool=true) %!s(bool=false) %!s(*render.ArticleStaleStatus=&{false API 0xc0067741e0 0xc0067741f8}) map[en:/cdk-lightspeed/lightspeed-3-rd-party-3-pa] [] %!s(*render.Article=<nil>) %!s(*render.Article=<nil>)}
/lizzy-dms-ecommerce-integration
5kjhjd1n67
Lizzy DMS Ecommerce Integration
{netips7jjp zrvfk56ptq Integrate Lizzy DMS with Ecommerce The Lizzy DMS Ecommerce integration allows Ecommerce to pull in inventory and pricing information on a nightly basis and push Ecommerce orders to Lizzy. https://help.dealerspike.com/lizzy-dms-ecommerce-integration/lizzy-dms-ecommerce-integration /lizzy-dms-ecommerce-integration/lizzy-dms-ecommerce-integration lizzy-dms-ecommerce-integration [] [] 2023-08-31 21:45:08.609299 +0000 UTC 2023-10-04 18:34:54.193405 +0000 UTC %!s(*render.Author=<nil>) %!s(bool=true) %!s(bool=false) 2 years ago %!s(bool=false) %!s(bool=false) %!s(*render.ArticleStaleStatus=&{false API 0xc006774258 0xc006774270}) map[en:/lizzy-dms-ecommerce-integration/lizzy-dms-ecommerce-integration] [] %!s(*render.Article=<nil>) %!s(*render.Article=<nil>)}
/email
fa-envelope
Email Administration
{5f3fkexlbj bx6i7ud9hv Dealer Spike Email Our hosted email service, Dealer Spike Email, is a great option for sending emails using your website domain. Please reach out to your Web Manager if you would like to learn more about getting Dealer… https://help.dealerspike.com/email/dealer-spike-email /email/dealer-spike-email dealer-spike-email [] [] 2025-02-12 15:40:55.27646 +0000 UTC 2026-03-11 21:15:16.628737 +0000 UTC %!s(*render.Author=&{0r2gjy8pko Randall Theil https://www.gravatar.com/avatar/deda774ad13f3d7133da2cb2a6777b5e?d=mm&s=150}) %!s(bool=true) %!s(bool=false) 2 months ago %!s(bool=true) %!s(bool=false) %!s(*render.ArticleStaleStatus=&{false API 0xc0067742d0 0xc0067742e8}) map[en:/email/dealer-spike-email] [] %!s(*render.Article=<nil>) %!s(*render.Article=<nil>)}
/inventory
fa-cubes
Inventory
{xb4dc1juvb ojo0exsk94 Changing Inventory Prices This article explains what each of the price fields on the inventory pages do and shows how they affect the price display on the front end of the site. https://help.dealerspike.com/inventory/managing-price-fields-on-the-inventory-pages /inventory/managing-price-fields-on-the-inventory-pages managing-price-fields-on-the-inventory-pages [] [] 2021-12-17 07:43:42.642909 +0000 UTC 2026-06-09 15:57:53.461998 +0000 UTC %!s(*render.Author=<nil>) %!s(bool=true) %!s(bool=false) 31 seconds ago %!s(bool=true) %!s(bool=true) %!s(*render.ArticleStaleStatus=&{false API 0xc006774348 0xc006774360}) map[en:/inventory/managing-price-fields-on-the-inventory-pages] [] %!s(*render.Article=<nil>) %!s(*render.Article=<nil>)}{4n36cnsw54 ojo0exsk94 Managing Featured Inventory Estimated Reading Time: 10 Minutes Required Permissions: Inventory Inventory Platform: Any.. Managing Featured Inventory. Featured Inventory is a great tool to highlight units that dealers may want t… https://help.dealerspike.com/inventory/managing-featured-inventory /inventory/managing-featured-inventory managing-featured-inventory [featured1] [] 2021-09-28 21:17:05.700639 +0000 UTC 2023-06-27 12:30:05.798643 +0000 UTC %!s(*render.Author=<nil>) %!s(bool=true) %!s(bool=false) 2 years ago %!s(bool=true) %!s(bool=true) %!s(*render.ArticleStaleStatus=&{false API 0xc006774b88 0xc006774ba0}) map[en:/inventory/managing-featured-inventory] [] %!s(*render.Article=<nil>) %!s(*render.Article=<nil>)}{bxahbxv8rb ojo0exsk94 Filtering & Sorting Inventory Dealer Spike websites have many options for filtering and sorting inventory pages. Check out this list of options to see what's available! https://help.dealerspike.com/inventory/filtering-sorting-inventory /inventory/filtering-sorting-inventory filtering-sorting-inventory [_recent] [] 2026-03-19 12:02:22.741219 +0000 UTC 2026-03-19 15:25:22.31961 +0000 UTC %!s(*render.Author=&{0r2gjy8pko Randall Theil https://www.gravatar.com/avatar/deda774ad13f3d7133da2cb2a6777b5e?d=mm&s=150}) %!s(bool=true) %!s(bool=false) 2 months ago %!s(bool=true) %!s(bool=false) %!s(*render.ArticleStaleStatus=&{false API 0xc0067743a8 0xc0067743c0}) map[en:/inventory/filtering-sorting-inventory] [] %!s(*render.Article=<nil>) %!s(*render.Article=<nil>)}{9c6k2djhep ojo0exsk94 Getting the Dealer Spike Mobile App The Dealer Spike mobile app lets you to take and upload pictures and 360° spins with your phone without having to transfer them to a computer first. Use of the app to take and manage photos is free f… https://help.dealerspike.com/inventory/getting-the-dealer-spike-mobile-app /inventory/getting-the-dealer-spike-mobile-app getting-the-dealer-spike-mobile-app [] [] 2025-07-30 21:00:09.543154 +0000 UTC 2025-08-14 14:51:58.089972 +0000 UTC %!s(*render.Author=&{0r2gjy8pko Randall Theil https://www.gravatar.com/avatar/deda774ad13f3d7133da2cb2a6777b5e?d=mm&s=150}) %!s(bool=true) %!s(bool=false) 9 months ago %!s(bool=true) %!s(bool=false) %!s(*render.ArticleStaleStatus=&{false API 0xc006774420 0xc006774438}) map[en:/inventory/getting-the-dealer-spike-mobile-app] [] %!s(*render.Article=<nil>) %!s(*render.Article=<nil>)}{s4fdi1syui ojo0exsk94 Using the Dealer Spike Mobile App The free Dealer Spike mobile app lets you to take and upload pictures and 360° spins with your phone without having to transfer them to a computer first. This article will explain how the app works and how to use it. https://help.dealerspike.com/inventory/using-the-dealer-spike-mobile-app /inventory/using-the-dealer-spike-mobile-app using-the-dealer-spike-mobile-app [] [] 2025-06-26 15:48:06.632279 +0000 UTC 2025-08-14 14:46:11.200763 +0000 UTC %!s(*render.Author=&{0r2gjy8pko Randall Theil https://www.gravatar.com/avatar/deda774ad13f3d7133da2cb2a6777b5e?d=mm&s=150}) %!s(bool=true) %!s(bool=false) 9 months ago %!s(bool=true) %!s(bool=false) %!s(*render.ArticleStaleStatus=&{false API 0xc006774498 0xc0067744b0}) map[en:/inventory/using-the-dealer-spike-mobile-app] [] %!s(*render.Article=<nil>) %!s(*render.Article=<nil>)}{vg7c2rmq4x ojo0exsk94 Enhance Digital Retailing with Payment Genie Payment Genie provides customers with convenient monthly payment estimates on sales item and search pages. https://help.dealerspike.com/inventory/enhance-digital-retailing-with-payment-genie /inventory/enhance-digital-retailing-with-payment-genie enhance-digital-retailing-with-payment-genie [payment genie shop by payment monthly payment credit score digital retailing credit check] [] 2022-05-23 11:58:50.722818 +0000 UTC 2024-03-15 15:55:49.129583 +0000 UTC %!s(*render.Author=<nil>) %!s(bool=true) %!s(bool=false) 2 years ago %!s(bool=false) %!s(bool=false) %!s(*render.ArticleStaleStatus=&{false API 0xc0067744f8 0xc006774510}) map[en:/inventory/enhance-digital-retailing-with-payment-genie] [] %!s(*render.Article=<nil>) %!s(*render.Article=<nil>)}{t0ta3c1e4c ojo0exsk94 How to Add a Sale Price to Inventory Listings While sales or discounts can be exciting for customers due to the savings, adding sale prices and inventory listings can provide benefit to you as a dealer too. Sale prices not only attract customers… https://help.dealerspike.com/inventory/how-to-add-a-sale-price-to-inventory-listings /inventory/how-to-add-a-sale-price-to-inventory-listings how-to-add-a-sale-price-to-inventory-listings [] [] 2023-10-02 23:26:46.930651 +0000 UTC 2023-10-17 16:08:13.340237 +0000 UTC %!s(*render.Author=<nil>) %!s(bool=true) %!s(bool=false) 2 years ago %!s(bool=false) %!s(bool=false) %!s(*render.ArticleStaleStatus=&{false API 0xc006774570 0xc006774588}) map[en:/inventory/how-to-add-a-sale-price-to-inventory-listings] [] %!s(*render.Article=<nil>) %!s(*render.Article=<nil>)}{50x65fiq6l ojo0exsk94 Dealerpic360 User Guide DealerPic360 lets dealers share full 360-degree walk-arounds with customers. It lets customers on their PC or mobile device see an Inventory unit as if they were the dealer lot. https://help.dealerspike.com/inventory/dealerpic-360-user-guide /inventory/dealerpic-360-user-guide dealerpic-360-user-guide [walkaround spins 360] [] 2023-09-18 14:48:24.356831 +0000 UTC 2023-10-03 00:28:48.511596 +0000 UTC %!s(*render.Author=&{0r2gjy8pko Randall Theil https://www.gravatar.com/avatar/deda774ad13f3d7133da2cb2a6777b5e?d=mm&s=150}) %!s(bool=true) %!s(bool=false) 2 years ago %!s(bool=true) %!s(bool=false) %!s(*render.ArticleStaleStatus=&{false API 0xc0067745d0 0xc0067745e8}) map[en:/inventory/dealerpic-360-user-guide] [] %!s(*render.Article=<nil>) %!s(*render.Article=<nil>)}{0v2jnjgmab ojo0exsk94 Add and Remove Inventory Units Estimated Reading Time: 5 Minutes Required Permissions: Inventory Inventory Platform: Any Click Here for Quick Guide: Log into your site's admin panel. Go to the Inventory Manager page from the Inven… https://help.dealerspike.com/inventory/adding-units-to-your-inventory /inventory/adding-units-to-your-inventory adding-units-to-your-inventory [] [] 2021-11-16 16:14:44.955901 +0000 UTC 2023-09-15 20:11:16.724143 +0000 UTC %!s(*render.Author=<nil>) %!s(bool=true) %!s(bool=false) 2 years ago %!s(bool=true) %!s(bool=false) %!s(*render.ArticleStaleStatus=&{false API 0xc006774648 0xc006774660}) map[en:/inventory/adding-units-to-your-inventory] [] %!s(*render.Article=<nil>) %!s(*render.Article=<nil>)}{8ygp5lnfsk ojo0exsk94 How to Troubleshoot Duplicate Inventory Units on your Dealer Spike Website If you notice units showing up twice on your Dealer Spike website, it's likely due to one of two common causes and you can fix it quickly and easily without contacting Dealer Spike! Common Cause #1:… https://help.dealerspike.com/inventory/how-to-troubleshoot-duplicate-major-unit-inventory-units /inventory/how-to-troubleshoot-duplicate-major-unit-inventory-units how-to-troubleshoot-duplicate-major-unit-inventory-units [duplicate unit duplicate unit duplicates automaintain] [] 2022-09-07 21:08:59.525399 +0000 UTC 2023-09-13 14:53:51.455934 +0000 UTC %!s(*render.Author=&{0jkkbet7wr Marcia Lovell https://www.gravatar.com/avatar/0ac3ff8556a1fbddf80e3bc020aee4b4?d=mm&s=150}) %!s(bool=true) %!s(bool=false) 2 years ago %!s(bool=false) %!s(bool=false) %!s(*render.ArticleStaleStatus=&{false API 0xc0067746a8 0xc0067746c0}) map[en:/inventory/how-to-troubleshoot-duplicate-major-unit-inventory-units] [] %!s(*render.Article=<nil>) %!s(*render.Article=<nil>)}{3biqj2mny3 ojo0exsk94 Managing Stock Photos on Inventory Units This article will show you how to make sure your unit is connected to the database and how to switch between and add multiple stock photos to a unit. https://help.dealerspike.com/inventory/adding-stock-photos-to-inventory-units /inventory/adding-stock-photos-to-inventory-units adding-stock-photos-to-inventory-units [photo image picture] [] 2021-12-07 08:38:19.020821 +0000 UTC 2023-08-01 17:59:29.175175 +0000 UTC %!s(*render.Author=<nil>) %!s(bool=true) %!s(bool=false) 2 years ago %!s(bool=true) %!s(bool=false) %!s(*render.ArticleStaleStatus=&{false API 0xc006774708 0xc006774720}) map[en:/inventory/adding-stock-photos-to-inventory-units] [] %!s(*render.Article=<nil>) %!s(*render.Article=<nil>)}{dcnwwte84i ojo0exsk94 About The Vehicle Detail Page This article explains each part of the vehicle detail page or inventory detail page, along with what can be edited for each section. https://help.dealerspike.com/inventory/the-vehicle-detail-page /inventory/the-vehicle-detail-page the-vehicle-detail-page [pricing] [] 2022-04-21 22:03:46.616855 +0000 UTC 2023-06-27 12:33:15.338464 +0000 UTC %!s(*render.Author=<nil>) %!s(bool=true) %!s(bool=false) 2 years ago %!s(bool=true) %!s(bool=false) %!s(*render.ArticleStaleStatus=&{false API 0xc006774768 0xc006774780}) map[en:/inventory/the-vehicle-detail-page] [] %!s(*render.Article=<nil>) %!s(*render.Article=<nil>)}{qbucd7euoh ojo0exsk94 Protecting Manual Changes to your Major Inventory Units Protecting Manual Changes to your Inventory Units. The Dealer Spike platform allows you, the dealer, to make changes to your inventory units within the Inventory Manager of your website. The most com… https://help.dealerspike.com/inventory/protecting-manual-changes-to-your-major-inventory-units /inventory/protecting-manual-changes-to-your-major-inventory-units protecting-manual-changes-to-your-major-inventory-units [overwrite overwriting manual change changes inventory manager auto-maintain change nightly feed picture unit missing website issues issues] [] 2022-08-16 22:48:24.880219 +0000 UTC 2023-06-27 12:33:10.653153 +0000 UTC %!s(*render.Author=&{0jkkbet7wr Marcia Lovell https://www.gravatar.com/avatar/0ac3ff8556a1fbddf80e3bc020aee4b4?d=mm&s=150}) %!s(bool=true) %!s(bool=false) 2 years ago %!s(bool=false) %!s(bool=false) %!s(*render.ArticleStaleStatus=&{false API 0xc0067747c8 0xc0067747e0}) map[en:/inventory/protecting-manual-changes-to-your-major-inventory-units] [] %!s(*render.Article=<nil>) %!s(*render.Article=<nil>)}{hax63jyqdi ojo0exsk94 Clearance, Consignment, and Custom Inventory Additional clearance, consignment, and custom inventory list pages can be added to any Dealer Spike site for free on request. This article will show you how they work and how to assign inventory to them. https://help.dealerspike.com/inventory/clearance-consignment-and-custom-inventory /inventory/clearance-consignment-and-custom-inventory clearance-consignment-and-custom-inventory [_recent] [] 2022-12-27 14:38:38.966059 +0000 UTC 2023-06-27 12:33:06.147362 +0000 UTC %!s(*render.Author=<nil>) %!s(bool=true) %!s(bool=false) 2 years ago %!s(bool=true) %!s(bool=false) %!s(*render.ArticleStaleStatus=&{false API 0xc006774828 0xc006774840}) map[en:/inventory/clearance-consignment-and-custom-inventory] [] %!s(*render.Article=<nil>) %!s(*render.Article=<nil>)}{ke0k64cw5l ojo0exsk94 Adding Youtube Videos to Inventory Units Estimated Reading Time: 10 Minutes Required Permissions: Inventory Inventory Platform: Any Click Here for Quick Guide: Log into your site's admin panel. Go to the Inventory Manager page from the Inve… https://help.dealerspike.com/inventory/adding-youtube-videos-to-inventory-units /inventory/adding-youtube-videos-to-inventory-units adding-youtube-videos-to-inventory-units [_Leads] [] 2021-10-01 17:13:38.392299 +0000 UTC 2023-06-27 12:33:01.930105 +0000 UTC %!s(*render.Author=<nil>) %!s(bool=true) %!s(bool=false) 2 years ago %!s(bool=false) %!s(bool=false) %!s(*render.ArticleStaleStatus=&{false API 0xc006774888 0xc0067748a0}) map[en:/inventory/adding-youtube-videos-to-inventory-units] [] %!s(*render.Article=<nil>) %!s(*render.Article=<nil>)}{20bt57ytdh ojo0exsk94 What to Do If Your Inventory Isn't Updating This article will show you some basic troubleshooting steps and considerations to keep in mind if you find your inventory changes aren't showing up on the front end of your website. https://help.dealerspike.com/inventory/what-to-do-if-your-inventory-isn-t-updating /inventory/what-to-do-if-your-inventory-isn-t-updating what-to-do-if-your-inventory-isn-t-updating [inventory update missing units Feed inventory manager changes updated overwrite] [] 2021-12-02 20:21:01.533592 +0000 UTC 2023-06-27 12:32:57.814355 +0000 UTC %!s(*render.Author=<nil>) %!s(bool=true) %!s(bool=false) 2 years ago %!s(bool=false) %!s(bool=false) %!s(*render.ArticleStaleStatus=&{false API 0xc0067748e8 0xc006774900}) map[en:/inventory/what-to-do-if-your-inventory-isn-t-updating] [] %!s(*render.Article=<nil>) %!s(*render.Article=<nil>)}{zez7nmr2ep ojo0exsk94 Tips on Troubleshooting VIN Issues The Dealer Spike platform prevents the same stock number from being entered for different units onto the same website, but this validation feature does not work for VINs. If you are experiencing issu… https://help.dealerspike.com/inventory/tips-on-troubleshooting-vin-issues /inventory/tips-on-troubleshooting-vin-issues tips-on-troubleshooting-vin-issues [] [] 2023-03-31 15:41:36.825251 +0000 UTC 2023-06-27 12:32:52.794737 +0000 UTC %!s(*render.Author=&{0jkkbet7wr Marcia Lovell https://www.gravatar.com/avatar/0ac3ff8556a1fbddf80e3bc020aee4b4?d=mm&s=150}) %!s(bool=true) %!s(bool=false) 2 years ago %!s(bool=false) %!s(bool=false) %!s(*render.ArticleStaleStatus=&{false API 0xc006774960 0xc006774978}) map[en:/inventory/tips-on-troubleshooting-vin-issues] [] %!s(*render.Article=<nil>) %!s(*render.Article=<nil>)}{dpt5ahyxpq ojo0exsk94 Sold Inventory Units Still Showing on Website Having sold inventory units continue to show up on your website can be extremely frustrating.. Why does this happen?. How can I fix it?. Read on to find out... Not every DMS has the functionality to… https://help.dealerspike.com/inventory/sold-units-still-showing-on-website /inventory/sold-units-still-showing-on-website sold-units-still-showing-on-website [sold units remove sell sold units sold inventory updating inventory display displaying] [] 2023-01-24 23:18:15.339031 +0000 UTC 2023-06-27 12:31:07.370187 +0000 UTC %!s(*render.Author=&{0jkkbet7wr Marcia Lovell https://www.gravatar.com/avatar/0ac3ff8556a1fbddf80e3bc020aee4b4?d=mm&s=150}) %!s(bool=true) %!s(bool=false) 2 years ago %!s(bool=false) %!s(bool=false) %!s(*render.ArticleStaleStatus=&{false API 0xc0067749c0 0xc0067749d8}) map[en:/inventory/sold-units-still-showing-on-website] [] %!s(*render.Article=<nil>) %!s(*render.Article=<nil>)}{ou8ifgl275 ojo0exsk94 Managing Rental Inventory This page will show you how to manage rental units. https://help.dealerspike.com/inventory/managing-rental-inventory /inventory/managing-rental-inventory managing-rental-inventory [] [] 2021-12-07 04:56:39.046354 +0000 UTC 2023-06-27 12:30:24.46978 +0000 UTC %!s(*render.Author=<nil>) %!s(bool=true) %!s(bool=false) 2 years ago %!s(bool=true) %!s(bool=false) %!s(*render.ArticleStaleStatus=&{false API 0xc006774a38 0xc006774a50}) map[en:/inventory/managing-rental-inventory] [] %!s(*render.Article=<nil>) %!s(*render.Article=<nil>)}{7ci2c8t5s0 ojo0exsk94 Exporting / Printing Out Your Inventory Estimated Reading Time: 2 Minutes Required Permissions: Inventory Inventory Platform: Any Click Here for Quick Guide: Log into your site's admin panel. Go to the Inventory Manager page from the Inven… https://help.dealerspike.com/inventory/exporting-printing-out-your-inventory /inventory/exporting-printing-out-your-inventory exporting-printing-out-your-inventory [] [] 2021-11-16 16:14:16.028631 +0000 UTC 2023-06-27 12:30:15.342413 +0000 UTC %!s(*render.Author=<nil>) %!s(bool=true) %!s(bool=false) 2 years ago %!s(bool=false) %!s(bool=false) %!s(*render.ArticleStaleStatus=&{false API 0xc006774ab0 0xc006774ac8}) map[en:/inventory/exporting-printing-out-your-inventory] [] %!s(*render.Article=<nil>) %!s(*render.Article=<nil>)}{00a7hzs9ev ojo0exsk94 Adding Overlay Text to Inventory Units Estimated Reading Time: 10 Minutes Required Permissions: Inventory Inventory Platform: Any Click Here for Quick Guide: Log into your site's admin panel. Go to the Inventory Manager page from the Inve… https://help.dealerspike.com/inventory/adding-overlay-text-to-inventory-units /inventory/adding-overlay-text-to-inventory-units adding-overlay-text-to-inventory-units [] [] 2021-10-01 15:18:23.867101 +0000 UTC 2023-06-27 12:30:10.401529 +0000 UTC %!s(*render.Author=<nil>) %!s(bool=true) %!s(bool=false) 2 years ago %!s(bool=false) %!s(bool=false) %!s(*render.ArticleStaleStatus=&{false API 0xc006774b28 0xc006774b40}) map[en:/inventory/adding-overlay-text-to-inventory-units] [] %!s(*render.Article=<nil>) %!s(*render.Article=<nil>)}{qz8bh8g3rn ojo0exsk94 Managing Multi-Location and Multi-Site Inventory This article will show off the differences between multi-location and multi-site inventory and how to manage your inventory from either perspective. https://help.dealerspike.com/inventory/managing-multi-location-and-multi-site-inventory /inventory/managing-multi-location-and-multi-site-inventory managing-multi-location-and-multi-site-inventory [] [] 2021-12-07 18:19:30.806802 +0000 UTC 2023-06-27 12:30:01.463732 +0000 UTC %!s(*render.Author=<nil>) %!s(bool=true) %!s(bool=false) 2 years ago %!s(bool=true) %!s(bool=false) %!s(*render.ArticleStaleStatus=&{false API 0xc006774c00 0xc006774c18}) map[en:/inventory/managing-multi-location-and-multi-site-inventory] [] %!s(*render.Article=<nil>) %!s(*render.Article=<nil>)}{hk71jfgtzt ojo0exsk94 Managing Inventory Display Order Display Order is a feature that lets you override the default sorting behavior on your inventory pages with custom ordering. This page will show you how to control display order and explain how it works. https://help.dealerspike.com/inventory/managing-inventory-display-order /inventory/managing-inventory-display-order managing-inventory-display-order [] [] 2021-12-10 02:59:13.483196 +0000 UTC 2023-06-27 12:29:51.987295 +0000 UTC %!s(*render.Author=<nil>) %!s(bool=true) %!s(bool=false) 2 years ago %!s(bool=true) %!s(bool=false) %!s(*render.ArticleStaleStatus=&{false API 0xc006774c78 0xc006774c90}) map[en:/inventory/managing-inventory-display-order] [] %!s(*render.Article=<nil>) %!s(*render.Article=<nil>)}{qekdm7fdbm ojo0exsk94 Recently Viewed Inventory This page shows off and explains the Recently Viewed Inventory widget that can be added to inventory detail (VDP) pages. https://help.dealerspike.com/inventory/recently-viewed-inventory /inventory/recently-viewed-inventory recently-viewed-inventory [] [] 2022-06-07 13:55:27.524571 +0000 UTC 2023-06-27 12:29:46.172732 +0000 UTC %!s(*render.Author=<nil>) %!s(bool=true) %!s(bool=false) 2 years ago %!s(bool=false) %!s(bool=false) %!s(*render.ArticleStaleStatus=&{false API 0xc006774cf0 0xc006774d08}) map[en:/inventory/recently-viewed-inventory] [] %!s(*render.Article=<nil>) %!s(*render.Article=<nil>)}{ffnxt7zhl6 ojo0exsk94 Adding Units that Aren't in the Vehicle Database This article will show you how to add units that haven't been added to Dealer Spike's inventory database yet, like pre-order units where the full stats sheets haven't been released. https://help.dealerspike.com/inventory/adding-units-from-outside-the-vehicle-database /inventory/adding-units-from-outside-the-vehicle-database adding-units-from-outside-the-vehicle-database [preorder pre-order 2023 2024 2025 2026 2027] [] 2021-11-16 15:17:24.634149 +0000 UTC 2023-06-27 12:29:25.105903 +0000 UTC %!s(*render.Author=<nil>) %!s(bool=true) %!s(bool=false) 2 years ago %!s(bool=false) %!s(bool=false) %!s(*render.ArticleStaleStatus=&{false API 0xc006774d50 0xc006774d68}) map[en:/inventory/adding-units-from-outside-the-vehicle-database] [] %!s(*render.Article=<nil>) %!s(*render.Article=<nil>)}{pcgcos9a29 ojo0exsk94 How to Edit/Update Inventory Units in the Inventory Manager This article walks through the process to add new inventory units through the DS Admin Panel. https://help.dealerspike.com/inventory/how-to-edit-inventory-units-in-the-inventory-manager /inventory/how-to-edit-inventory-units-in-the-inventory-manager how-to-edit-inventory-units-in-the-inventory-manager [pricing] [] 2022-10-05 22:10:32.423632 +0000 UTC 2023-06-27 12:29:20.392221 +0000 UTC %!s(*render.Author=&{0jkkbet7wr Marcia Lovell https://www.gravatar.com/avatar/0ac3ff8556a1fbddf80e3bc020aee4b4?d=mm&s=150}) %!s(bool=true) %!s(bool=false) 2 years ago %!s(bool=false) %!s(bool=false) %!s(*render.ArticleStaleStatus=&{false API 0xc006774db0 0xc006774dc8}) map[en:/inventory/how-to-edit-inventory-units-in-the-inventory-manager] [] %!s(*render.Article=<nil>) %!s(*render.Article=<nil>)}
/leads
fa-flash
Leads
{tbcd24unj4 5vjxnhke33 Tips for Managing Leads to Increase Sales Online sales leads are one of the most valuable things you can receive from your web presence. Leads enable the quality customer contacts that drive sales, enabling customers to schedule demos, request quotes, or ask for more information. This article will run down how leads work in Spark, tips for getting more high quality leads, and how to maximize your chances of converting leads into sales. https://help.dealerspike.com/leads/tips-for-managing-leads-to-increase-sales /leads/tips-for-managing-leads-to-increase-sales tips-for-managing-leads-to-increase-sales [_recent] [] 2024-09-03 15:08:30.964169 +0000 UTC 2024-09-03 15:16:21.4475 +0000 UTC %!s(*render.Author=&{0r2gjy8pko Randall Theil https://www.gravatar.com/avatar/deda774ad13f3d7133da2cb2a6777b5e?d=mm&s=150}) %!s(bool=true) %!s(bool=false) 2 years ago %!s(bool=true) %!s(bool=true) %!s(*render.ArticleStaleStatus=&{false API 0xc006774e70 0xc006774e88}) map[en:/leads/tips-for-managing-leads-to-increase-sales] [] %!s(*render.Article=<nil>) %!s(*render.Article=<nil>)}{xwdgxs0i2d 5vjxnhke33 Using Lead Hunter Lead Hunter is a tool for dealers with Dealer Spike automated email marketing services that generates a list of potential buyers along with a summary of their activity across the website and email campaigns, even when they haven't submitted a lead form at each visit. Lead Hunter can save time and generate unique high quality sales leads by combining information that isn't normally available to identify customers by engagement level and interest in particular vehicles. This article will show you how to access and use Lead Hunter. https://help.dealerspike.com/leads/using-lead-hunter /leads/using-lead-hunter using-lead-hunter [_recent] [] 2025-07-11 14:20:36.58283 +0000 UTC 2026-02-12 14:53:47.961139 +0000 UTC %!s(*render.Author=&{0r2gjy8pko Randall Theil https://www.gravatar.com/avatar/deda774ad13f3d7133da2cb2a6777b5e?d=mm&s=150}) %!s(bool=true) %!s(bool=false) 3 months ago %!s(bool=true) %!s(bool=false) %!s(*render.ArticleStaleStatus=&{false API 0xc006774e10 0xc006774e28}) map[en:/leads/using-lead-hunter] [] %!s(*render.Article=<nil>) %!s(*render.Article=<nil>)}{kncfwwqxt1 5vjxnhke33 Leads Manager This page will walk you through how to get and use the Leads Manager page https://help.dealerspike.com/leads/leads-manager /leads/leads-manager leads-manager [] [] 2024-05-17 14:49:35.630783 +0000 UTC 2024-05-23 15:18:06.267577 +0000 UTC %!s(*render.Author=&{0r2gjy8pko Randall Theil https://www.gravatar.com/avatar/deda774ad13f3d7133da2cb2a6777b5e?d=mm&s=150}) %!s(bool=true) %!s(bool=false) 2 years ago %!s(bool=true) %!s(bool=false) %!s(*render.ArticleStaleStatus=&{false API 0xc006774ee8 0xc006774f00}) map[en:/leads/leads-manager] [] %!s(*render.Article=<nil>) %!s(*render.Article=<nil>)}{8i1iiji7r3 5vjxnhke33 Change Lead Email Settings This document will walk through the process of updating your lead email settings. https://help.dealerspike.com/leads/change-lead-email-settings /leads/change-lead-email-settings change-lead-email-settings [conversions Test-CMS-LighthouseWP] [] 2021-09-28 21:05:15.35752 +0000 UTC 2023-06-27 12:32:41.562495 +0000 UTC %!s(*render.Author=<nil>) %!s(bool=true) %!s(bool=false) 2 years ago %!s(bool=true) %!s(bool=false) %!s(*render.ArticleStaleStatus=&{false API 0xc006774f48 0xc006774f60}) map[en:/leads/change-lead-email-settings] [] %!s(*render.Article=<nil>) %!s(*render.Article=<nil>)}{3dvr8e72jf 5vjxnhke33 Approving and Rejecting User Surveys and Testimonials Estimated Reading Time: 5 Minutes Required Permissions: Survey Click Here for Quick Guide: Log into your site's admin panel. Click the Content tab at the top of the page, then click the Manage Survey… https://help.dealerspike.com/leads/approving-and-rejecting-user-surveys-and-testimonials /leads/approving-and-rejecting-user-surveys-and-testimonials approving-and-rejecting-user-surveys-and-testimonials [] [] 2021-12-06 02:00:17.599316 +0000 UTC 2023-06-27 12:32:37.351502 +0000 UTC %!s(*render.Author=<nil>) %!s(bool=true) %!s(bool=false) 2 years ago %!s(bool=false) %!s(bool=false) %!s(*render.ArticleStaleStatus=&{false API 0xc006774fc0 0xc006774fd8}) map[en:/leads/approving-and-rejecting-user-surveys-and-testimonials] [] %!s(*render.Article=<nil>) %!s(*render.Article=<nil>)}{c4zmefs4v7 5vjxnhke33 Printing Finance App Leads This article shows how to find and print out finance application leads in the admin panel. https://help.dealerspike.com/leads/printing-finance-app-leads /leads/printing-finance-app-leads printing-finance-app-leads [credit] [] 2021-11-16 15:43:27.523762 +0000 UTC 2023-06-27 12:32:32.979085 +0000 UTC %!s(*render.Author=<nil>) %!s(bool=true) %!s(bool=false) 2 years ago %!s(bool=false) %!s(bool=false) %!s(*render.ArticleStaleStatus=&{false API 0xc006775020 0xc006775038}) map[en:/leads/printing-finance-app-leads] [] %!s(*render.Article=<nil>) %!s(*render.Article=<nil>)}{78qavs3tpv 5vjxnhke33 Exporting Leads This article will show you where to go to export leads from your website and offer some configuration tips. https://help.dealerspike.com/leads/exporting-leads /leads/exporting-leads exporting-leads [] [] 2021-10-01 15:14:01.500733 +0000 UTC 2023-06-27 12:32:28.531937 +0000 UTC %!s(*render.Author=<nil>) %!s(bool=true) %!s(bool=false) 2 years ago %!s(bool=false) %!s(bool=false) %!s(*render.ArticleStaleStatus=&{false API 0xc006775098 0xc0067750b0}) map[en:/leads/exporting-leads] [] %!s(*render.Article=<nil>) %!s(*render.Article=<nil>)}
/marketing
fa-bullhorn
Marketing
{7cnhcqv5en 50fxjz9ao4 Understanding Your Automated Email Marketing (AEM) Campaigns & Metrics Automated email marketing is a software tool for your dealership to effortlessly streamline engagement with your audience and promote products or services. In this article, we will explore the various types of AEM emails and how to understand their performance. https://help.dealerspike.com/marketing/automated-email-marketing-aem /marketing/automated-email-marketing-aem automated-email-marketing-aem [email marketing automated email marketing aem market to site visitors capture site visitors reach site visitors re-get re-target email services] [] 2023-06-30 16:24:30.445085 +0000 UTC 2026-05-21 16:00:06.4098 +0000 UTC %!s(*render.Author=<nil>) %!s(bool=true) %!s(bool=false) 2 weeks ago %!s(bool=true) %!s(bool=false) %!s(*render.ArticleStaleStatus=&{false API 0xc0067750f8 0xc006775110}) map[en:/marketing/automated-email-marketing-aem] [] %!s(*render.Article=<nil>) %!s(*render.Article=<nil>)}{anilwfrygm 50fxjz9ao4 Add Dealer Spike as a Google Business Profile Manager This article will explain how to add Dealer Spike as a Google business profile manager https://help.dealerspike.com/marketing/add-dealer-spike-as-a-google-business-profile-manager /marketing/add-dealer-spike-as-a-google-business-profile-manager add-dealer-spike-as-a-google-business-profile-manager [_recent] [] 2026-03-05 21:55:07.927758 +0000 UTC 2026-03-12 15:57:54.987899 +0000 UTC %!s(*render.Author=&{0r2gjy8pko Randall Theil https://www.gravatar.com/avatar/deda774ad13f3d7133da2cb2a6777b5e?d=mm&s=150}) %!s(bool=true) %!s(bool=false) 2 months ago %!s(bool=false) %!s(bool=false) %!s(*render.ArticleStaleStatus=&{false API 0xc006775158 0xc006775170}) map[en:/marketing/add-dealer-spike-as-a-google-business-profile-manager] [] %!s(*render.Article=<nil>) %!s(*render.Article=<nil>)}
/newsletter
fa-send-o
Newsletter
{aj1bj6u6f1 092l3ha9r6 Log into the Dealerspike Newsletter tool This article explains how to sign into the Dealerspike Newsletter tool. https://help.dealerspike.com/newsletter/log-into-the-dealerspike-newsletter-tool /newsletter/log-into-the-dealerspike-newsletter-tool log-into-the-dealerspike-newsletter-tool [] [] 2021-12-13 21:36:34.442094 +0000 UTC 2023-06-27 12:34:30.909357 +0000 UTC %!s(*render.Author=<nil>) %!s(bool=true) %!s(bool=false) 2 years ago %!s(bool=false) %!s(bool=false) %!s(*render.ArticleStaleStatus=&{false API 0xc0067751d0 0xc0067751e8}) map[en:/newsletter/log-into-the-dealerspike-newsletter-tool] [] %!s(*render.Article=<nil>) %!s(*render.Article=<nil>)}{34kzk3eycg 092l3ha9r6 Resetting Your Newsletter Password Estimated Reading Time: 2 Minutes Required Permissions: Newsletter Click Here for Quick Guide: Go to https://app.e2ma.net/app2/login/. Enter the email address associated with your newsletter account… https://help.dealerspike.com/newsletter/resetting-your-newsletter-password /newsletter/resetting-your-newsletter-password resetting-your-newsletter-password [] [] 2021-11-16 15:26:01.785047 +0000 UTC 2023-06-27 12:34:26.070259 +0000 UTC %!s(*render.Author=<nil>) %!s(bool=true) %!s(bool=false) 2 years ago %!s(bool=false) %!s(bool=false) %!s(*render.ArticleStaleStatus=&{false API 0xc006775248 0xc006775260}) map[en:/newsletter/resetting-your-newsletter-password] [] %!s(*render.Article=<nil>) %!s(*render.Article=<nil>)}{xv2rbz0kuc 092l3ha9r6 Creating a Newsletter Newsletters broadcast your business news directly to the people who care: customers who sign up for your email list. This article explains how to create a Newsletter using the Dealerspike Newsletter tool. https://help.dealerspike.com/newsletter/creating-a-newsletter /newsletter/creating-a-newsletter creating-a-newsletter [] [] 2021-12-10 22:55:51.407759 +0000 UTC 2023-06-27 12:34:20.860203 +0000 UTC %!s(*render.Author=<nil>) %!s(bool=true) %!s(bool=false) 2 years ago %!s(bool=false) %!s(bool=false) %!s(*render.ArticleStaleStatus=&{false API 0xc0067752c0 0xc0067752d8}) map[en:/newsletter/creating-a-newsletter] [] %!s(*render.Article=<nil>) %!s(*render.Article=<nil>)}{hm2k216olk 092l3ha9r6 Importing an Audience List into the Newsletter Tool Estimated Reading Time: 10 Minutes Required Permissions: Newsletter Click Here for Quick Guide: Log into the newsletter tool. Click the Audience tab at the top of the page. Click the Imports tab on t… https://help.dealerspike.com/newsletter/importing-an-audience-list-into-the-newsletter-tool /newsletter/importing-an-audience-list-into-the-newsletter-tool importing-an-audience-list-into-the-newsletter-tool [] [] 2021-12-02 20:26:22.431644 +0000 UTC 2023-06-27 12:34:11.303163 +0000 UTC %!s(*render.Author=<nil>) %!s(bool=true) %!s(bool=false) 2 years ago %!s(bool=false) %!s(bool=false) %!s(*render.ArticleStaleStatus=&{false API 0xc006775338 0xc006775350}) map[en:/newsletter/importing-an-audience-list-into-the-newsletter-tool] [] %!s(*render.Article=<nil>) %!s(*render.Article=<nil>)}{bb99cxk348 092l3ha9r6 Exporting Newsletter Contacts to a CSV File This article will show you how to export your newsletter contacts individually or as a group to a CSV file. https://help.dealerspike.com/newsletter/exporting-newsletter-contacts-to-a-csv-file /newsletter/exporting-newsletter-contacts-to-a-csv-file exporting-newsletter-contacts-to-a-csv-file [] [] 2022-01-04 11:10:03.039479 +0000 UTC 2023-06-27 12:34:04.832133 +0000 UTC %!s(*render.Author=<nil>) %!s(bool=true) %!s(bool=false) 2 years ago %!s(bool=false) %!s(bool=false) %!s(*render.ArticleStaleStatus=&{false API 0xc0067753b0 0xc0067753c8}) map[en:/newsletter/exporting-newsletter-contacts-to-a-csv-file] [] %!s(*render.Article=<nil>) %!s(*render.Article=<nil>)}
/outbound-feeds
fa-arrow-circle-o-down
Outbound Feeds and Syndications
{pvpzl9an6c ibwqme7y2w Signing into Auction123 This article will show you how to sign into the Auction123 control panel from your site's admin panel. https://help.dealerspike.com/outbound-feeds/signing-into-auction-123 /outbound-feeds/signing-into-auction-123 signing-into-auction-123 [] [] 2022-08-15 10:40:27.860297 +0000 UTC 2022-09-27 15:57:46.95594 +0000 UTC %!s(*render.Author=<nil>) %!s(bool=true) %!s(bool=false) 2 months ago %!s(bool=false) %!s(bool=false) %!s(*render.ArticleStaleStatus=&{false API 0xc006775428 0xc006775440}) map[en:/outbound-feeds/signing-into-auction-123] [] %!s(*render.Article=<nil>) %!s(*render.Article=<nil>)}{nolgyhw7xl ibwqme7y2w Intro to the Auction123 Dashboard This article will show you how the basics of how to navigate the Auction123 Dashboard. https://help.dealerspike.com/outbound-feeds/intro-to-the-auction-123-dashboard /outbound-feeds/intro-to-the-auction-123-dashboard intro-to-the-auction-123-dashboard [] [] 2022-08-15 10:46:03.406231 +0000 UTC 2022-08-16 20:05:23.444296 +0000 UTC %!s(*render.Author=<nil>) %!s(bool=true) %!s(bool=false) 2 months ago %!s(bool=false) %!s(bool=false) %!s(*render.ArticleStaleStatus=&{false API 0xc0067754a0 0xc0067754b8}) map[en:/outbound-feeds/intro-to-the-auction-123-dashboard] [] %!s(*render.Article=<nil>) %!s(*render.Article=<nil>)}{8k5zm6ljg5 ibwqme7y2w Google Business Profile Integration With our Google Business Profile integration, you can advertise vehicles with valid VINs directly in Google search results next to your Google Business Profile, showing your vehicles at the first point of customer contact on the largest search engine. This article will help you troubleshoot and resolve errors that could interfere with the integration. https://help.dealerspike.com/outbound-feeds/auction-123-google-business-profile-integration /outbound-feeds/auction-123-google-business-profile-integration auction-123-google-business-profile-integration [] [] 2024-04-01 13:16:47.617744 +0000 UTC 2024-04-19 18:13:06.599959 +0000 UTC %!s(*render.Author=&{0r2gjy8pko Randall Theil https://www.gravatar.com/avatar/deda774ad13f3d7133da2cb2a6777b5e?d=mm&s=150}) %!s(bool=true) %!s(bool=false) 2 years ago %!s(bool=true) %!s(bool=false) %!s(*render.ArticleStaleStatus=&{false API 0xc006775518 0xc006775530}) map[en:/outbound-feeds/auction-123-google-business-profile-integration] [] %!s(*render.Article=<nil>) %!s(*render.Article=<nil>)}{d4eh5i04se ibwqme7y2w Facebook Marketplace Posting Application The Facebook Marketplace Posting Application lets you share your website inventory to Facebook Marketplace from a Windows PC. This article explains how to get and use it. https://help.dealerspike.com/outbound-feeds/auction-123-facebook-marketplace-posting-application /outbound-feeds/auction-123-facebook-marketplace-posting-application auction-123-facebook-marketplace-posting-application [auction123] [] 2024-04-01 20:55:27.933325 +0000 UTC 2024-04-10 20:55:34.562641 +0000 UTC %!s(*render.Author=&{0r2gjy8pko Randall Theil https://www.gravatar.com/avatar/deda774ad13f3d7133da2cb2a6777b5e?d=mm&s=150}) %!s(bool=true) %!s(bool=false) 2 years ago %!s(bool=true) %!s(bool=false) %!s(*render.ArticleStaleStatus=&{false API 0xc006775578 0xc006775590}) map[en:/outbound-feeds/auction-123-facebook-marketplace-posting-application] [] %!s(*render.Article=<nil>) %!s(*render.Article=<nil>)}{2ueot504g6 ibwqme7y2w Request Outgoing Inventory Feeds (Exports) for Third Party Listing Sites This article explains how to start a request to set up a new outgoing feed from your website. https://help.dealerspike.com/outbound-feeds/how-to-request-a-new-major-unit-inventory-feed-to-a-third-party-listing-site-aka-outgoing-feed /outbound-feeds/how-to-request-a-new-major-unit-inventory-feed-to-a-third-party-listing-site-aka-outgoing-feed how-to-request-a-new-major-unit-inventory-feed-to-a-third-party-listing-site-aka-outgoing-feed [outgoing export eLeads V12 Homenet eBay Boats for Sale Ritchie Br Trade Pending Cycle Trader CUDL Hammer Zing Gurus TrailerCentral Gubagoo daily feed daily ICC trader JD Power Boatzon inventory export Auction 123 ICC daily feed outgoing feed DealerCenter Vast Daily feed request Serti CarNow autoTrader autotrader inventory feed Powersports.com Image Pro] [] 2022-05-12 15:13:46.653186 +0000 UTC 2023-06-27 12:24:55.917043 +0000 UTC %!s(*render.Author=&{0jkkbet7wr Marcia Lovell https://www.gravatar.com/avatar/0ac3ff8556a1fbddf80e3bc020aee4b4?d=mm&s=150}) %!s(bool=true) %!s(bool=false) 2 years ago %!s(bool=false) %!s(bool=false) %!s(*render.ArticleStaleStatus=&{false API 0xc0067755d8 0xc0067755f0}) map[en:/outbound-feeds/how-to-request-a-new-major-unit-inventory-feed-to-a-third-party-listing-site-aka-outgoing-feed] [] %!s(*render.Article=<nil>) %!s(*render.Article=<nil>)}