Table of Contents
Using Lead Hunter

Lead Hunter is a tool for dealers with Dealer Spike automated email marketing services that generates a list of potential buyers along with a summary of their activity across the website and email campaigns, even when they haven't submitted a lead form at each visit. Lead Hunter can save time and generate unique high quality sales leads by combining information that isn't normally available to identify customers by engagement level and interest in particular vehicles. This article will show you how to access and use Lead Hunter.
Accessing Lead Hunter
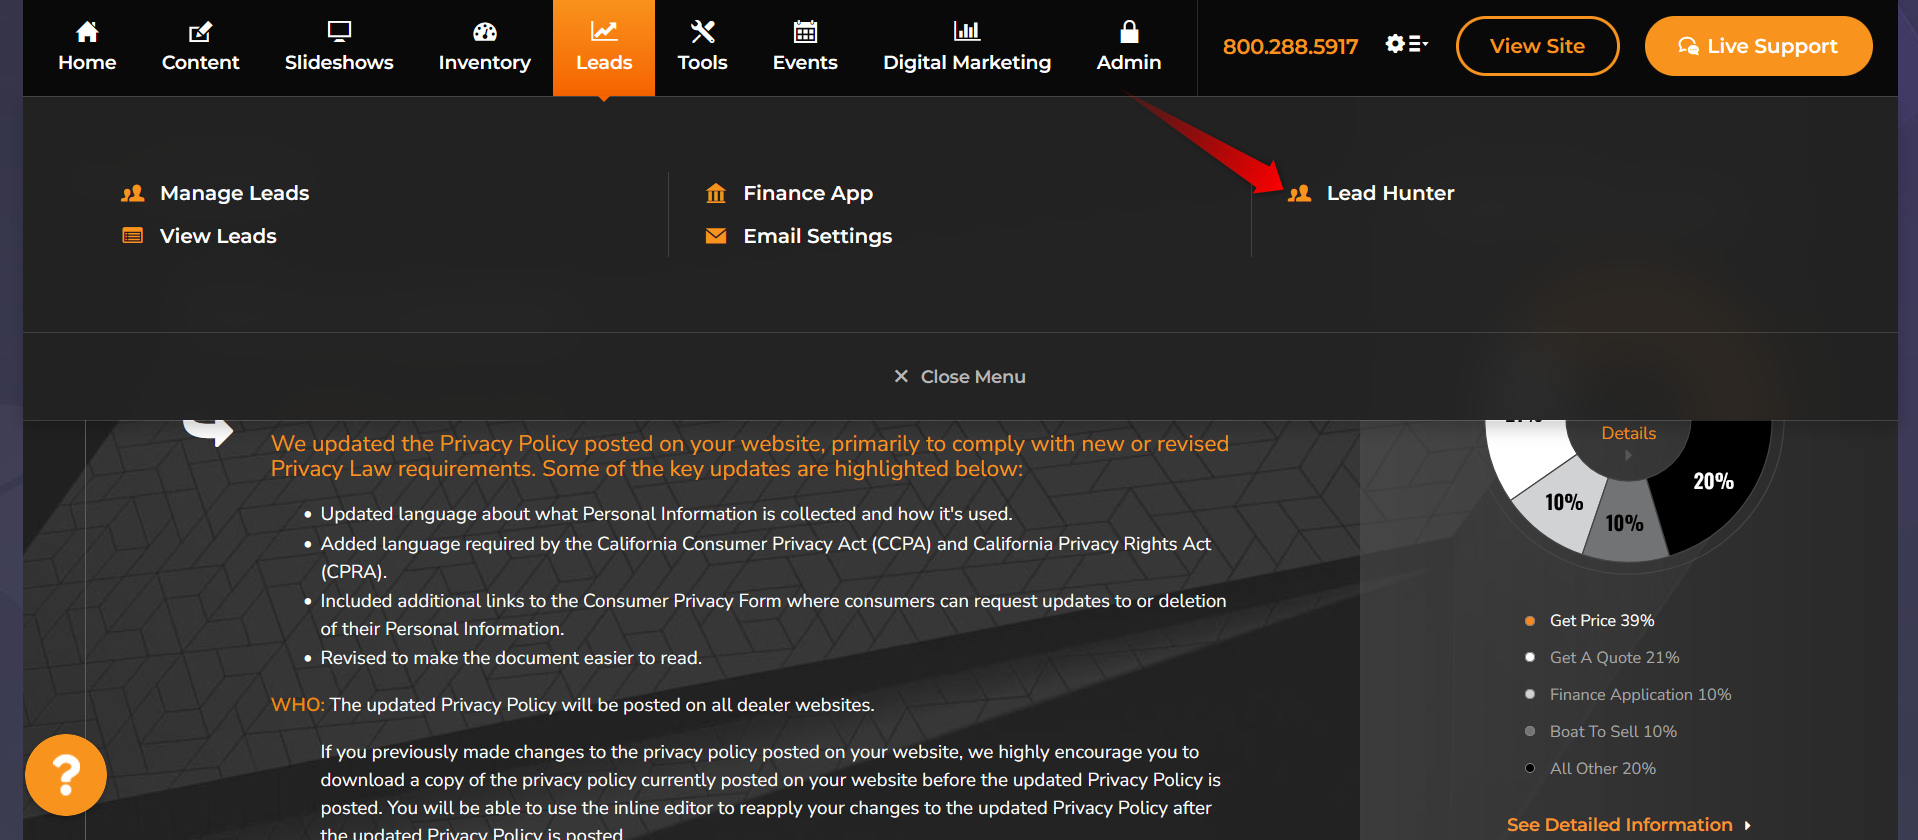
The Lead Hunter dashboard can be found by going to Leads > Lead Hunter from the admin panel menu. Lead Hunter is only available to customers with automated email marketing packages. If you're interested in Lead Hunter, or for assistance accessing it, please contact your account manager.
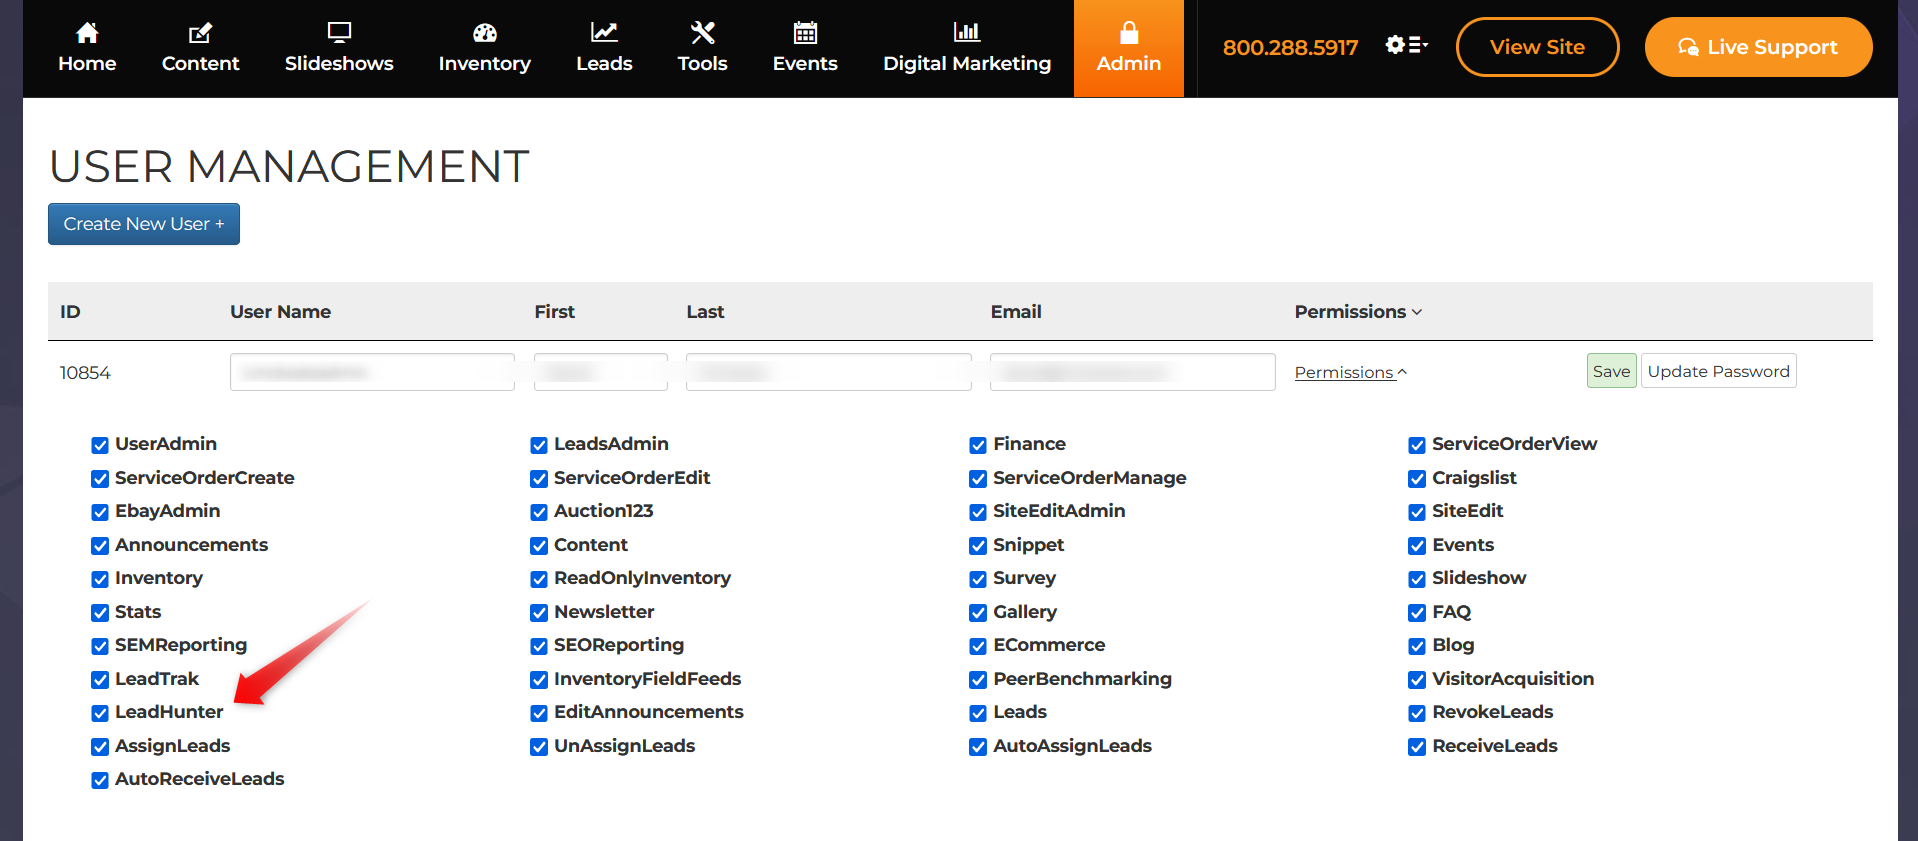
Access to Lead Hunter can be controlled on a per-user basis by enabling or disabling the new LeadHunter permission on the Manage Users page:
Browsing Customers from the Dashboard
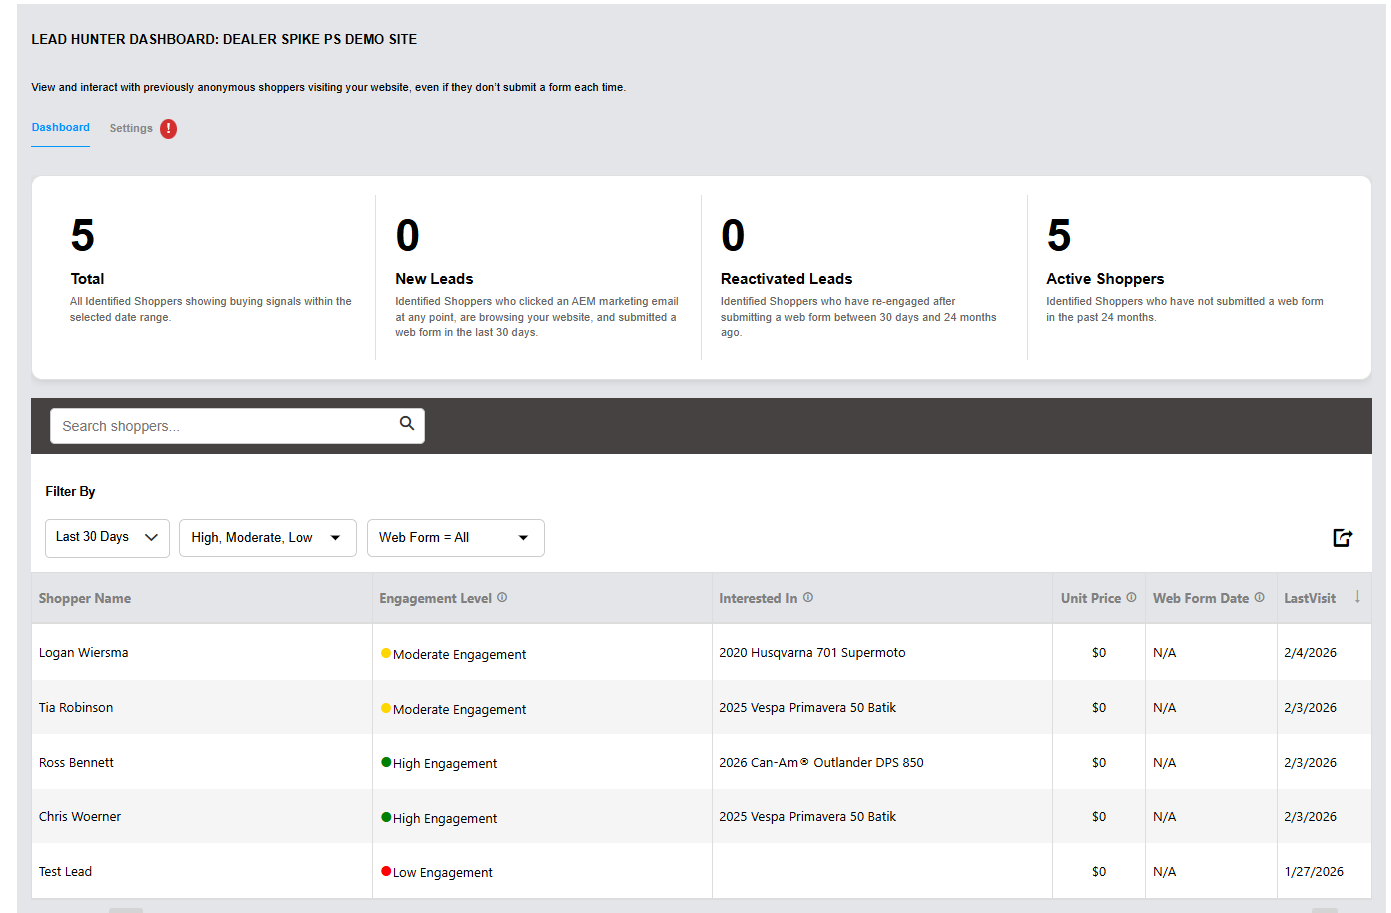
After clicking the Lead Hunter link, you'll arrive at the dashboard, the main page for Lead Hunter. Here you'll see a list of customers from your AEM customer list who have recently interacted with your website or email campaigns. You can see their name, the vehicle or type of vehicle they've shown interest in, their most recent visit to the website, along with an automatically generated engagement level that estimates how motivated they are to make a purchase.
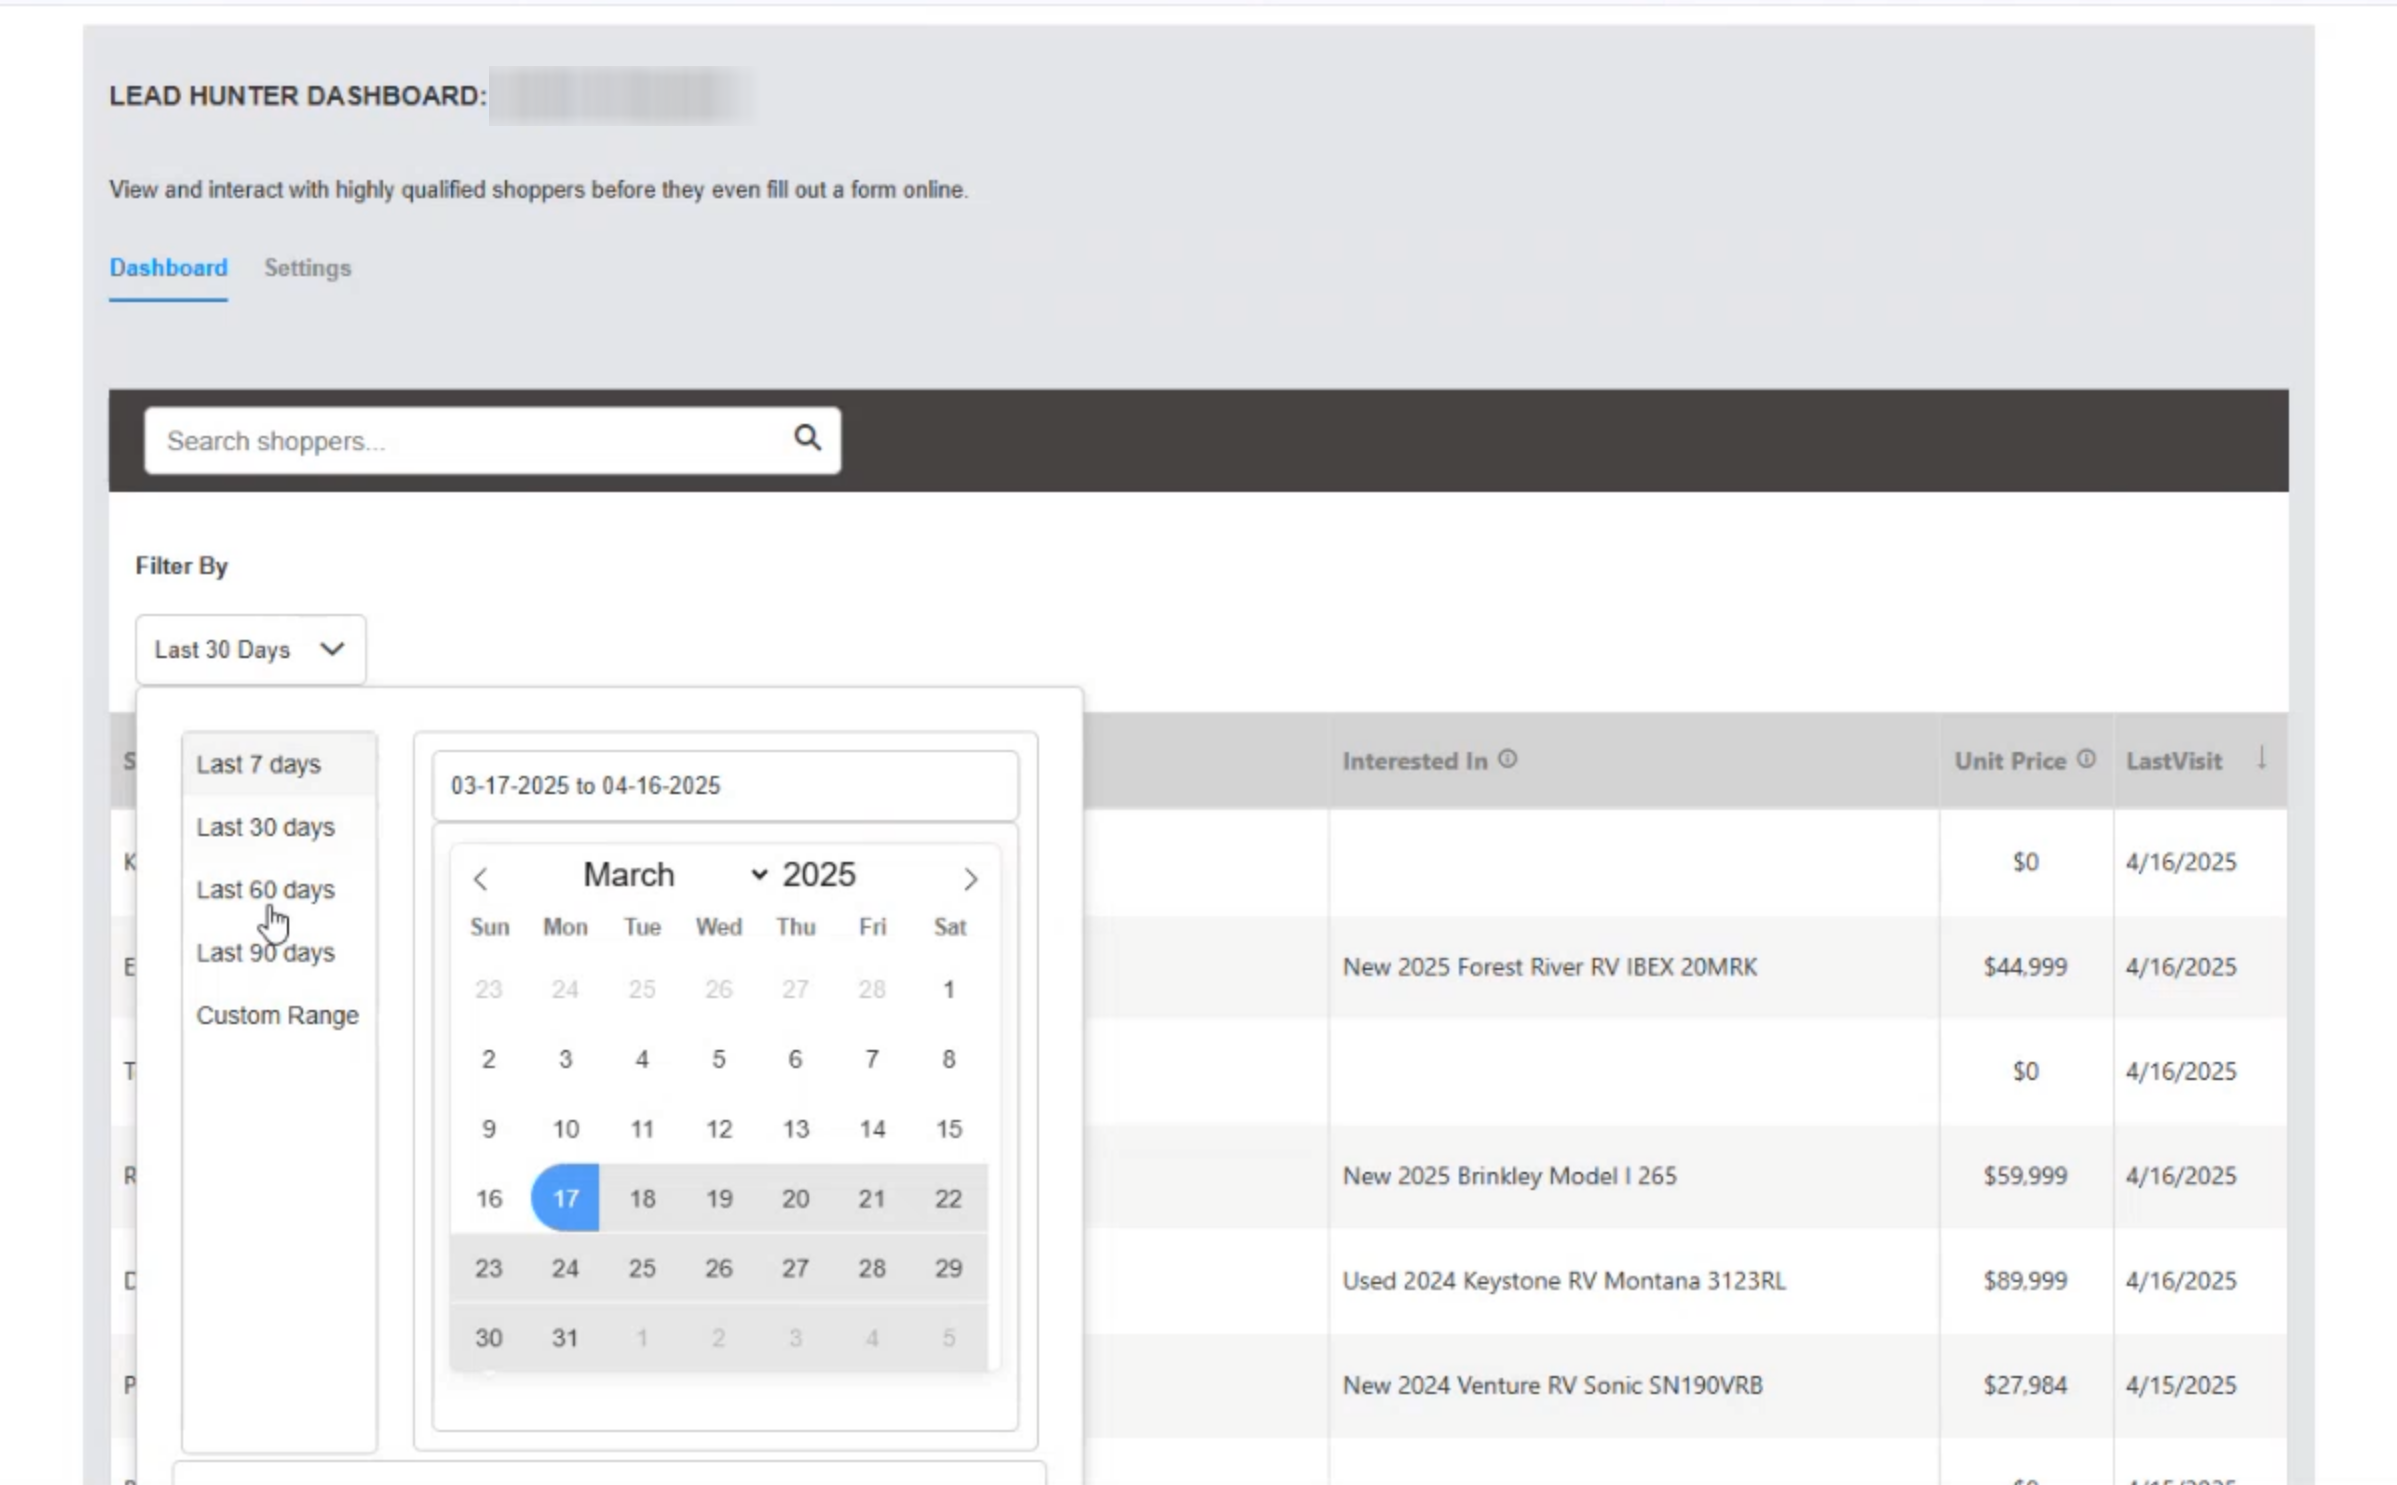
You can click on columns to sort the list by any of the displayed information. You can also click the Filter By menu at the top of the page to find customers whose last visit matches a particular date range. The Search bar allows you to find customers by name. To see details for a particular customer, click on their name to open the Shopper Drawer.
Seeing Customer Details in the Shopper Drawer
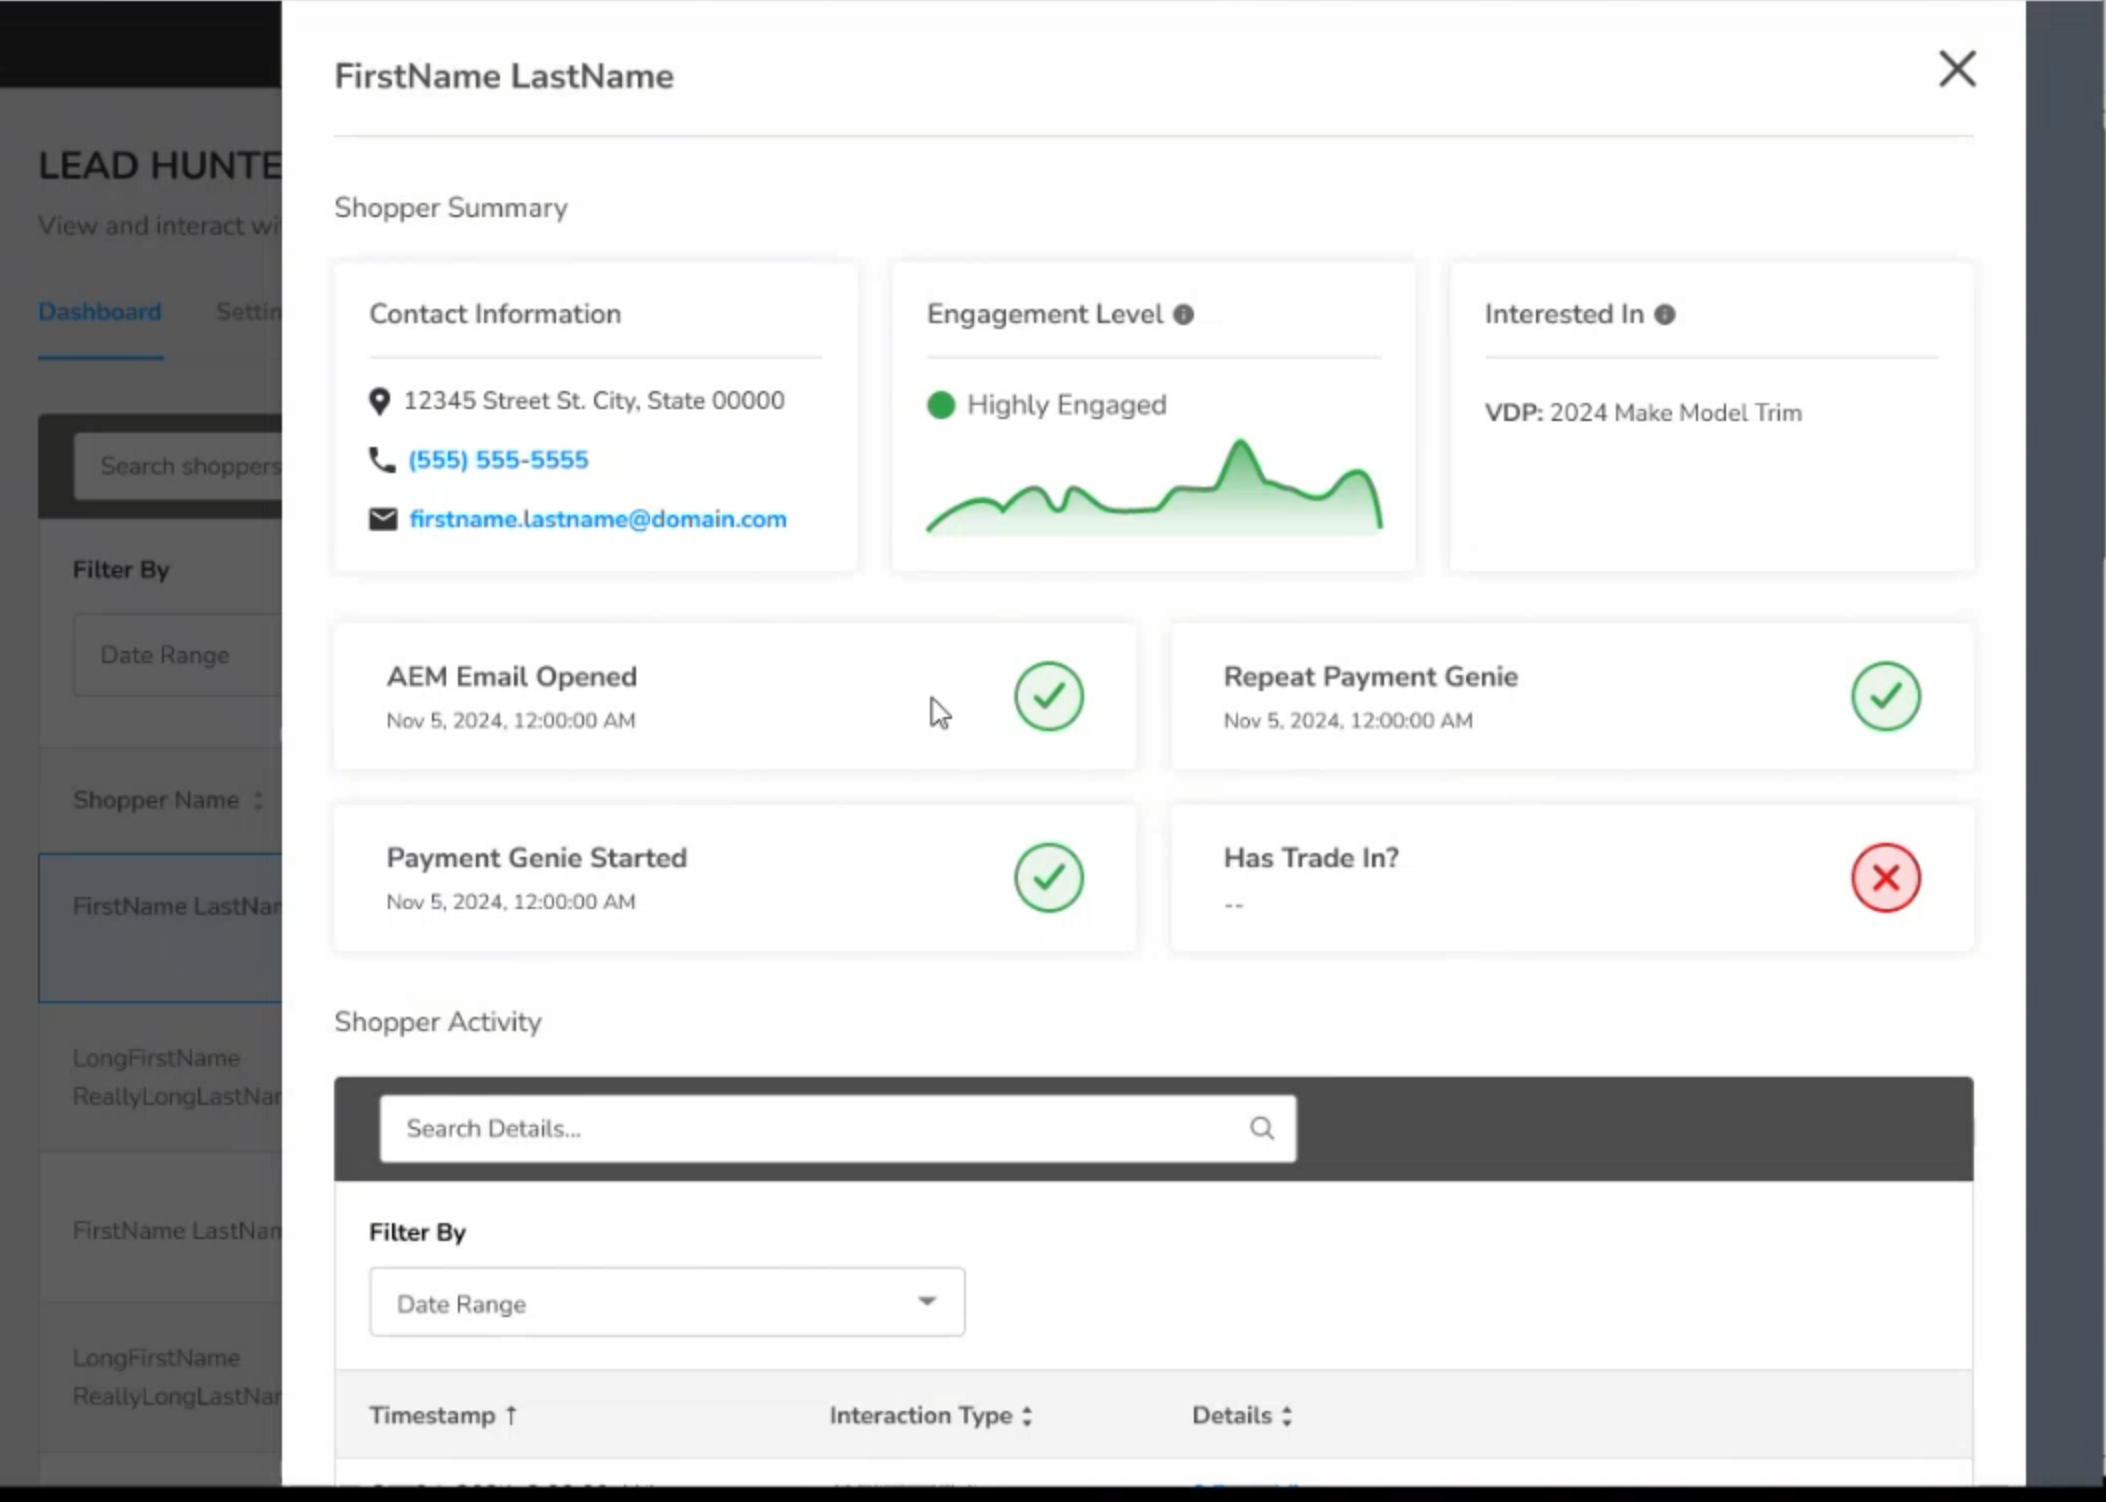
This slideout panel shows details about the customer you've picked, such as their contact information, a graph of their engagement over time, and previous interactions with email campaigns, Payment Genie, and the Value Your Trade form.
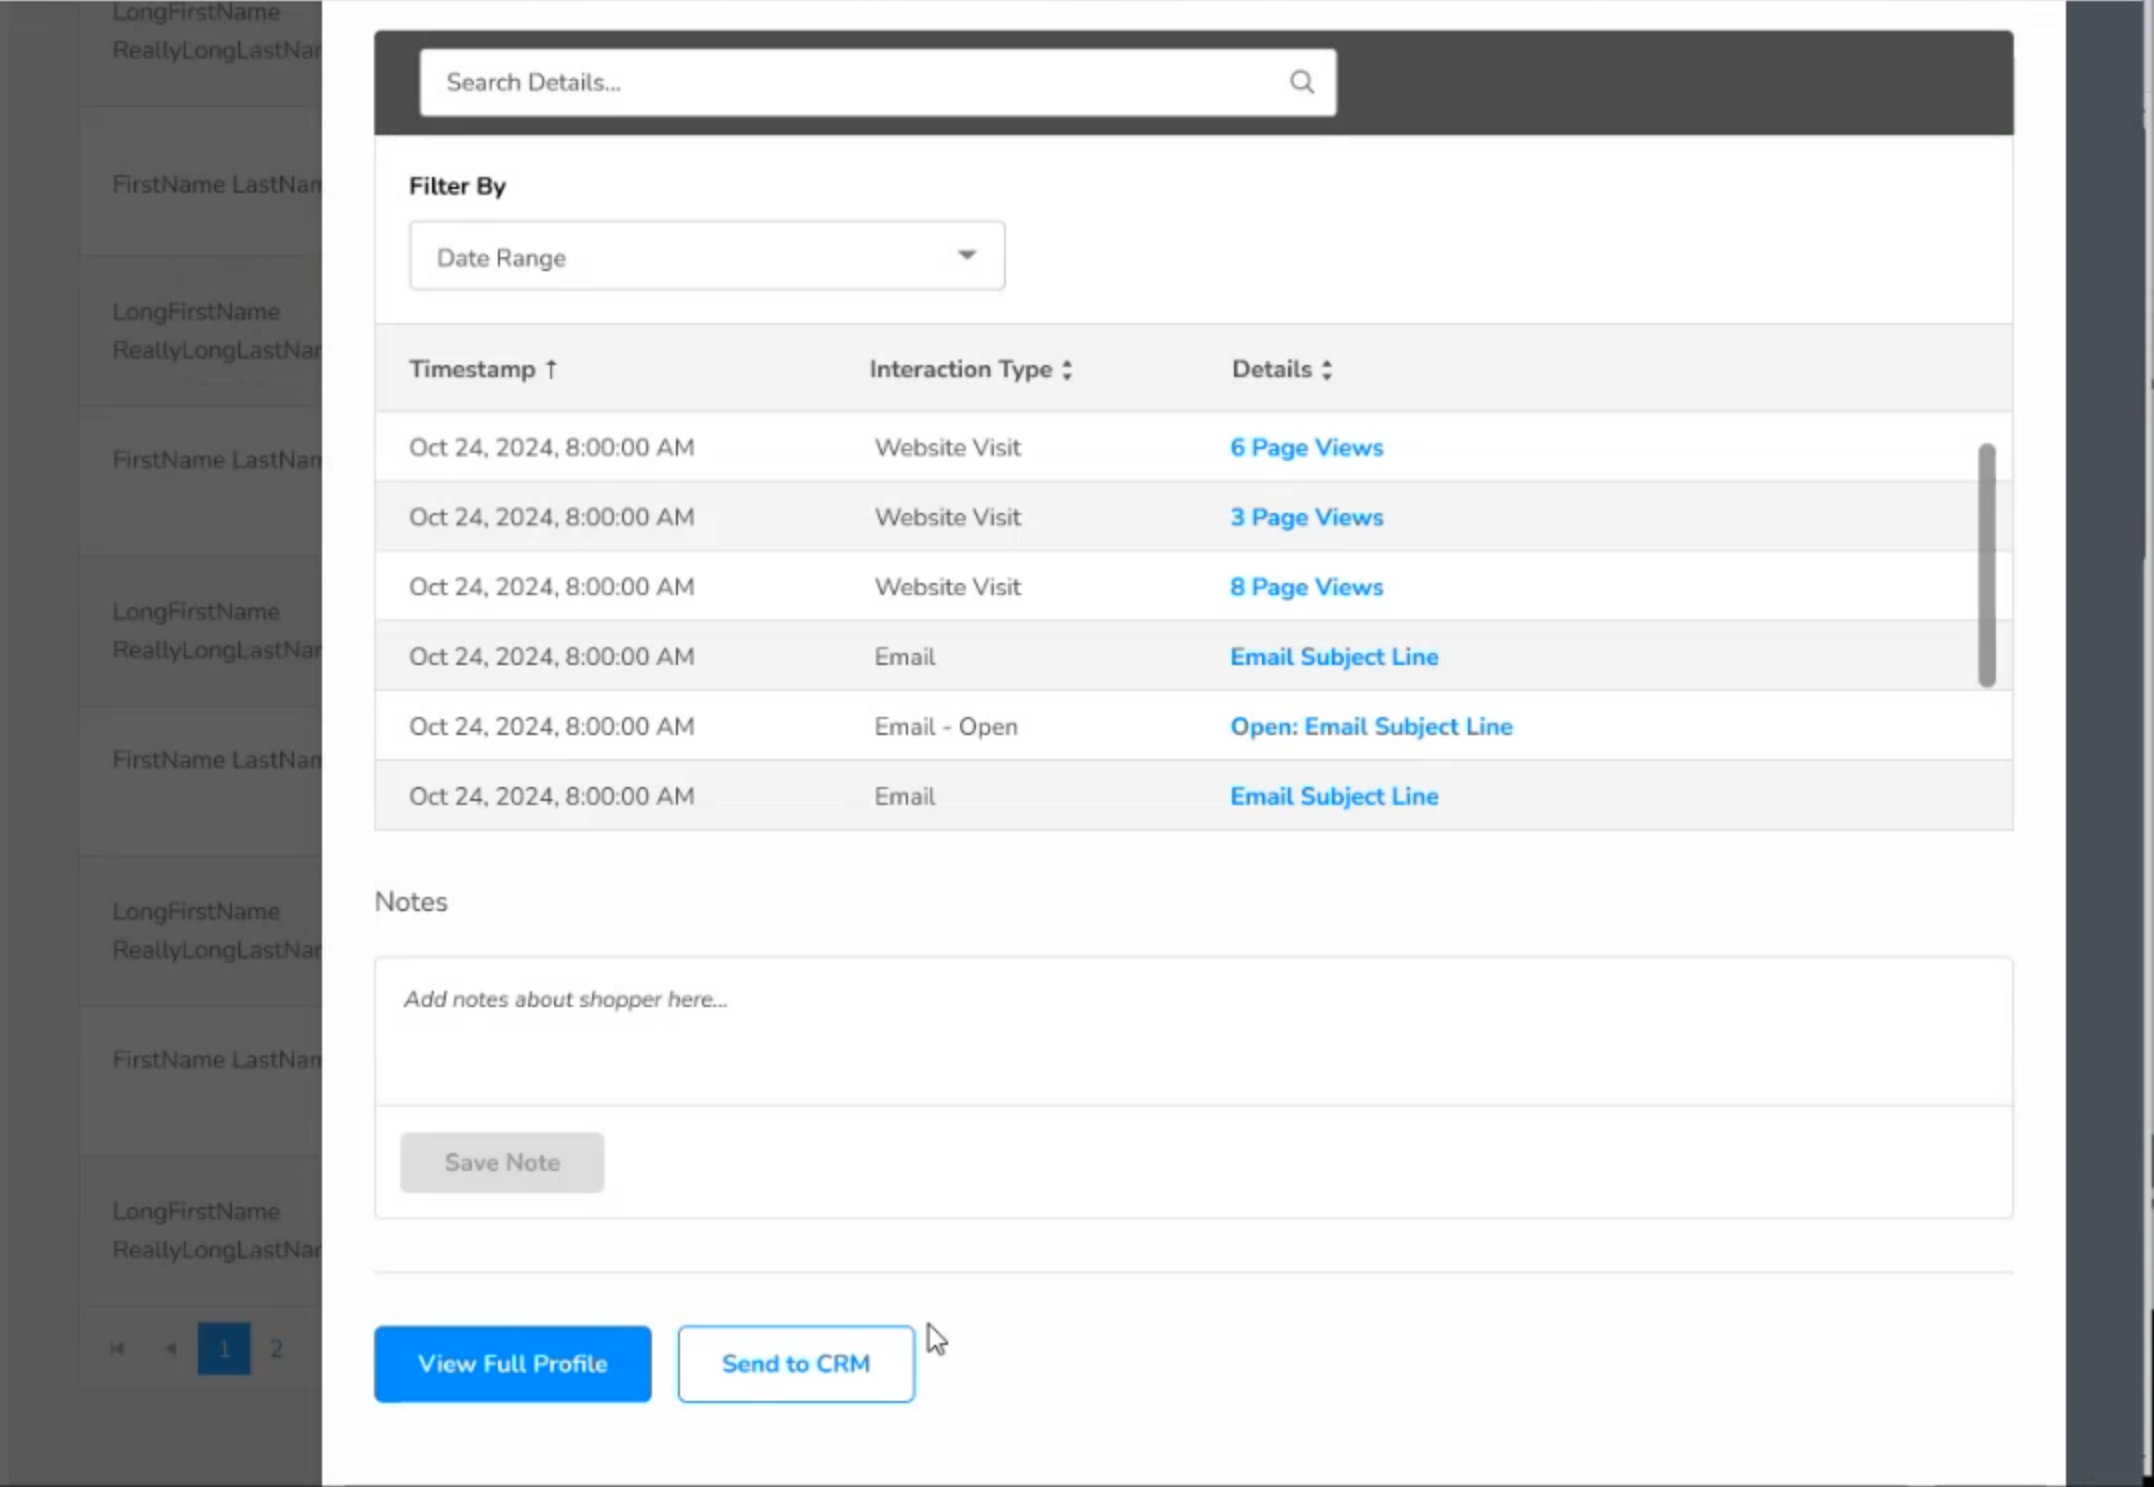
If you scroll down, you'll see a list of all of the customer's activity that has been recorded by Lead Hunter. You can click on the blue links in the Details column to see a pop-up with specific details about each visit or interaction. You can add internal-only notes about the customer in the Notes field. If your Lead Hunter is set to manually send leads to a CRM, you'll see a button at the bottom of the Shopper Drawer to send the customer's info to your CRM. The View Full Profile button will take you to a full page summary of the customer's activity.
Configuring Email Reports and CRMs in the Settings Tab
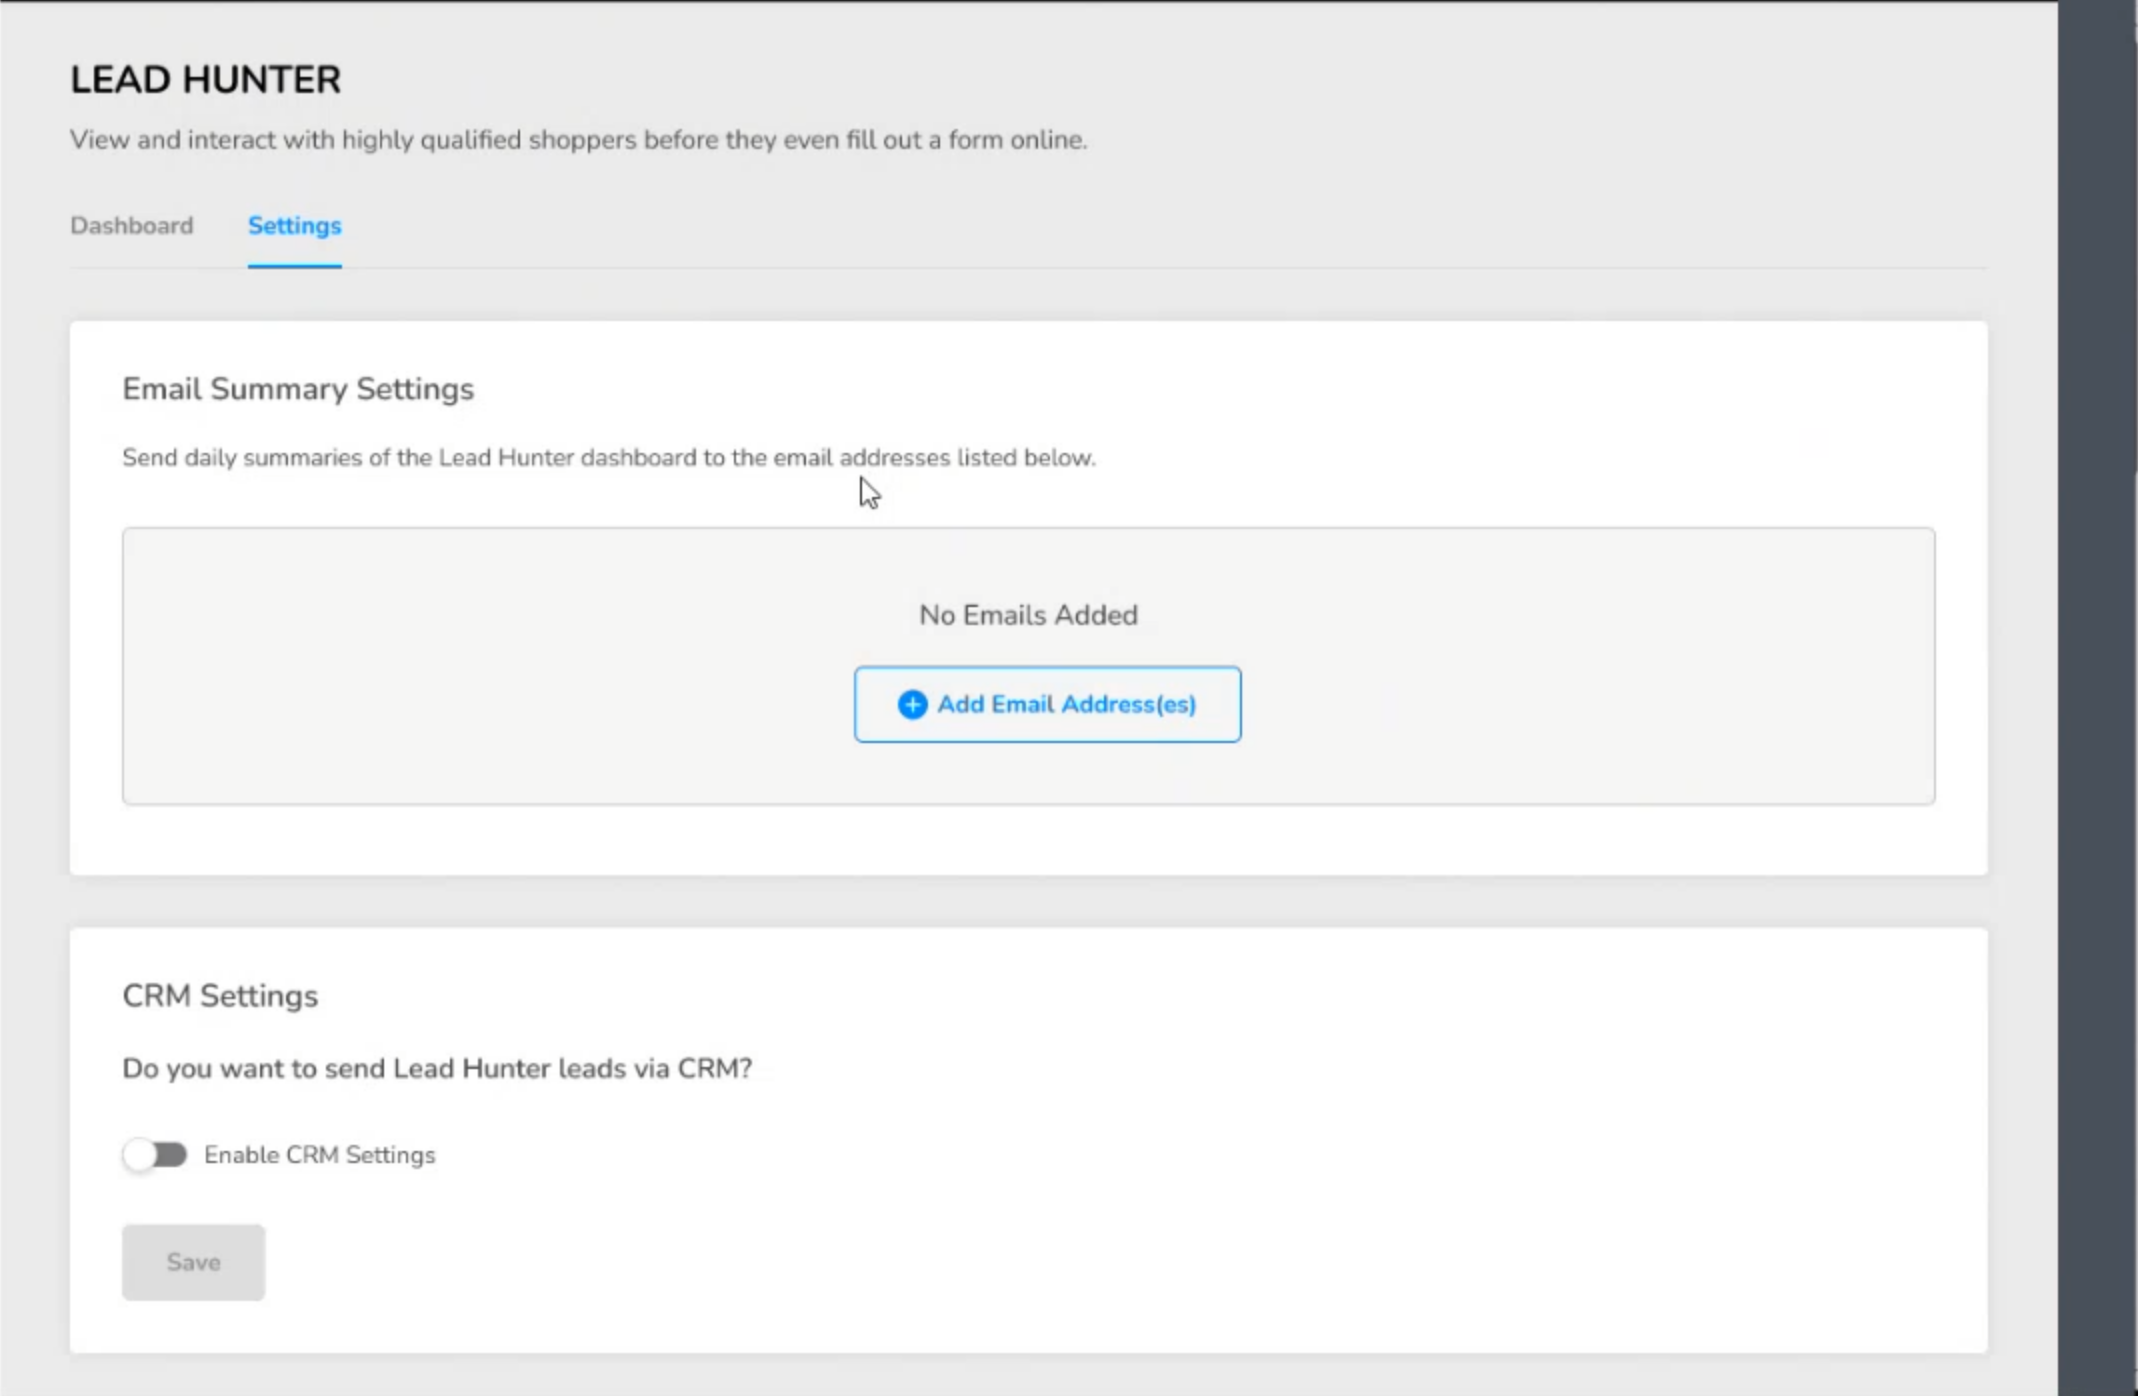
Lead Hunter can be configured to send daily email summaries to dealers and automatically or manually send Lead Hunter leads to a CRM. To set these up, click on the Settings tab from the dashboard.
Email Summary Settings
In the Email Summary Settings section you can add email addresses to receive a daily summary of customer activity from Lead Hunter. This email will show you a full list of customers who have recorded activity for the previous day along with their engagement level and interested vehicle, similar to how they appear on the Lead Hunter dashboard.
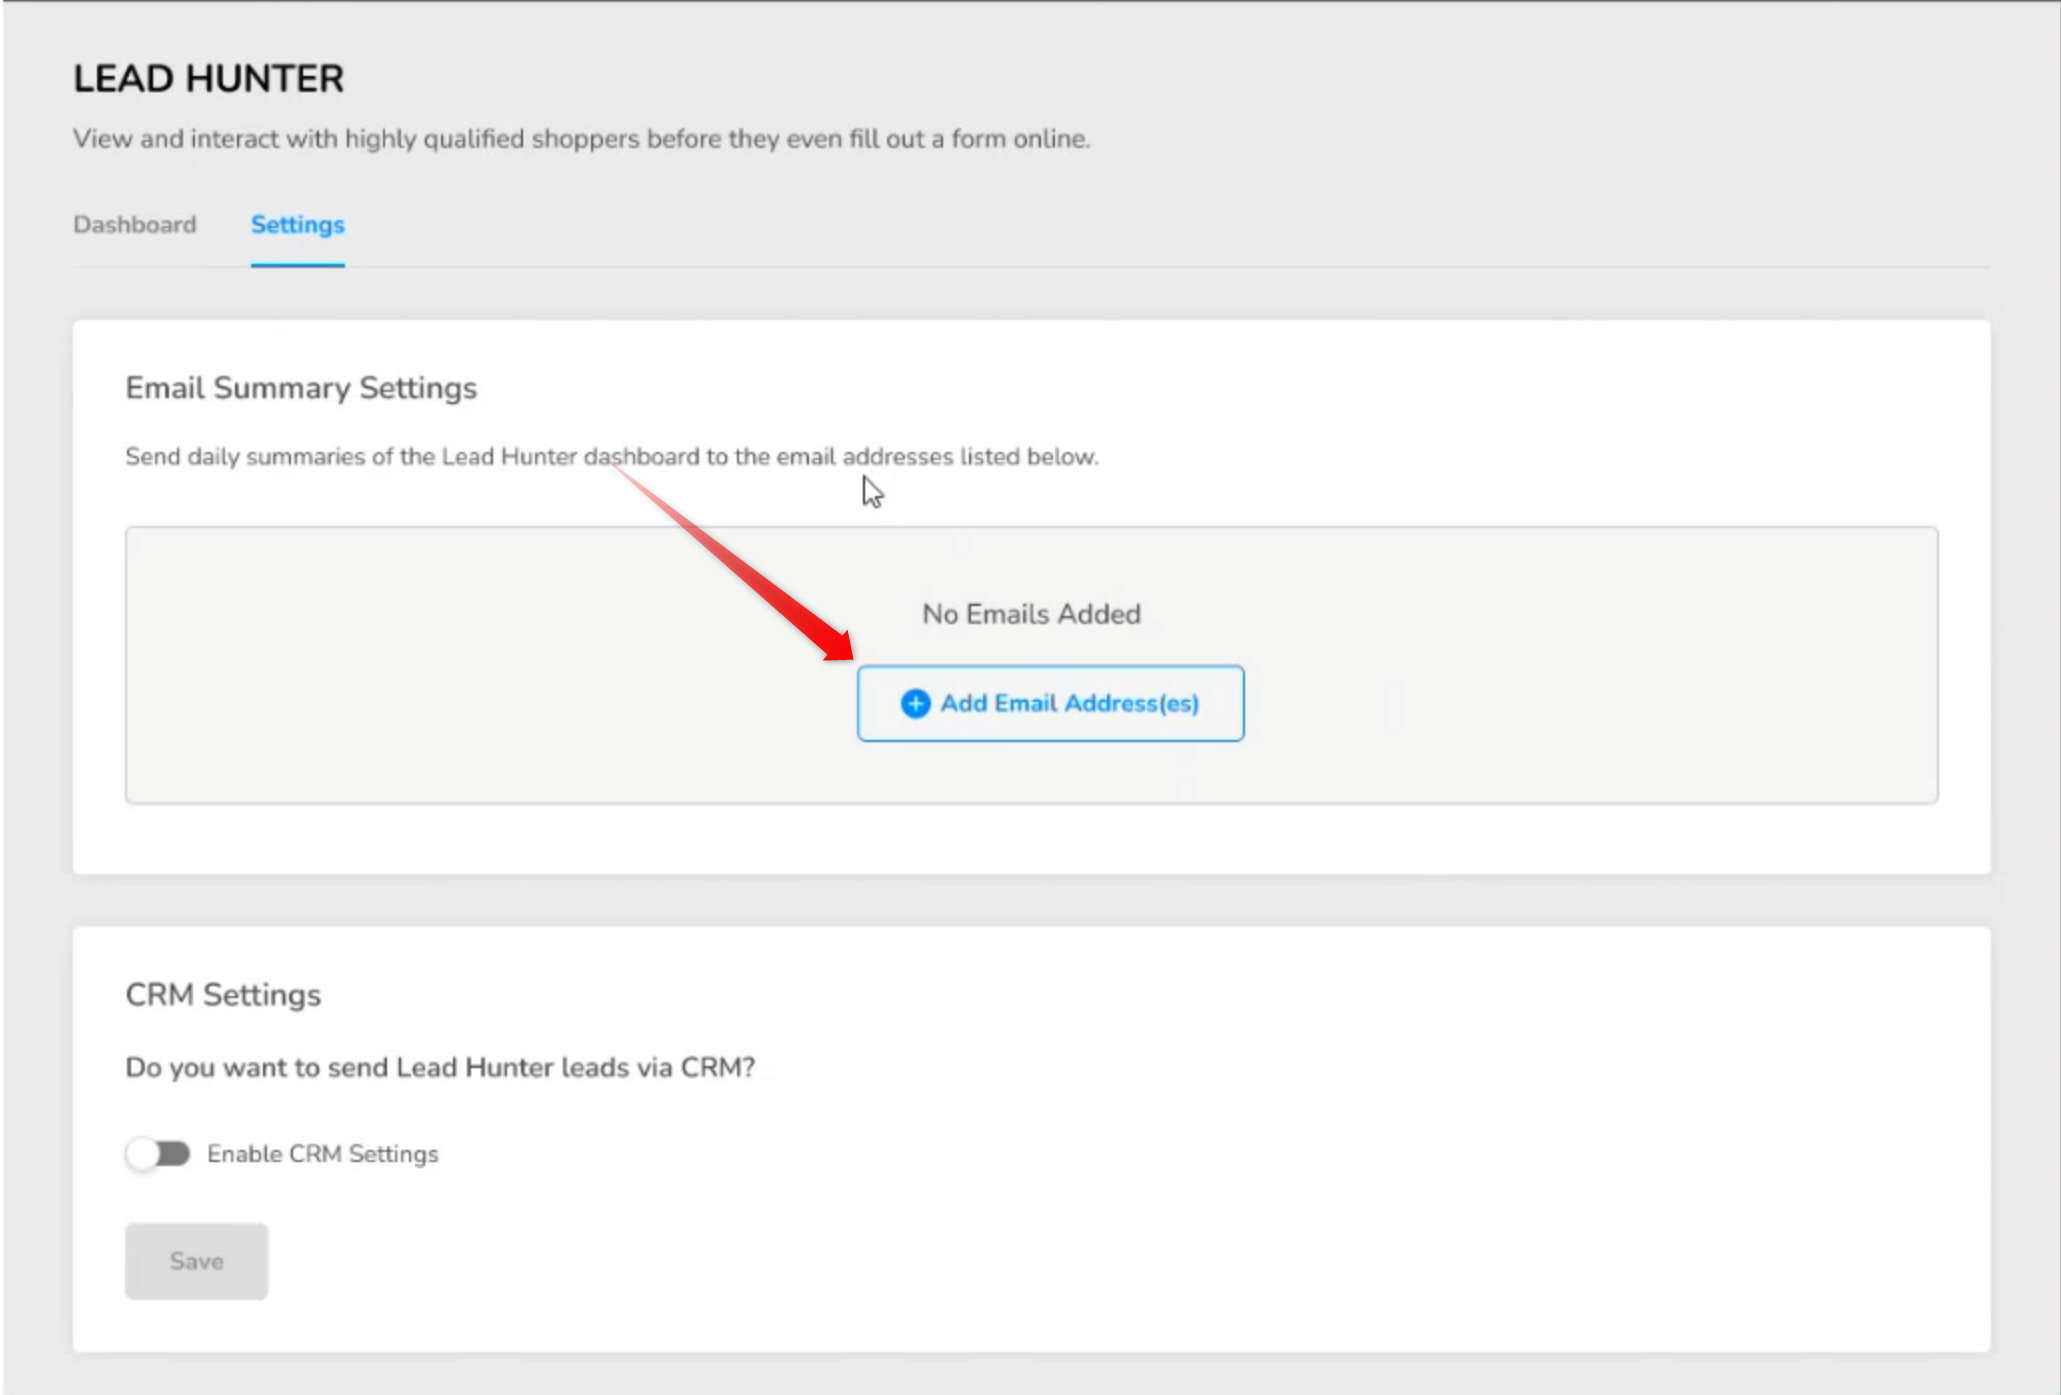
To add a new address to receive summaries, click the Add Email Addresses button.
Once you've added an address, you can edit it by clicking on the pencil icon to the right of the email or delete it by clicking the bin icon.
CRM Settings
Below the Email Summary Settings are options for configuring Lead Hunter to send leads to eternal CRMs. Lead Hunter currently supports sending leads to Lightspeed, Hyperdrive Pro, Traffic Log Pro / Dominion, or any CRM that can accept ADf/XML-formatted lead emails.
Lead Hunter leads can either be sent to a CRM automatically, in which case every contact with new activity will be sent to the CRM once per day, or manually, in which case leads will only be sent to the CRM when an internal user clicks the Send to CRM button from the bottom of a customer's Shopper Drawer.
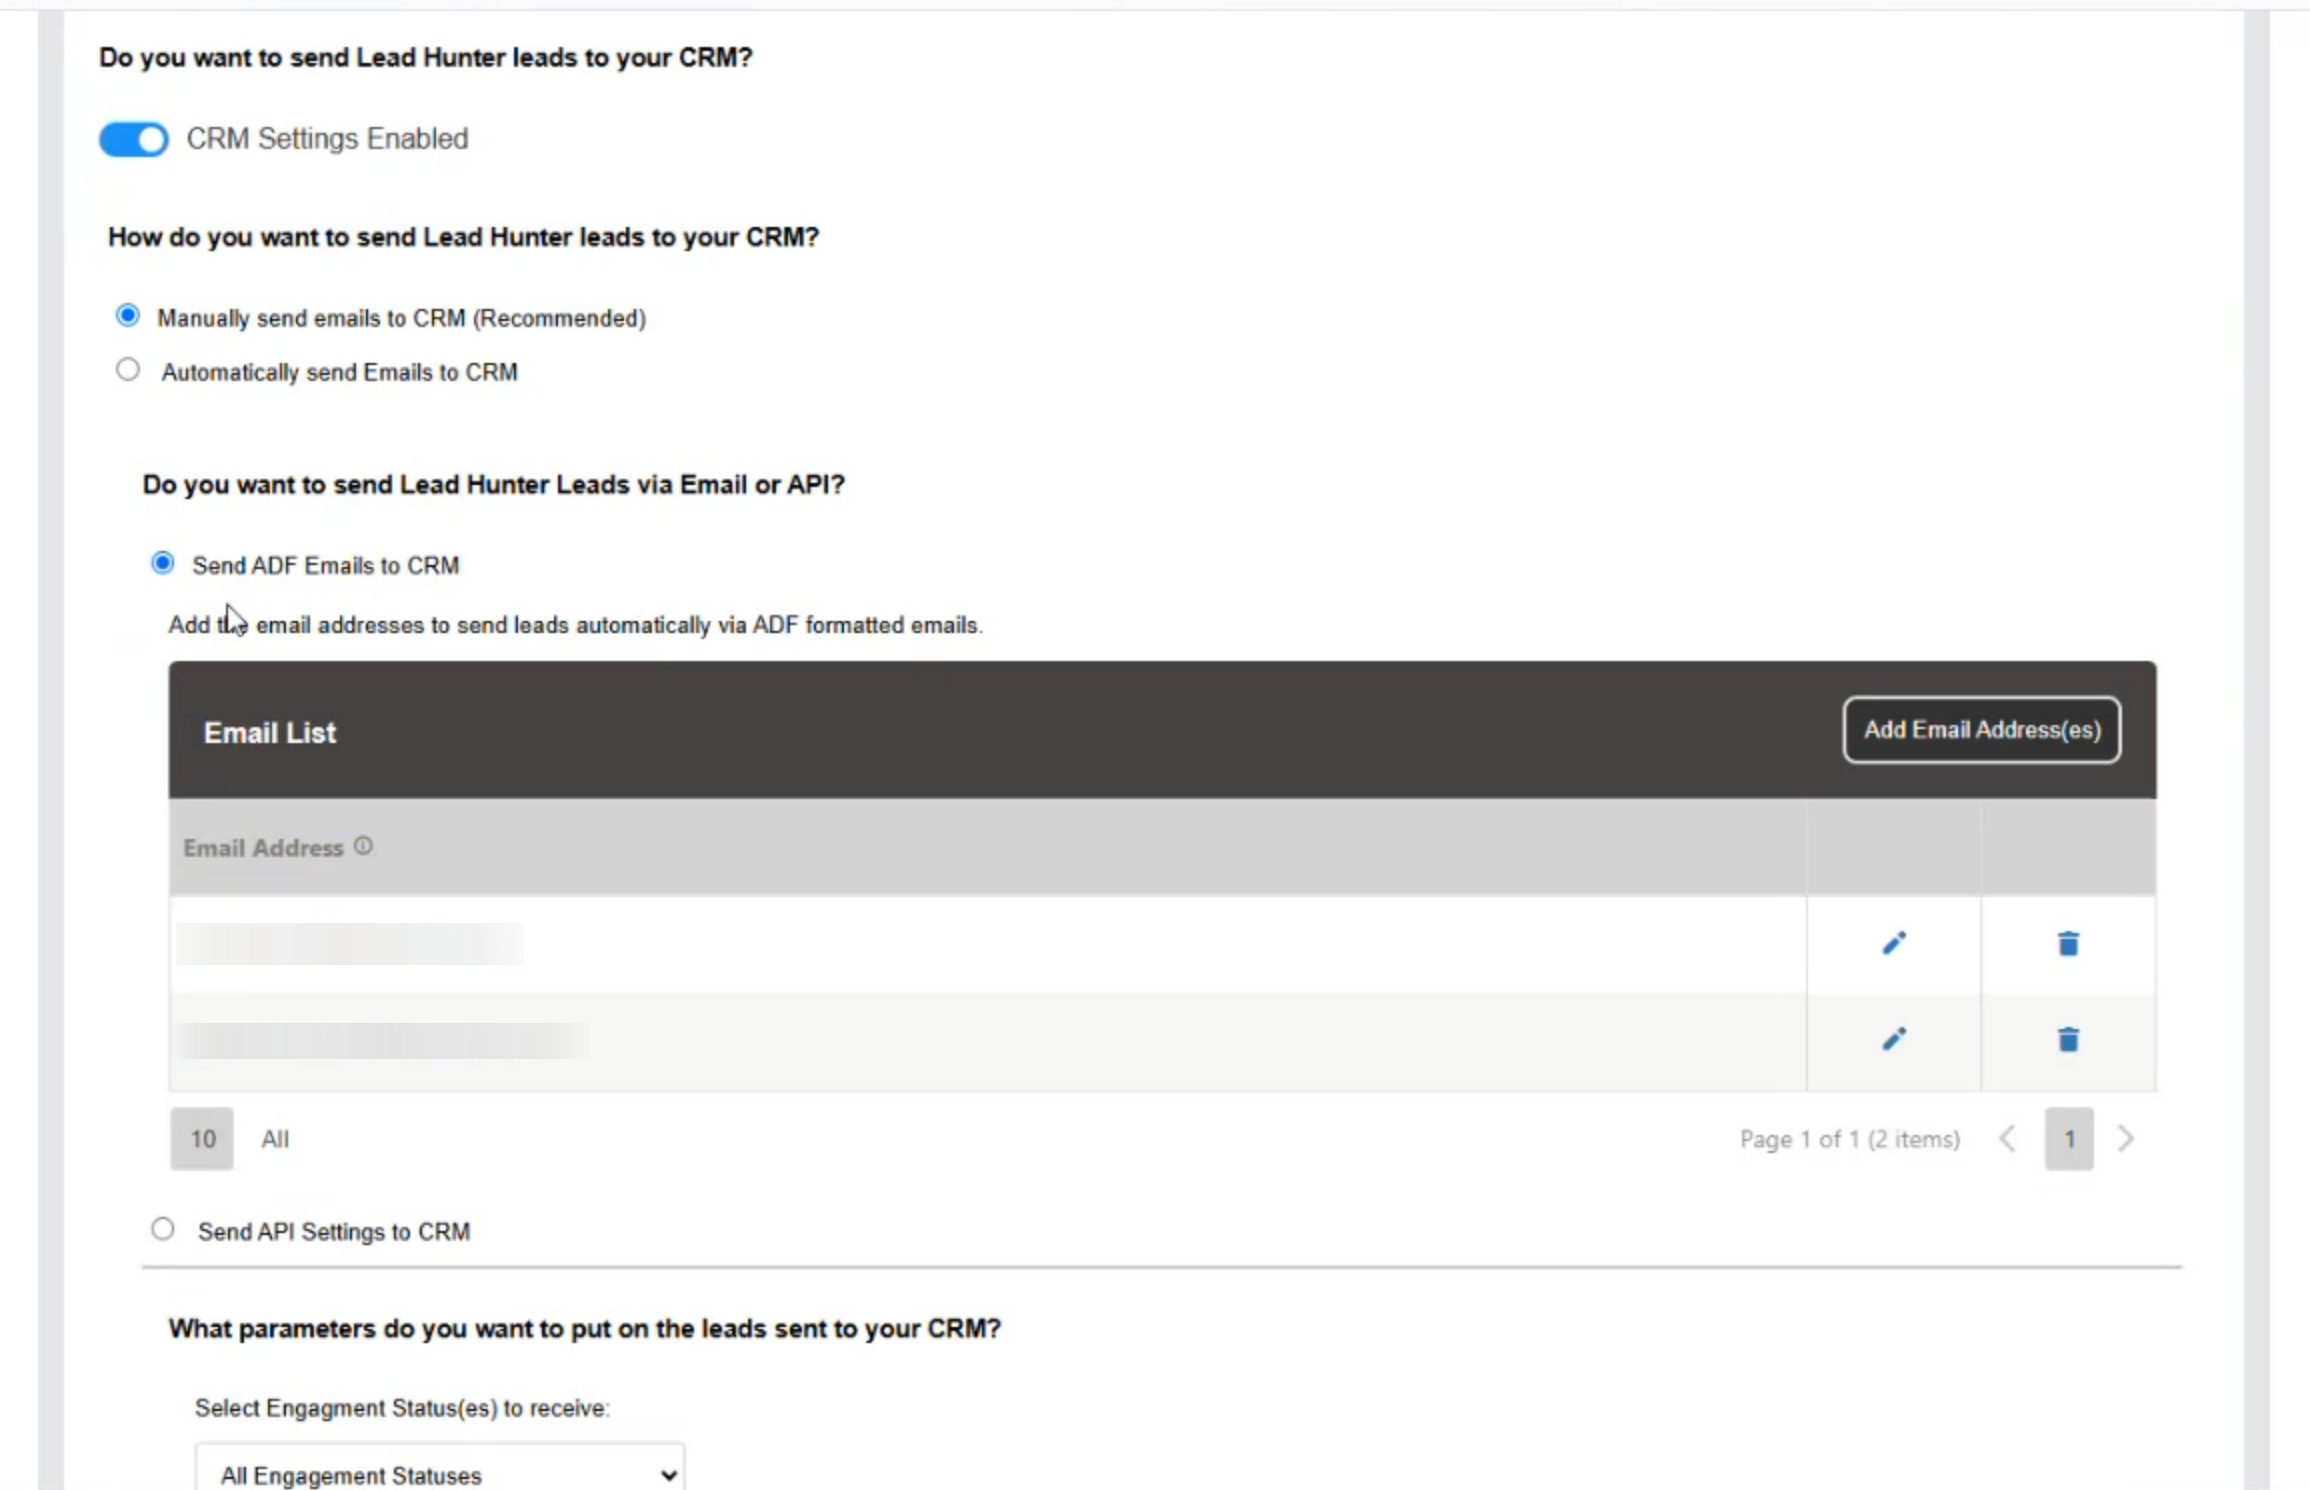
To get started, click the CRM Settings Enabled toggle. Then choose whether you want to send leads to your CRM automatically or manually.

Next choose whether to send leads via ADF emails or API settings. If you have Lightspeed, Hyperdrive Pro, or Traffic Log Pro / Dominion, click "Send API Settings to CRM". Otherwise if your CRM accepts ADF emails, click "Send ADF Emails to CRM".
Sending ADF Emails
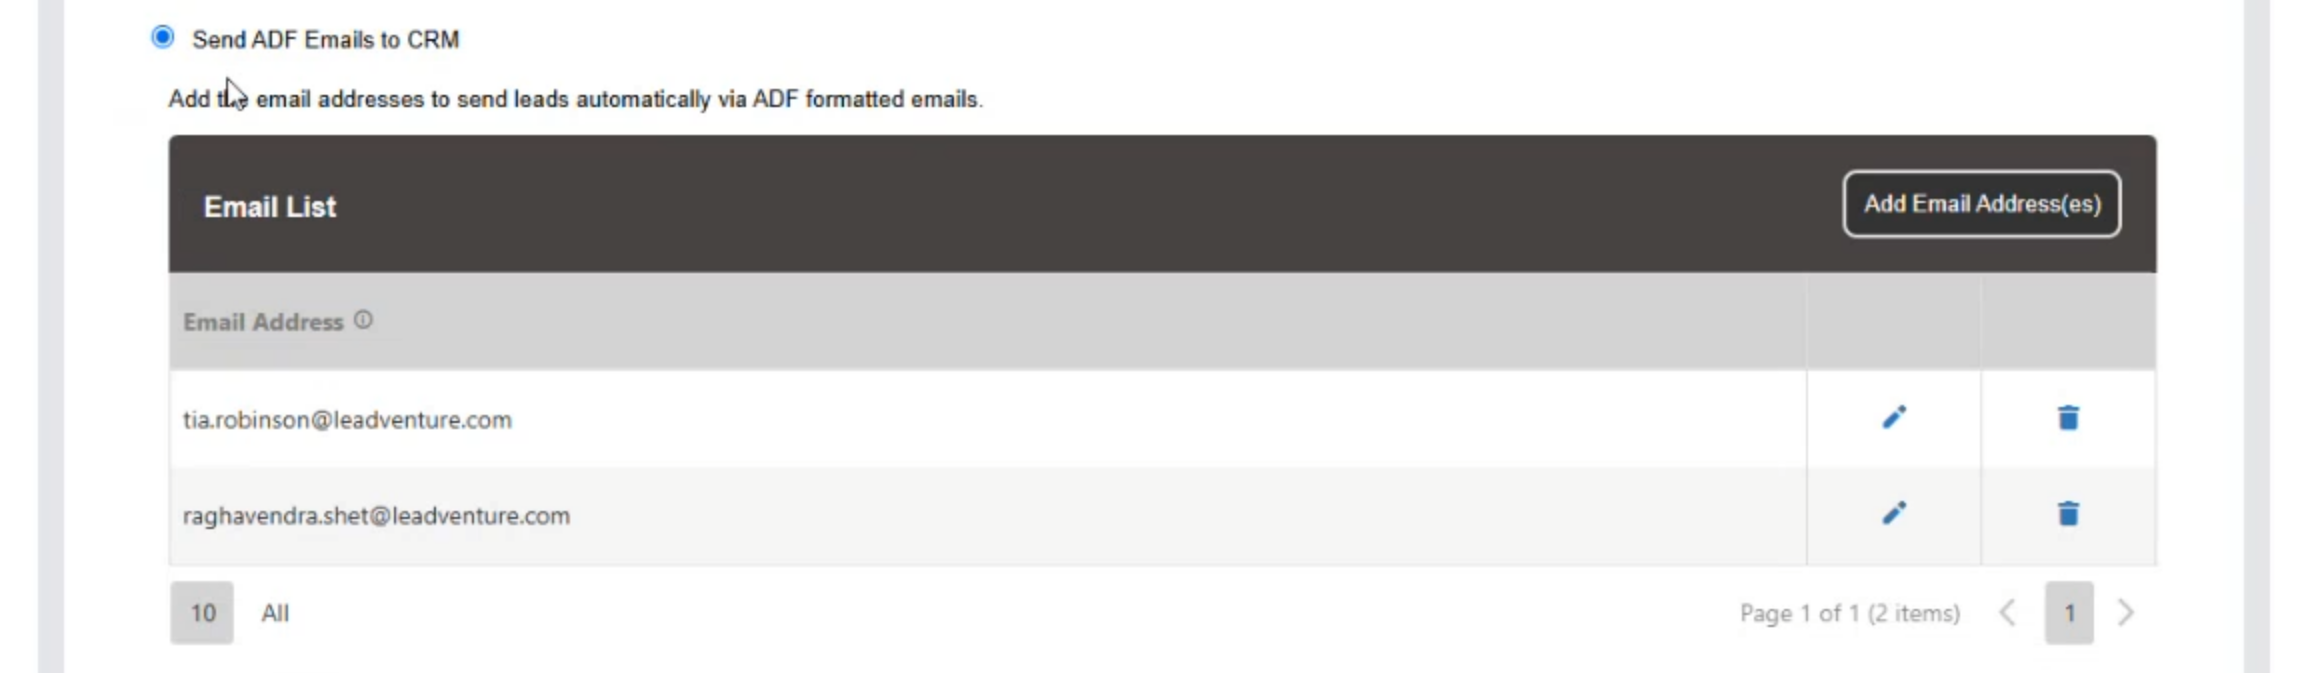
When you select ADF emails you'll get a email list of recipients you can customize, similar to the Email Settings Summary email list from above. Click Add Email Addresses to add a new recipient to the list. If you aren't sure whether your CRM can accept ADF-formatted emails, you can add yourself to the list and send yourself a lead to get an example you can send them.
Sending API Settings
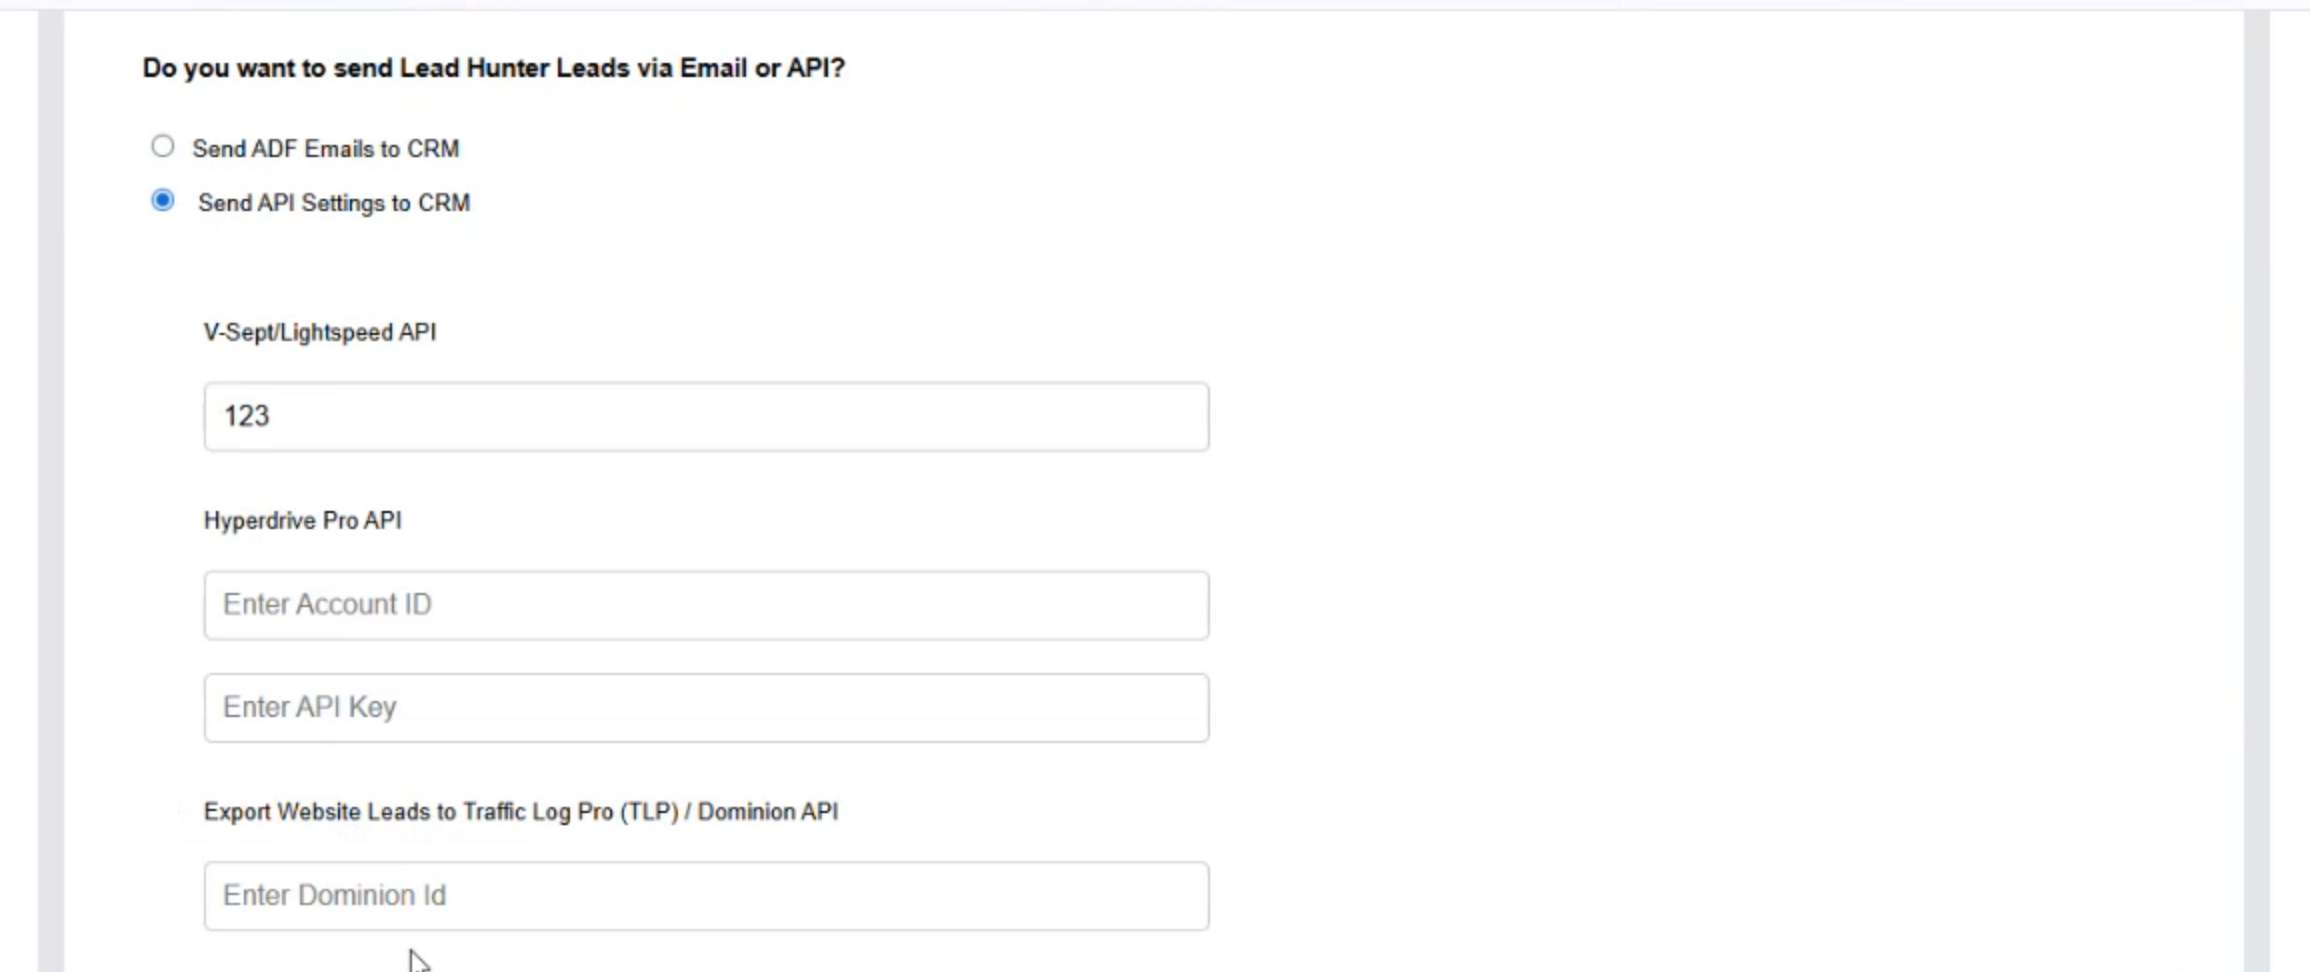
When you select API Settings you'll see a list of supported CRMs with fields for the ID and/or API key you need to enter to connect Lead Hunter to the CRM. These keys and IDs must come from the third party CRM.
Only Sending Leads for Particular Engagement Levels
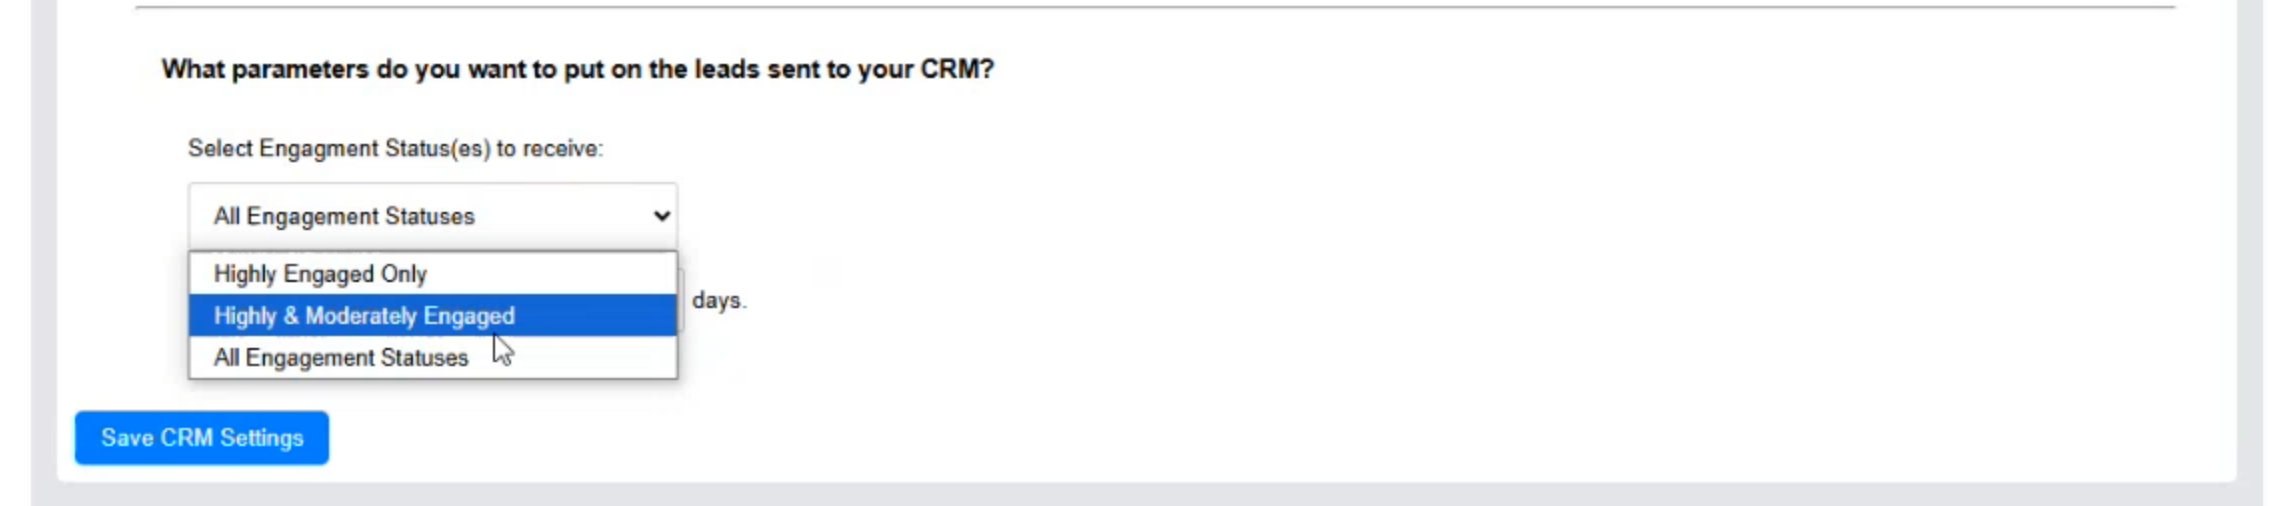
If you've chosen to automatically send leads to a CRM, you'll see a menu at the bottom of the page to only send leads for chosen engagement levels to the CRM. This can help cut down on the number of leads sent from Lead Hunter. Choose "Highly Engaged Only" to only send leads for customers with high engagement levels, "Highly & Moderately Engaged" to send high and moderate engaged customers to the CRM, or "All Engagement Statuses" to send all customer activity to the CRM.